Scheduling Student Absence messages to parents
Schools can set up a scheduled task that will send Student Absence messages at a designated time each day. This scheduling function is available to the schools' attendance administrators only.
Schools can now set up a schedule to send Student Absence messages at a fixed time each day. This function will send absence messages to all students who have been marked as unexplained absence (UA) or any other attendance reasons that have been marked as Explanation Required.
Please note that only administrators who have the appropriate user permission settings can set up the schedule to send absence messages.
In this article
Setting up user permissions
You must have Attendance - Read + SMS permission setting in order to set up a schedule to send automated absence messages.
Note:
If you are a XUNO administrator assigned to the Default Admin Group user group, you can set up the schedule to send absence messages without any additional permission settings.
- Go to Options > Software Settings > User Groups & Permissions.

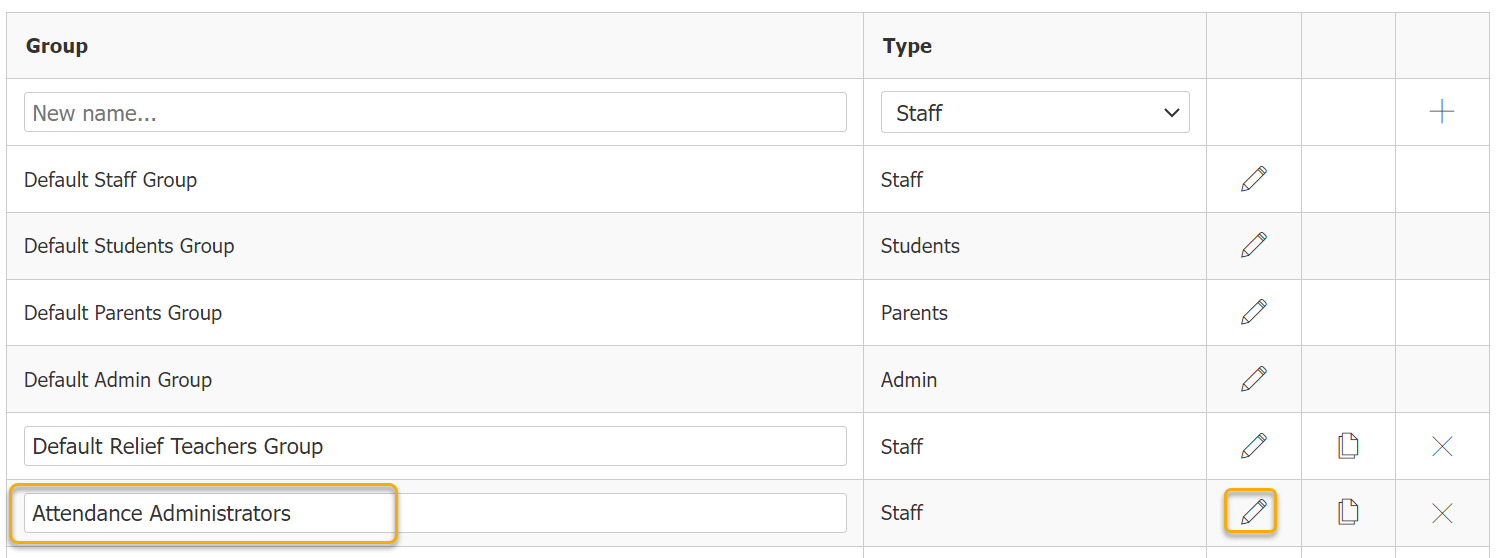
- Edit the attendance administrators user group by clicking on the pencil icon. See sample image below.

- Select the Reports option. Make sure the Attendance permission setting is set to "Read + SMS". This permission setting is required for user to see the "[ Schedule Automated Absence Message ]" link on the Student Absences Report page.

Setting up absence message schedule
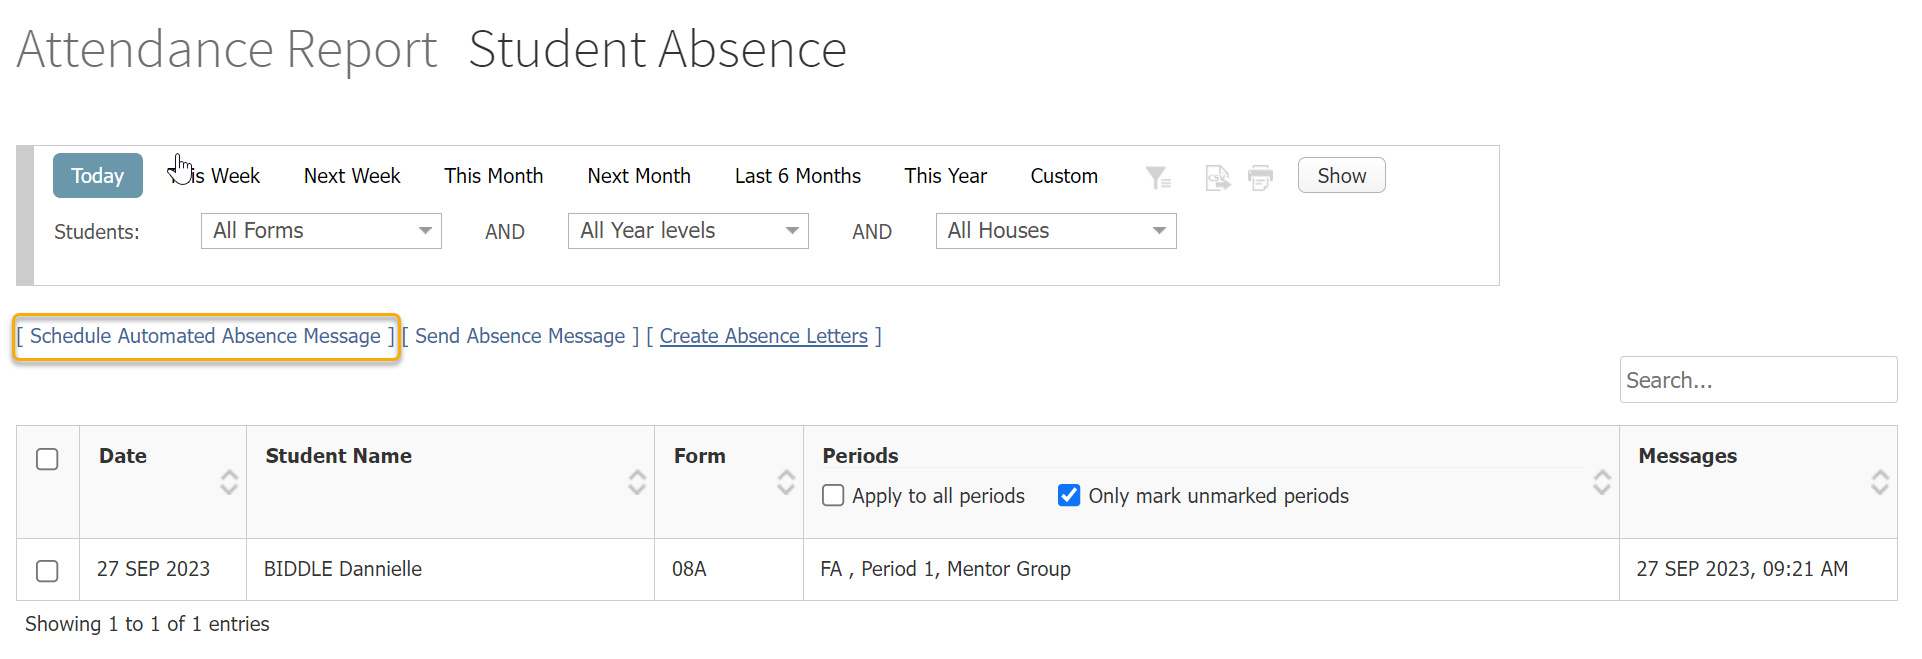
- Go to Administration > Attendance > Student Absences Report.

- Click on the "[ Schedule Automated Absence Message ]" link on the page. This link option is visible only to users who have the "Read + SMS" permission. Please see your XUNO administrator if you cannot see this link option.

- Set up your messaging schedule with these available options.

Number Field/Button Description 1 Active Tick this check box if you want to enable the schedule to send student absence messages at a specified time each day. You can un-tick this check box if the school decides they no longer want to use this feature. 2 SMS/
Internal Message
Choose how you would like the absence message to be sent - via Internal Message or by SMS. 3 Time to send When do you want the absence message to be sent? XUNO will send absence messages at this specified time. 4 Use Template Which absence message template would you like to use when sending absence messages? You may create new absence message template if required. Please refer to this article on how to create a new message template. 5 Message body This field will show the message content of the message template selected in Use Template field above. You may adjust this message content. XUNO will send absence messages based on what you have specified in this field. 6 Message Recipient Whom would you like the absence messages to be sent to? 7 Set schedule Click on this button when you are ready to save your changes on this page.
Tip:
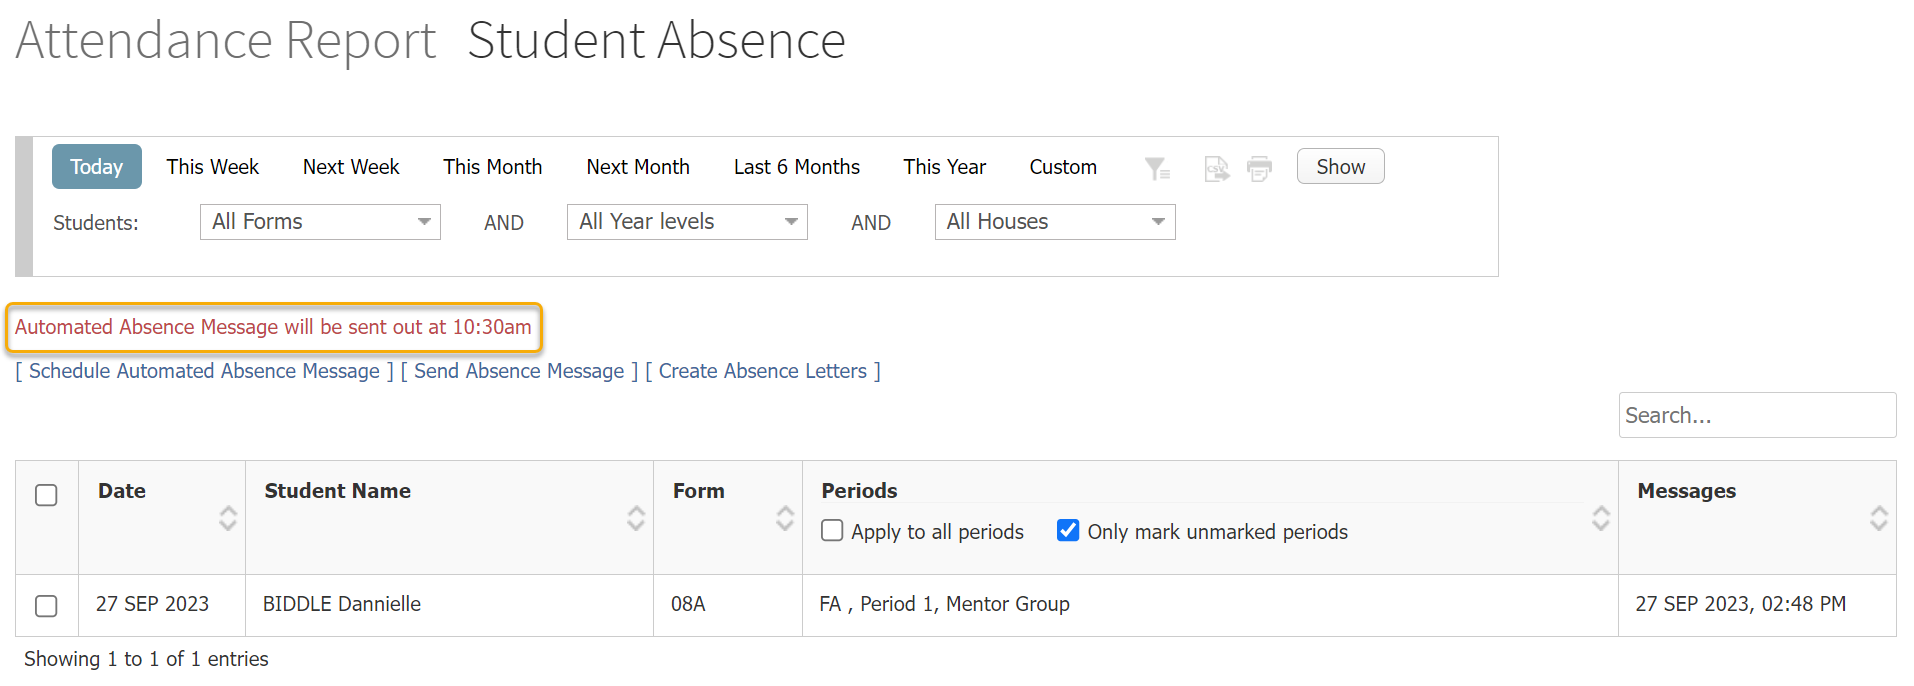
You will see the red warning message on the Student Absences Report page if an absence message schedule has been set up.

Warning:
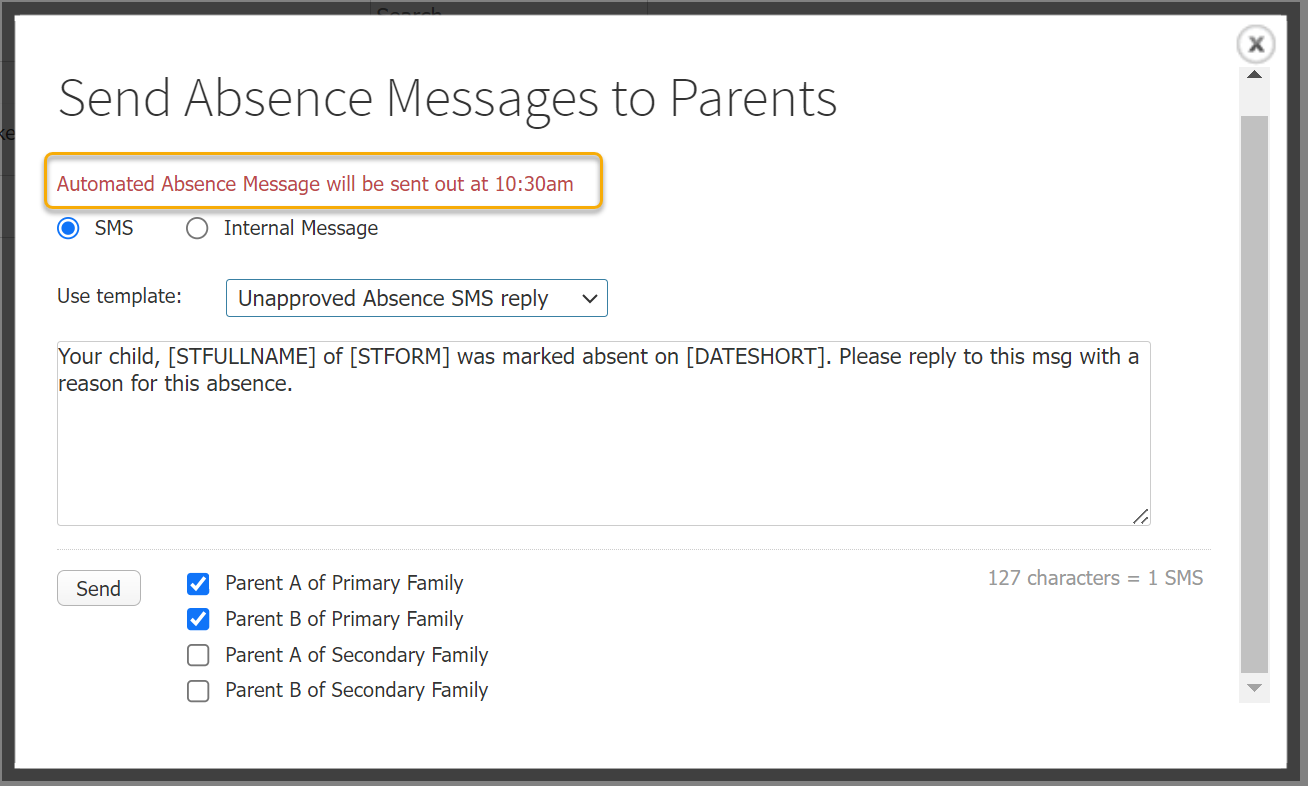
Attendance administrators can still choose to send absence messages manually i.e. following the existing Student Absences process. Please be aware that if an absence message has been sent manually before the scheduled task, the same parent may receive another absence message sent by the scheduled task.
A red warning message will be visible on the "Send Absence Messages to Parents" dialog box if an automated student absence message has been scheduled.
