In this article
IMPORTANT: This process is only for schools who do not have the automated timetable update feature turned on. For more information please see this article.
Note: Please ensure you have already set up your timetable for the year by following this article.
Adding students to the correct class in the timetable quilt
To begin, we will need to add the student to their new class in the XUNO timetable quilt.
- Go to Administration > Timetabling > Generate Basic Timetable.
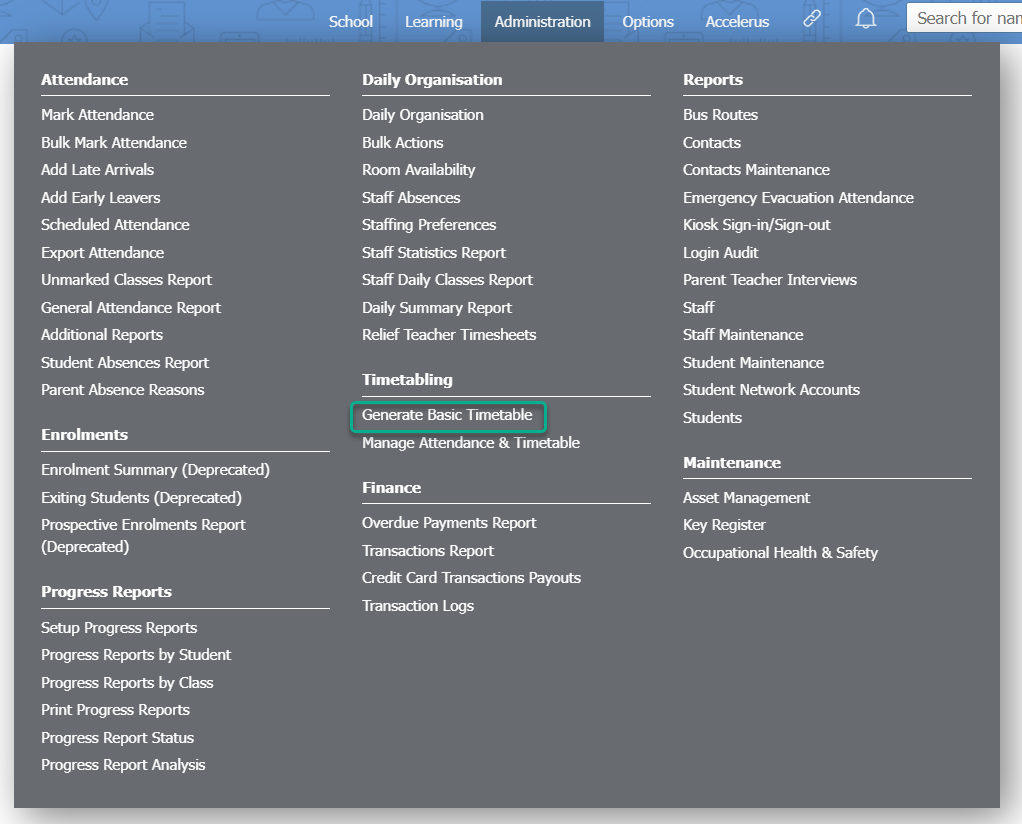
- Click on the Pencil icon in the third row, next to Timetables.
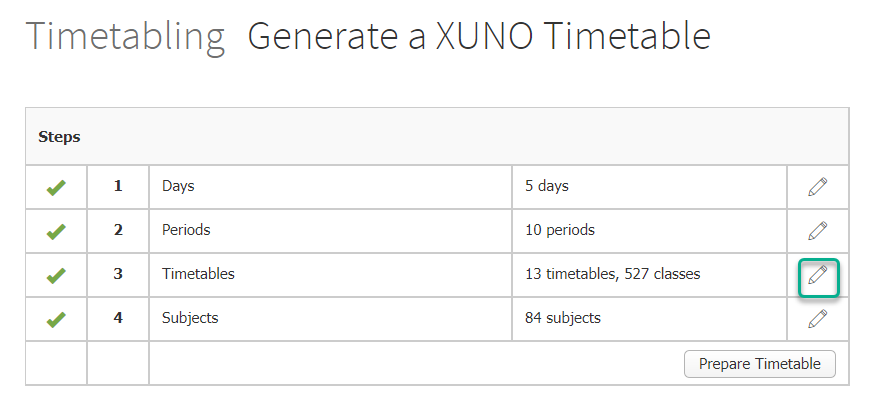
- Click on the Pencil icon to edit the current timetable quilt (this will usually be the first one listed).
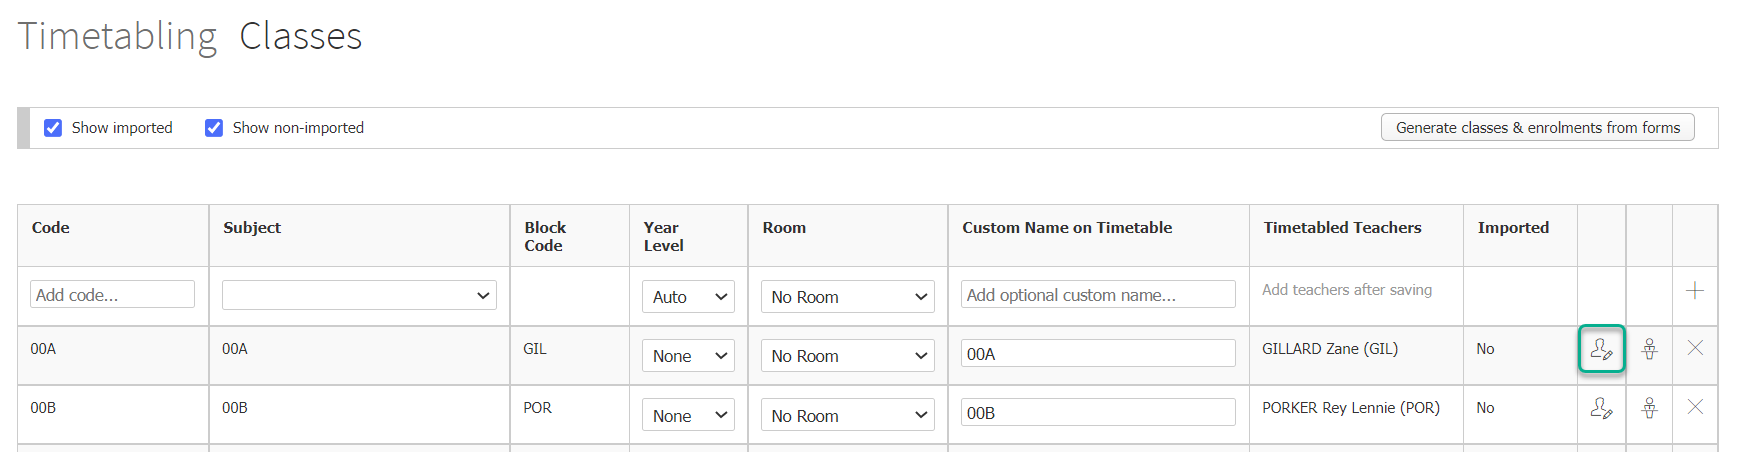
- If the student's correct class is recorded in their student record (either synced from your school's Student Information system, e.g. CASES21, or added manually), then you can click the Generate classes & enrolments from forms button, then click the OK button in the popup to confirm. This will also remove the student from their incorrect class. Then, skip to Saving your changes to the timetable.

- If you did not use the button in step 4, you will need to make class changes manually. Next to the class that will have the moved student, click the Edit the class enrolments icon (the person with the pencil).
- Select Individual Students from the first dropdown list.
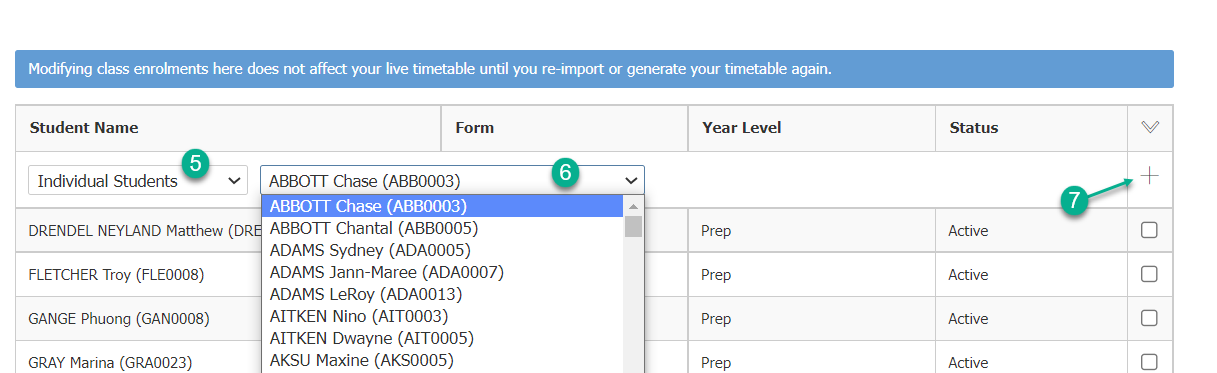
- From the second dropdown list, select the student that is going to join the class.
- Click the + icon to add the student.
Removing students from the incorrect class
Next, we will need to remove the student from their old class.
- Go to Administration > Timetabling > Generate Basic Timetable.
- Click on the Pencil icon in the third row, next to Timetables.
- Click on the Pencil icon to edit the current timetable quilt (this will usually be the first one listed).
- Next to the class that the student is moving from, click the Edit the class enrolments icon (the person with the pencil).
- Tick the checkbox next to the student you wish to remove from the class.
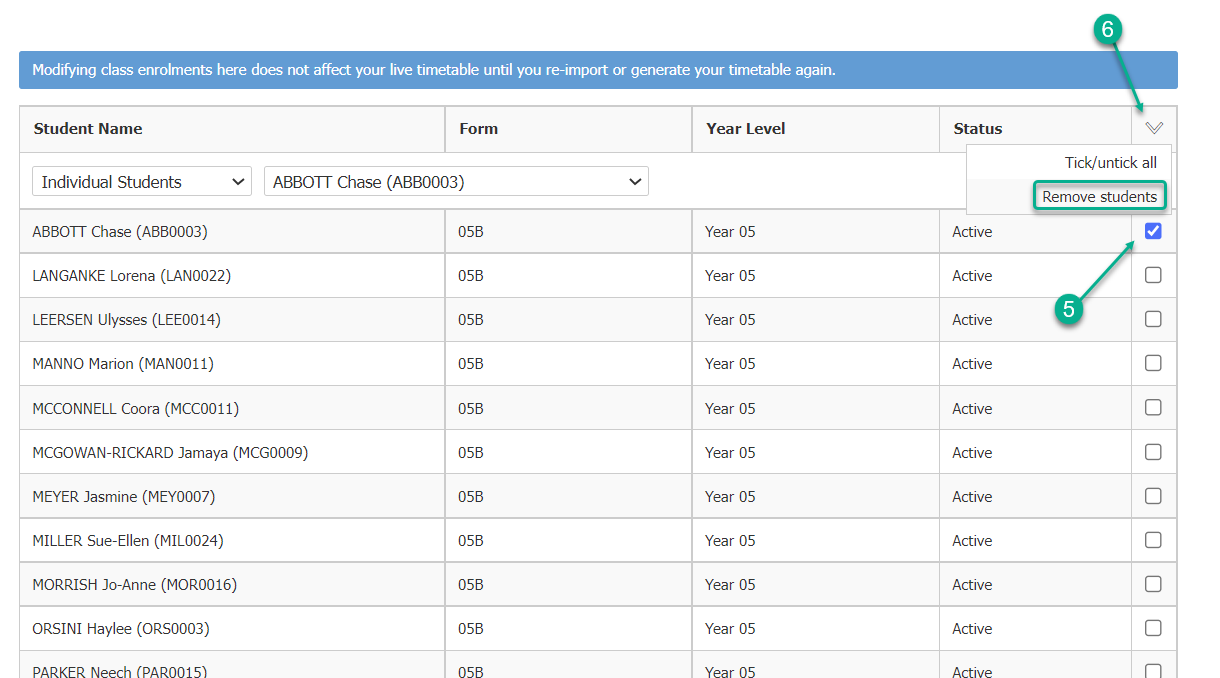
- From the dropdown arrow in the top right of the table, select Remove students. Click OK.
Saving your changes to the timetable
Once you have moved the student to their correct class and removed them from their old class, you will need to save your changes to the timetable. This will tell XUNO what days and periods will need attendance marked. In XUNO, this is called preparing the timetable.
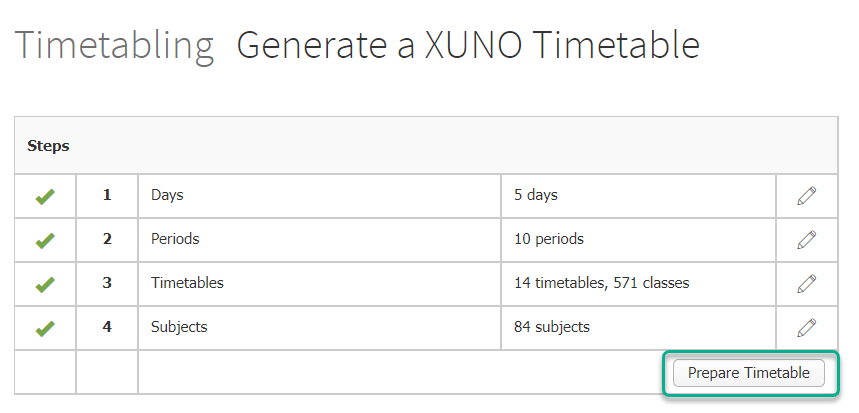
- Go to Administration > Timetabling > Generate Basic Timetable.
- Click on the Prepare Timetable button.
- Select the current quilt from the dropdown list (this is the same one you edited in the above section, in Step 3).
- The Generate From date will need to be the day the student is moved to their new class. You can edit the date, if required, by clicking on the date and selecting a new date using the calendar picker that appears.
Note: If you have already marked attendance for this student in their old class, and you backdate the timetable (i.e. choose a date before today), you will delete attendance data for this student when you prepare the timetable. Make sure you have a backup of the attendance data for the student in their old class to re-enter manually, if this is the case.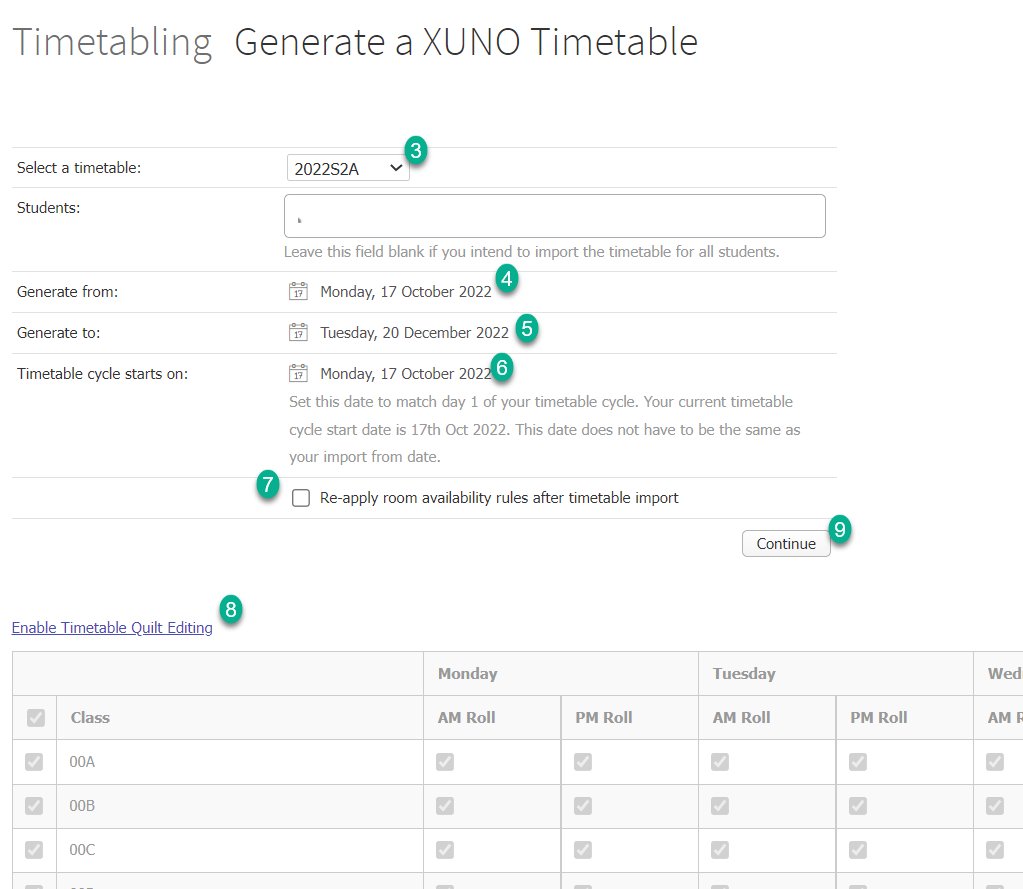
- The Generate to date will be the last day you would like to mark attendance for the student - this will usually be the last day of the term, semester or year, depending on how often your school updates their XUNO Basic Timetable.
- The Timetable cycle starts on date will be the Monday on or before your Generate From date.
- Tick the Re-apply room availability rules after timetable import checkbox, if you have room availability rules set up in XUNO.
- Make sure all periods and days are selected in the table where there is a timetabled class. If you need to edit this table, click the [Enable Timetable Quilt Editing ] text.
- Click the Continue button to save your changes to the timetable.
Before clicking Continue to save your changes to the timetable, please keep in mind that if you don't choose a specific student, this will save the timetable for all students. This means that if you have removed students and backdated the timetable, you will delete their attendance. Give us a call on 1300 067 478 if you would like some guidance.