In this article
What data can I import?
You can import data for staff, students and/or parents/carers into XUNO in bulk using a CSV file. This can include anything at all that you have recorded in the staff, student or parent record in XUNO, including any custom fields you have created.
Note: Victorian government schools, and some other state government schools, will have staff, student and contact data synced automatically from their Student Information System (SIS), for example, CASES21.
These schools should not use this process to import any data that is automatically synced from their SIS, as it will simply be overwritten in XUNO during the next sync.
What data do I need in my CSV file?
CSV files for importing custom data have only two requirements:
- The first column must be the unique student, staff or contact code used in your XUNO database. You can find out what these codes are in your school by going to Administration > Reports > Contacts/Staff/Students.
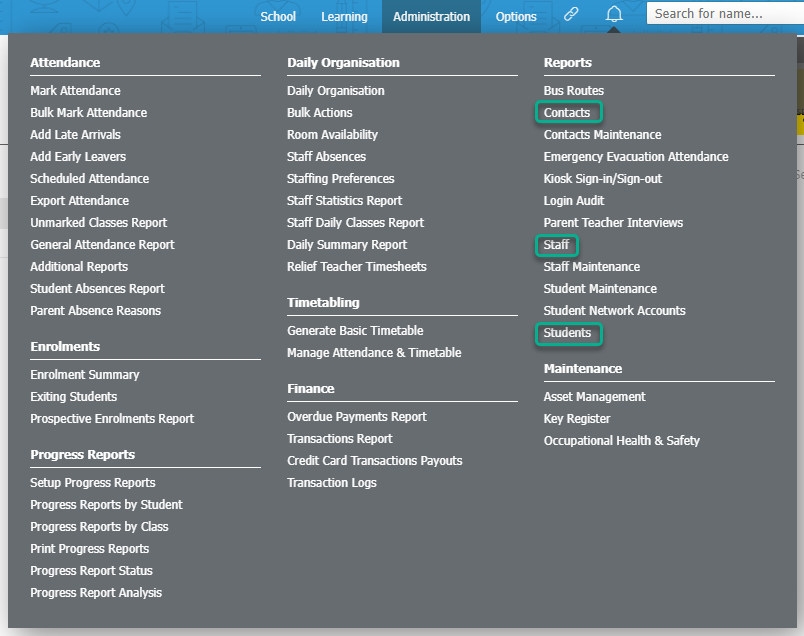
The user code will be in a column labelled either Contact Code, Staff Code, or Student Code, as seen in the example below from the Staff report: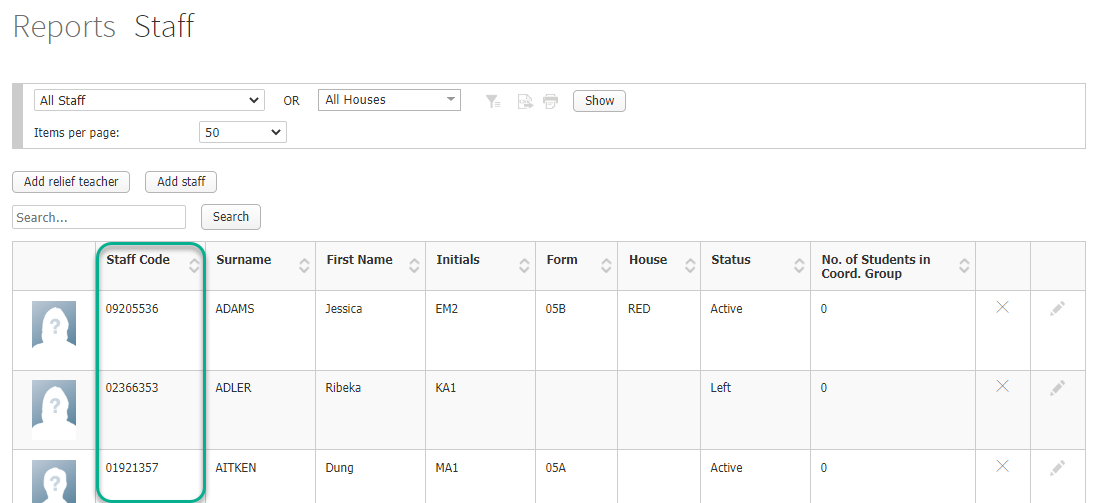
- All columns must have header titles that correspond to the field(s) you are importing.
For the user code, these are shown below:
- Contact code: ct_id
-
Staff code: sf_staffcode
- Student code: st_studentcode
You can check the exported CSV to see what header to use for the field(s) you wish to import data for.
Importing your custom data
To import your CSV, follow these steps:
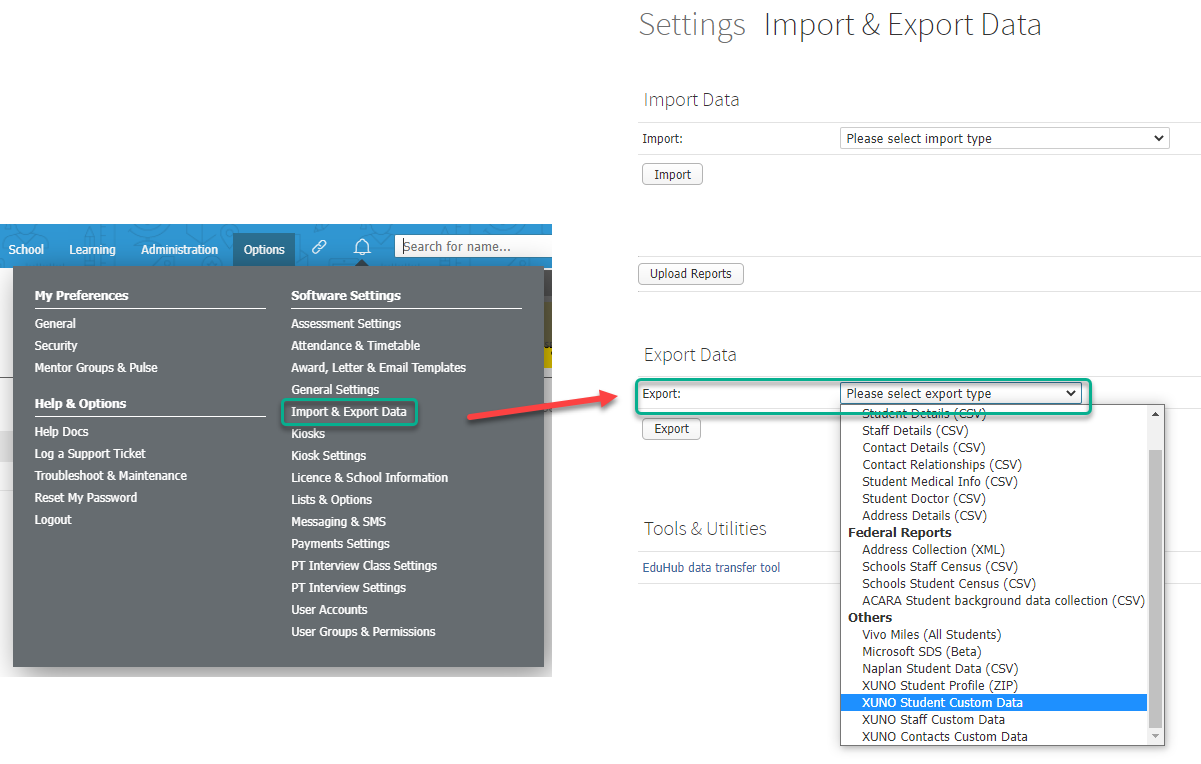
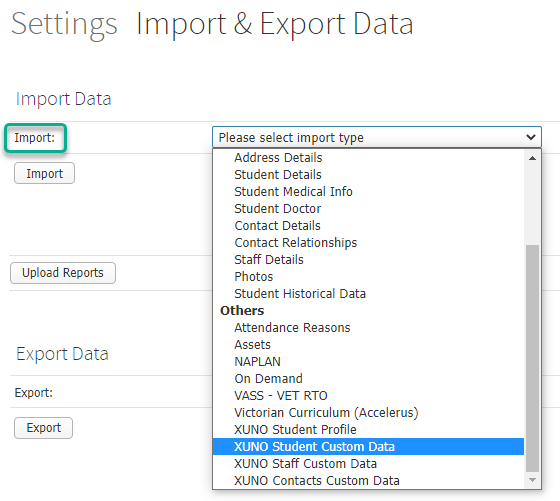
- Go to Options > Software Settings > Import & Export Data.
- Select the applicable option from the Import dropdown list (you may need to scroll to the bottom of the list).
- Use the Choose file button to navigate to and select your CSV file.
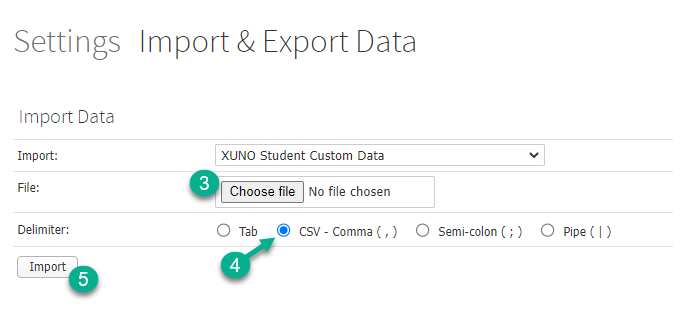
- Select CSV - Comma ( , ) as your Delimiter option.
- Click the Import button.