Introduction
You can send student absence messages as an SMS (charges apply) or a XUNO internal message, whichever is preferred.
You must have the correct permissions to be able to send these messages. To learn how to create templates for your school, please see the related article Creating absence message templates.
In this article
Sending an attendance absence message to parents/carers
Note: No message will be sent if the parent’s correspondence flag is set to “no”. This value comes from CASES21. If you are using XUNO as a SIS, you can set the correspondence flag by editing the student and changing the setting in the contact relationships section.
- Go to Administration > Attendance > Student Absences Report.
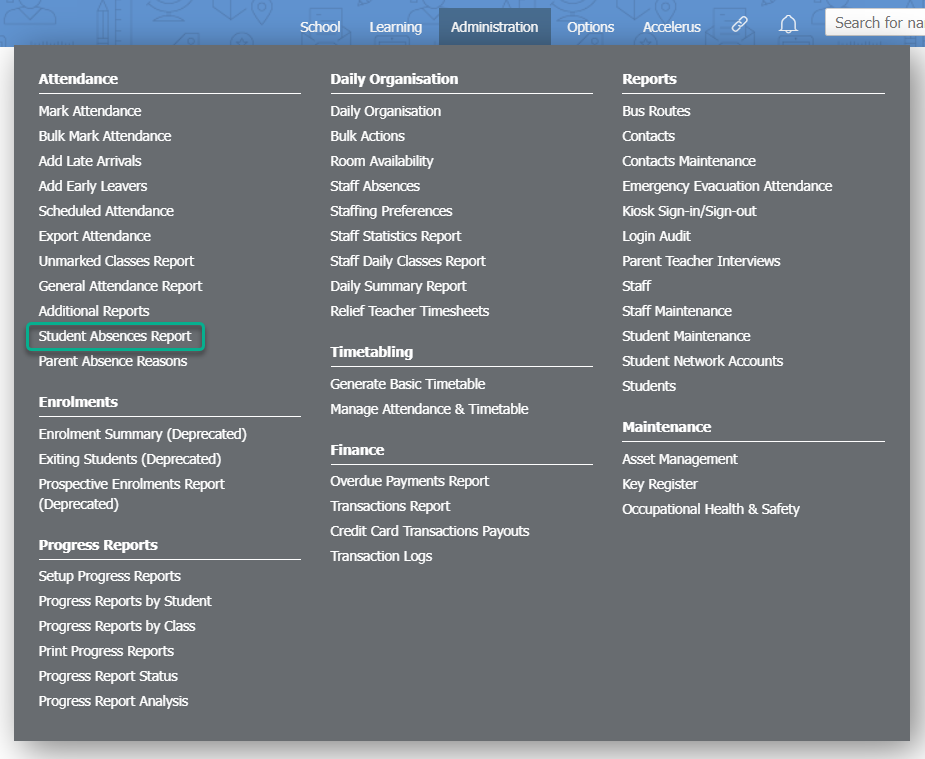
- Select the appropriate filtering options you require* and then click the Show button. If you need more information on using this report, see the related article 'Attendance reports: The Student Absences report'.
- Select the checkbox related to the student(s) whose parents should receive a message. You can also use the checkbox in the top left of the table to select all students shown on the page.
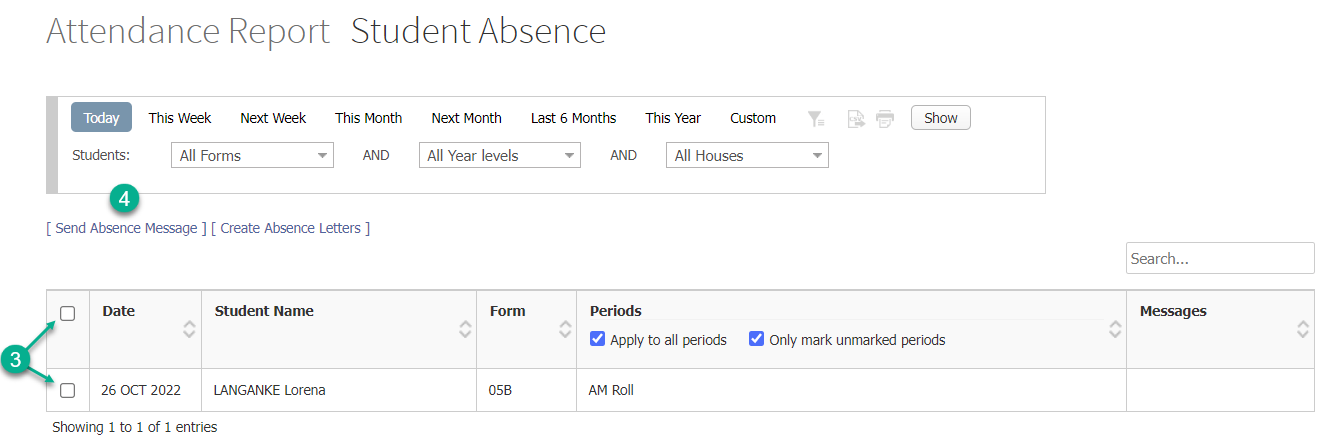
- Click on the [ Send Absence Message ] text found underneath the filtering options.
- In the popup window that appears, tick 'Active' if you wish to activate the absence message.

- Select how you wish to send the message - as an SMS or an Internal Message.
-
Select the time you wish to send the absence message. This selected time will be reflected in the message preview below. Please note that only absences from periods that occur before or up to the selected time will be included in the notification sent to parents.
- Select an existing message template from the dropdown list, or compose a new message in the text area. You may also make edits to the message after selecting a template. You can see the number of characters you are using, and how many SMS charges this will attract per recipient, in the bottom right, below the text area.
- Select the appropriate options for who you'd like to send the messages to - the options are:
Parent A of Primary Family
Parent B of Primary Family
Parent A of Secondary Family
Parent B of Secondary Family
Your school can setup a default option, depending on what you are most likely to choose when sending these messages. See the instructions below for steps to setup the default recipients. Be mindful that if sending SMS to more than one recipient, you will be using more SMS credits. - Click the Send button. An alert will appear if XUNO was unable to send the message to one or both parents.
*If you are sending the absence message in the morning, you may find it necessary to filter the absences to only show morning periods, such as AM or Period 1 + 2. Some schools who mark both AM and PM periods at once in the morning, and who also use a Kiosk for students signing in may find that PM attendance needs to be manually adjusted to reflect the students' presence at school once they've arrived. Filtering out your PM periods means you can choose to do this later in the day, and send SMS only to those students who have not appeared at school yet. For more information, phone XUNO Support.
Viewing sent absence message details
Once the message is sent, you will be able to see details. Listed below are the details you can see for the sent and received messages in the Administration > Attendance > Student Absences Report screen. The numbers below correspond to the numbers in the screenshot.
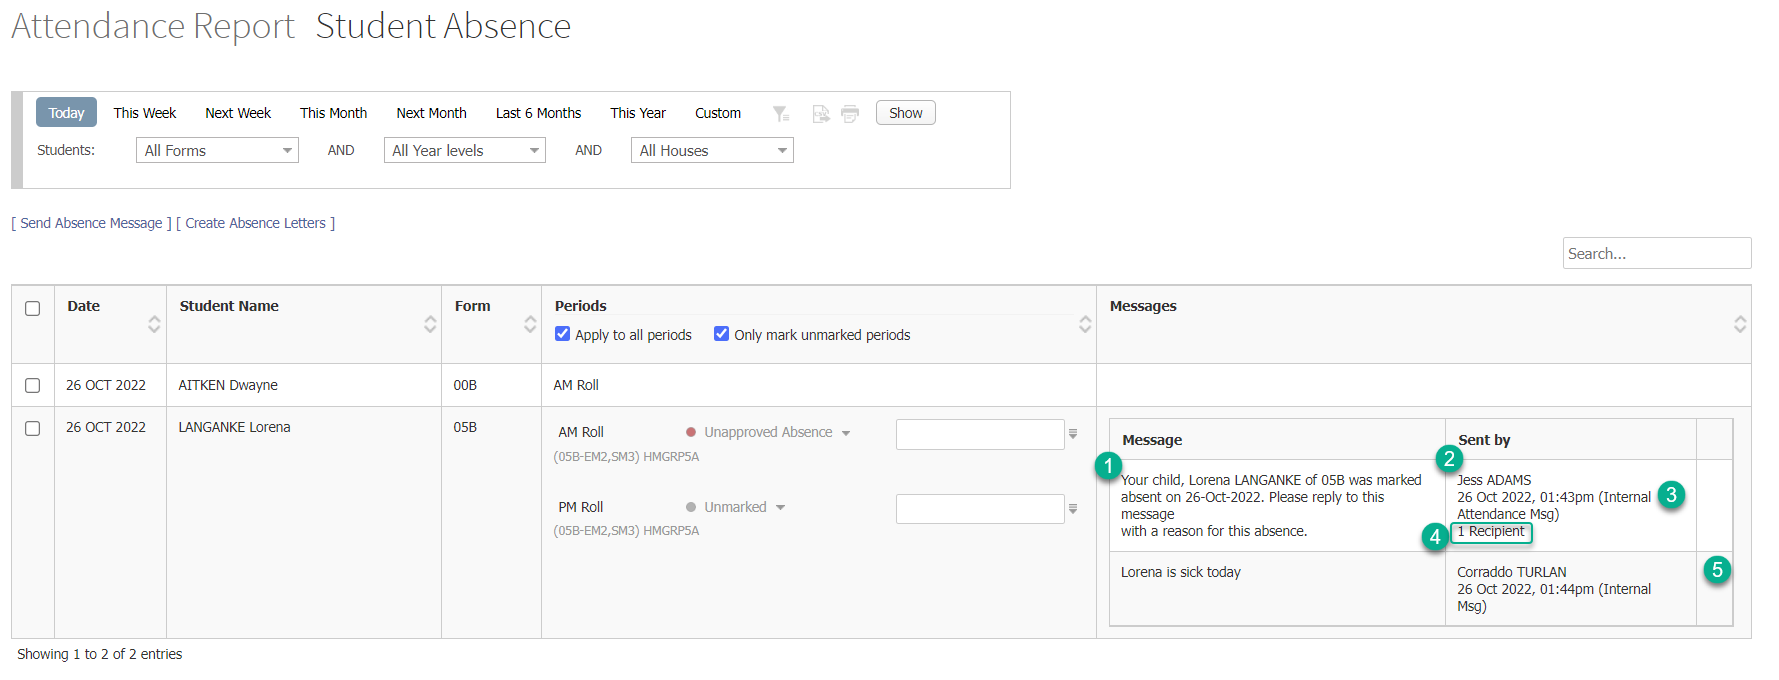
- The contents of the message that was sent.
- The name of the staff member who triggered the message - if an SMS, it will show on the parent's device as coming from the school number, regardless of which staff member sent it.
- The date and time the message was sent, as well as its type (internal message or SMS).
- The number of recipients - if you hover over this, you will see the names, and if applicable, the mobile numbers of the people who were sent the message.
- The reply icon - only displayed next to a received SMS from a parent. This screenshot does not show one, as the message was sent as an internal message. This allows you to reply directly to the parent who has sent the SMS and only sends your reply to that specified parent. If you wish to send an SMS to all parents of a student, select the student's checkbox again and send another message using the steps above.
Marking attendance from the Student Absence report screen
On receiving a reply from a parent, you can use the Periods column to mark attendance.
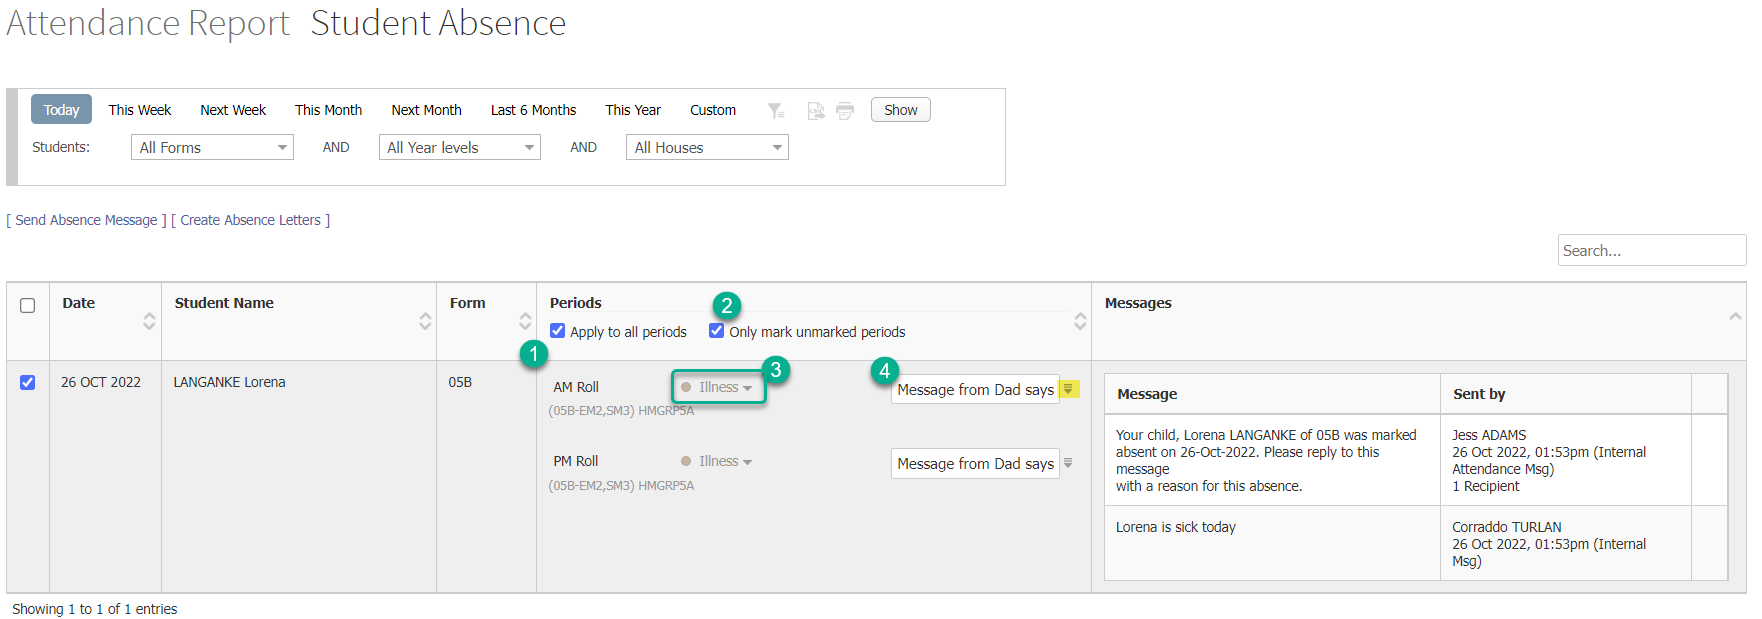
- Tick the Apply to all periods checkbox if you wish to mark all periods together.
- Tick the Only mark unmarked periods checkbox if required. If this is unticked and you are marking all periods together, you will overwrite all previously marked periods for the day.
- Use the dropdown list to select an attendance type.
- Enter an optional comment if required. You can use the Fill down icon (highlighted in yellow) to copy the comment to all periods below if you wish.
Setting default parent recipients of absence messages
You can set the default recipients to save time for your attendance admin staff. By default, the message is sent to the first parent (Parent A) of the student's primary family.
- Go to Options > Software Settings > Attendance & Timetable.
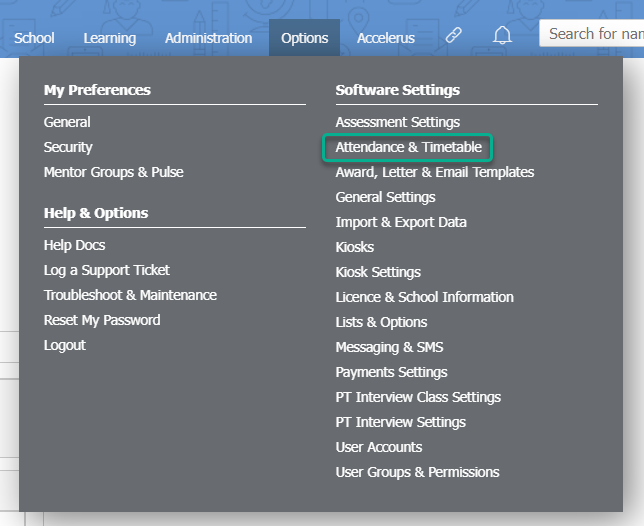
- Scroll down until you see Absence Message.
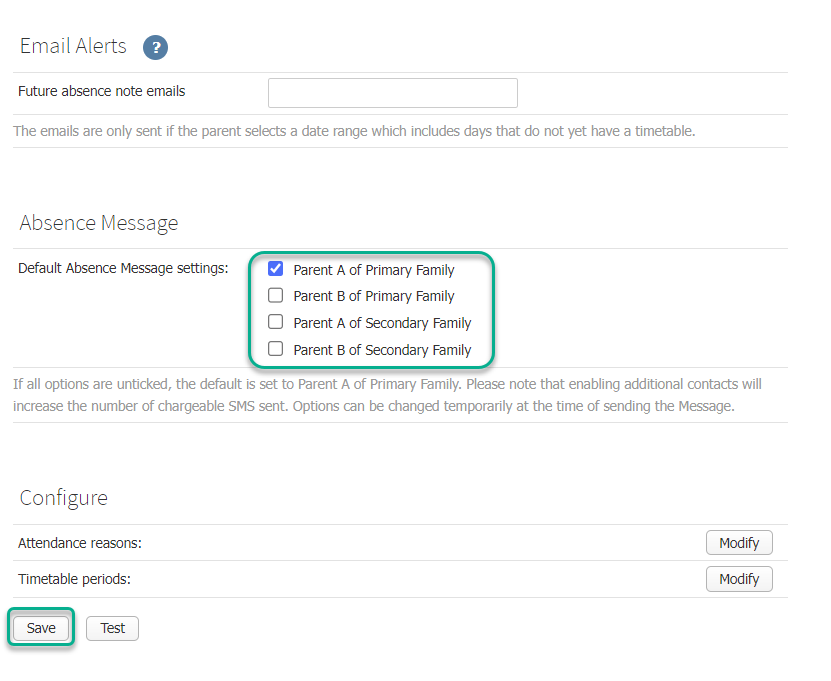
- Select the desired default recipients using the checkboxes.
- Click the Save button.
The person sending the absence message always has the ability to change the selection at the time of sending, to accommodate all situations that might arise with particular students or parents.
Note: No message will be sent if the parent’s correspondence flag is set to “no”. These values come from CASES21. If you are using XUNO as a SIS, you can set the correspondence flag by editing the student and changing the setting in the contact relationships section.