Who is this article for?
This article is for primary schools using the XUNO Basic Timetable with a simple setup that incorporates:
- Homegroup classes only (no specialist classes or yard duties are timetabled in XUNO).
- The same classes timetabled in every period of each day (for most schools, this will be AM and PM periods only).
Most primary schools are using XUNO in this way.
If this is the first time your school is setting up your XUNO timetable, or if your school's setup is more complex than described above, please see the related article ' How to generate a basic timetable within XUNO'.
How often should I update my school's XUNO Basic Timetable?
Most primary schools only need to update their timetable on a yearly basis, when homegroup enrolments and teachers change substantially. However, if your school makes significant changes to homegroup enrolments or teachers mid-year, you can instead update your timetable each semester.
Updating the XUNO Basic Timetable
- Step 1: Make sure teachers and students are assigned to correct homegroups
- Step 2: Create a new timetable quilt
- Step 3: Generate classes and enrolments
- Step 4: Prepare the timetable
Step 1: Make sure teachers and students are assigned to correct homegroups
You can't update your timetable if your students are still assigned to last year's or semester's homegroups, or if your new Prep students have not yet been added to XUNO.
- Ensure your students have been promoted to their new year level and assigned to their new homegroup, if applicable. You will need to do this in your Student Information System (SIS) (e.g. CASES21, EdSAS, Integris) and then wait until this information has been synced to XUNO, either automatically (for CASES21 and some other SISs) or manually, if required. If you use XUNO as a SIS, follow the required process for student promotion in XUNO.
- Ensure your teachers are assigned to the correct homegroup for the coming year or semester. Again, this will need to be done in your SIS (or in XUNO if you use XUNO as a SIS), and synced to XUNO.
Step 2: Create a new timetable quilt
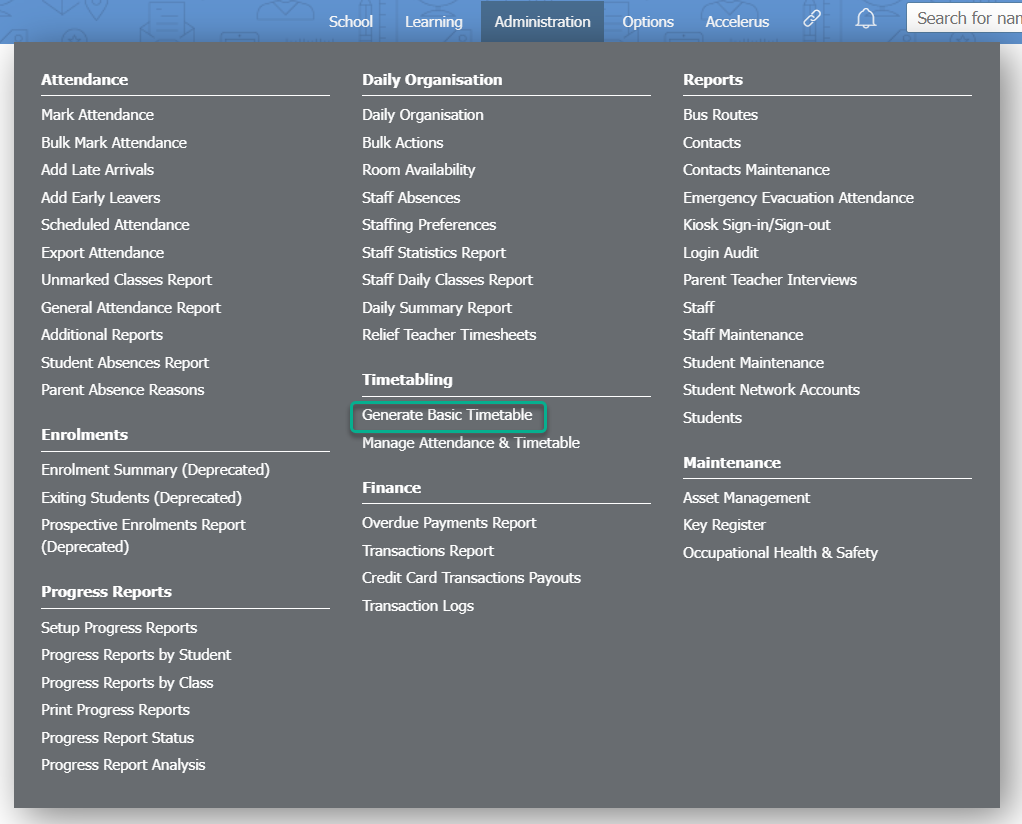
- Go to Administration > Timetabling > Generate Basic Timetable.
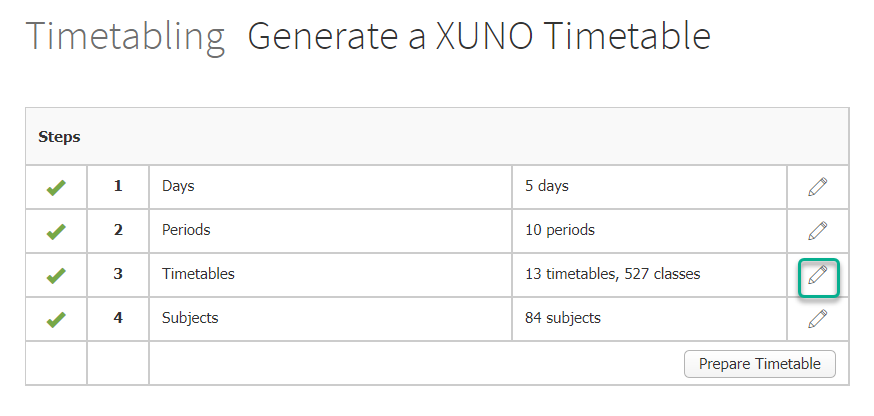
- Click the Pencil icon in the third row, next to Timetables.
- Create a name for your new timetable 'quilt' by selecting the appropriate Year & Semester from the dropdown list, and then click on the + icon. By default, the Version will be 'A' if this is the first timetable quilt created for this year and semester.
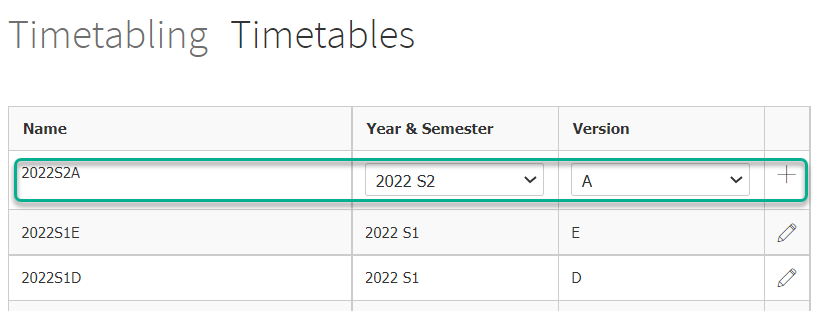
In a typical situation, a primary school will use their '2022S1A' quilt (2022 Semester 1, Version A) for the entirety of 2022, for instance. Alternatively, some schools will also create a 2022S2A quilt for use in semester 2).
Another situation that sometimes arises is that schools will initially create a 2022S1A for use when Preps are only attending school for certain days of the week, then create a 2022S1B (Version B) for the rest of the year or semester. Please contact XUNO Support for more information on setting up this kind of timetable. - Click OK.
Step 3: Generate classes and enrolments
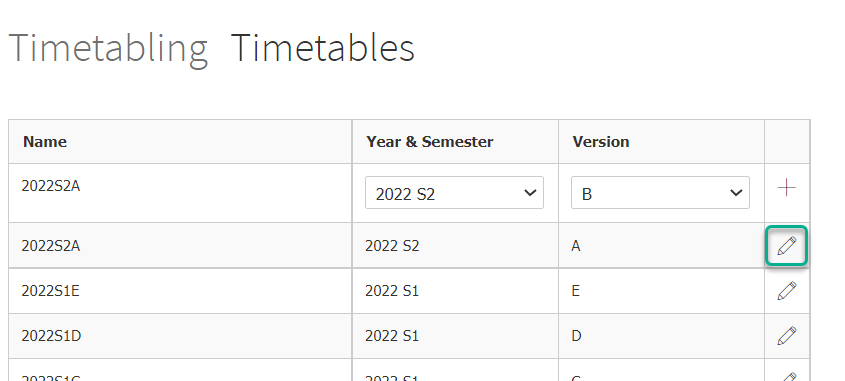
- Click on the Pencil icon next to the quilt you created in Step 2.
- Click on the Generate classes & enrolments from forms.
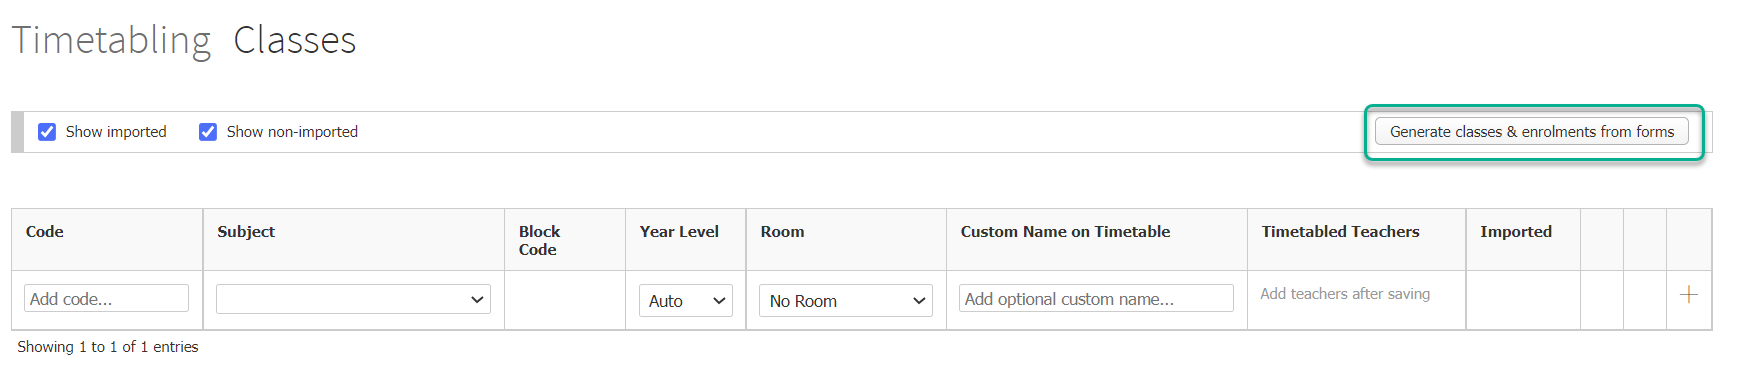
- Click OK.
- Scan down your list of classes. If you need to adjust which teachers are assigned to classes:
- Click on the Edit teachers of this class icon.

- To add a teacher to a class, select the teacher's name from the dropdown list. Note: You can add more than one teacher to a class, as long as each teacher is only assigned to one class. This means that Jess Adams can be added to team-teach the same class as Zane Gillard, but only if she is not assigned to any other class in the timetable.
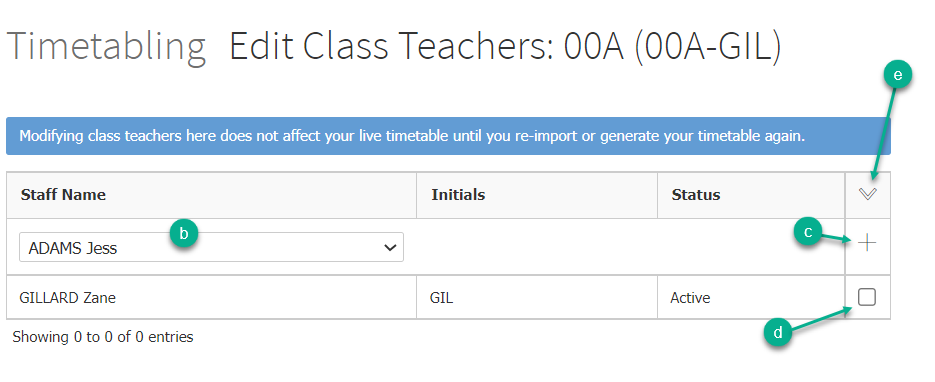
- Click the + icon.
- To remove a teacher from a class, tick the checkbox at the end of their row.
- Click on the dropdown arrow at the top of the right-hand column and select Remove Staff.
- Click OK.
- If you need to edit the teachers for another class, you must go to Options > Administration > Generate Basic Timetable, then click on the Pencil icon next to Timetables, and then click on the Pencil icon next to your quilt name before repeating the steps above.
- Click on the Edit teachers of this class icon.
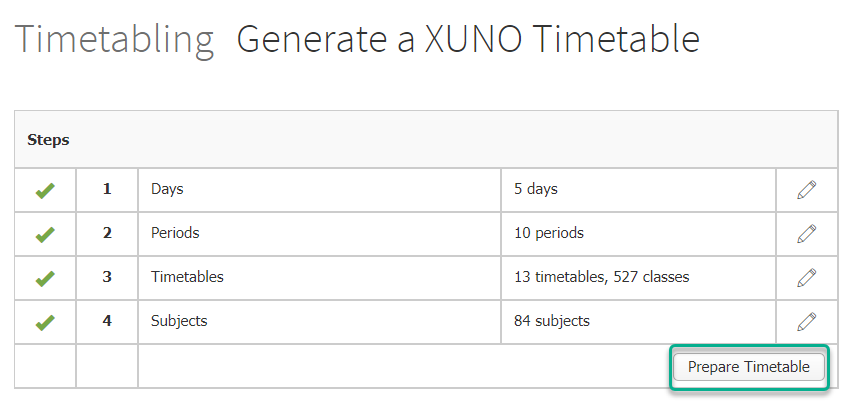
Step 4: Prepare the timetable
Your timetable is not 'live' until you complete this step. This last step will generate the timetable and import it into XUNO so that it is available for everyone to use.
Important: Backdating a timetable import will cause any student who has changed classes to lose all their attendance for the backdated period. Attendance data will also be deleted on backdating if there are changes to a class code or teacher. XUNO will tell you if you are about to delete attendance data when preparing your timetable.
- Go to Administration > Timetabling > Generate Basic Timetable.
- Click on the Prepare Timetable button.
- In the Select a timetable dropdown, choose the timetable quilt that you want to generate (this will be the quilt you created in Step 2).
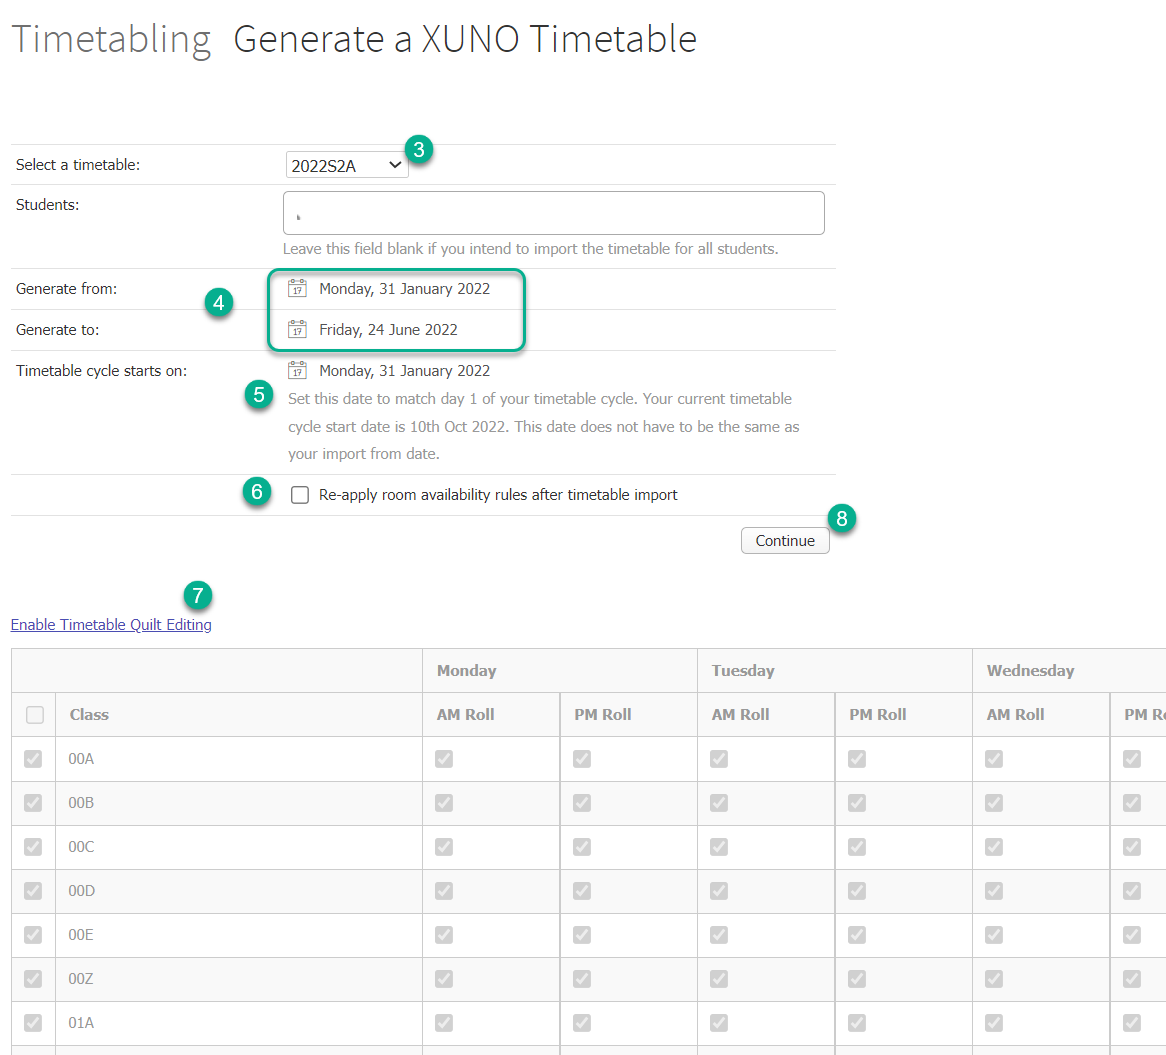
- Select the Generate from and Generate to dates by clicking on the dates and selecting using the calendar picker that appears. These will be the dates that the timetable will span from (e.g. from the start of Term 1 - 31/01/22 until the end of Term 2 - 24/06/22).
- Select the Timetable cycle starts on: date. Set this date to match day 1 of your timetable cycle (for most primary schools, this will be the Monday before or on the day you are preparing the timetable. This date does not have to be the same as your generate from date.
- Tick the Re-apply room availability rules after timetable import option, if you have room availability rules set up in XUNO (many primary schools do not have this set up, as it is a feature mostly used with the XUNO Daily Organisation module).
- At the bottom of the page you will see a large table that contains checkboxes. Each row in this table is a class and each column is a period. To edit this table, click the [Enable Timetable Quilt Editing ] text.
Ensure all checkboxes in your table are ticked. - Double check that all of the previous steps above have been followed and that your generate from/to date ranges are correct. Then click the Continue button to generate your timetable.
- A confirmation alert will appear, click OK to proceed with the timetable generation.