In this article
Adding a new incident or action
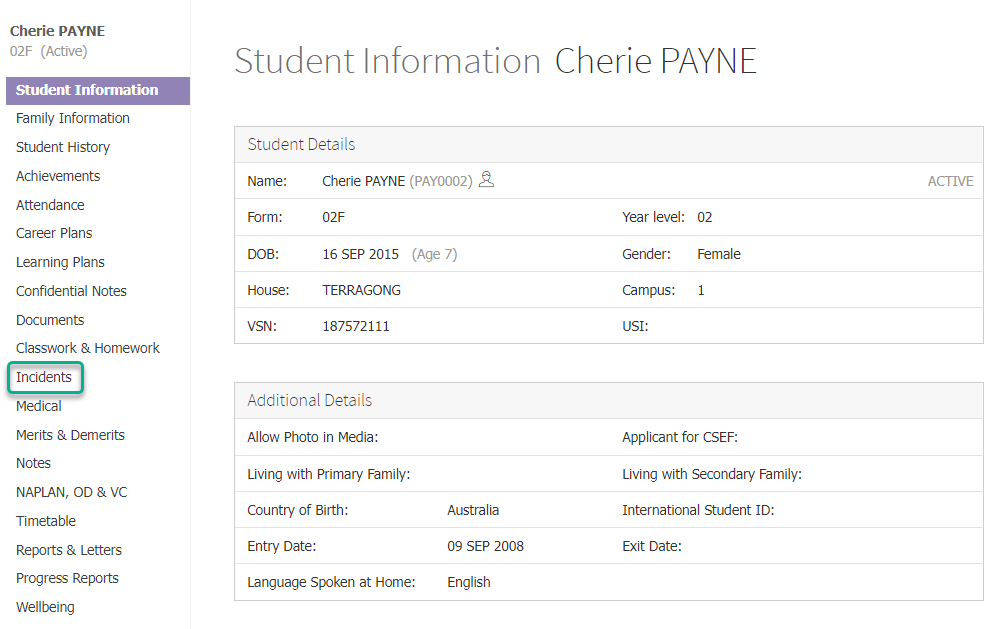
- Find a student using the search bar and click on their name to go to their student dashboard.
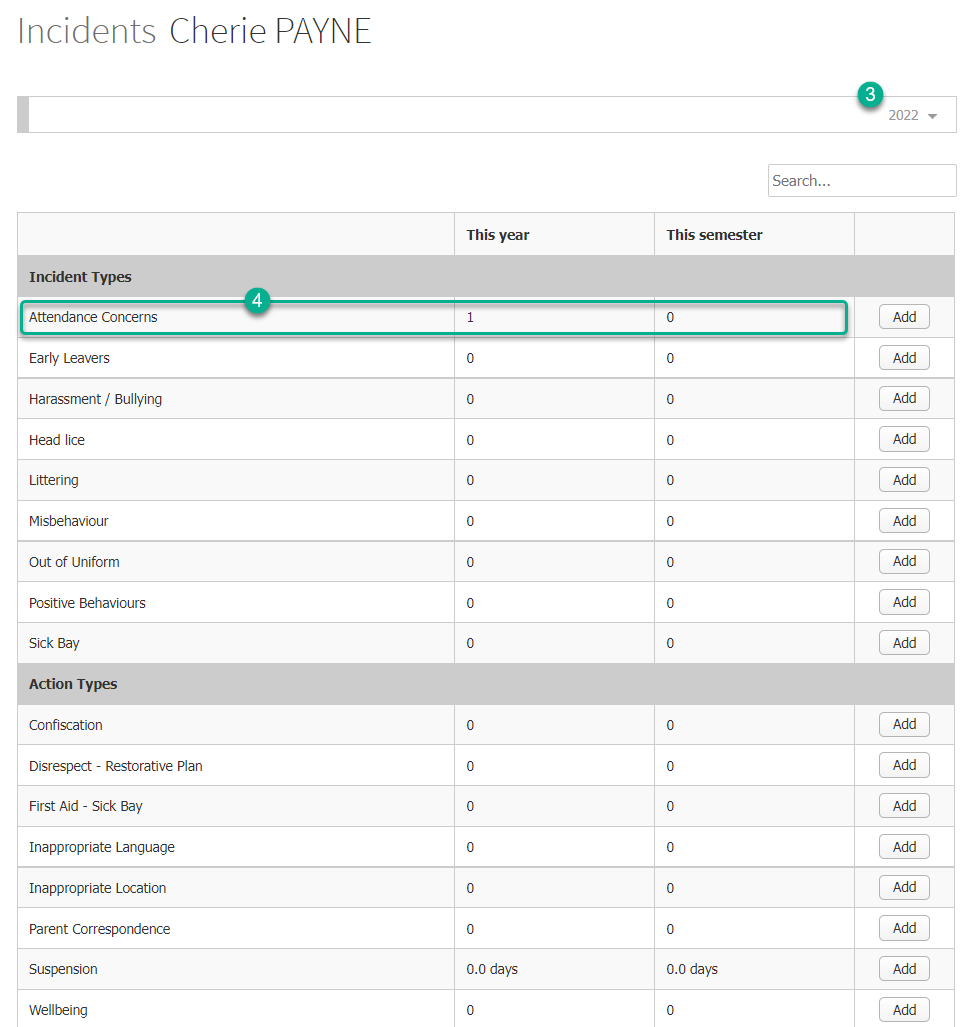
- Click on the Incidents item in the left hand menu.
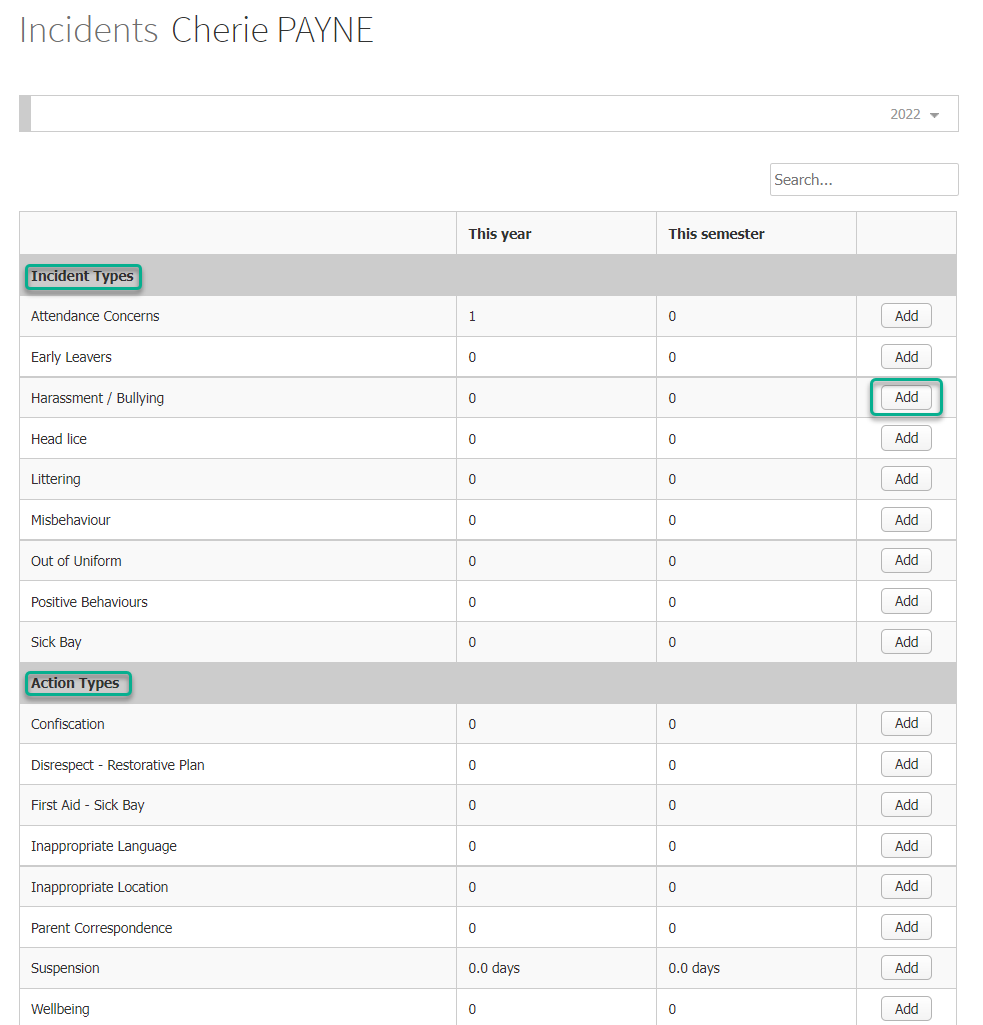
- Choose an incident or action type and click on the corresponding Add button. You can only add incidents/actions if you have the required permissions.
- If you are adding an incident, and Student Role is enabled for that incident type, select the appropriate role for this student.
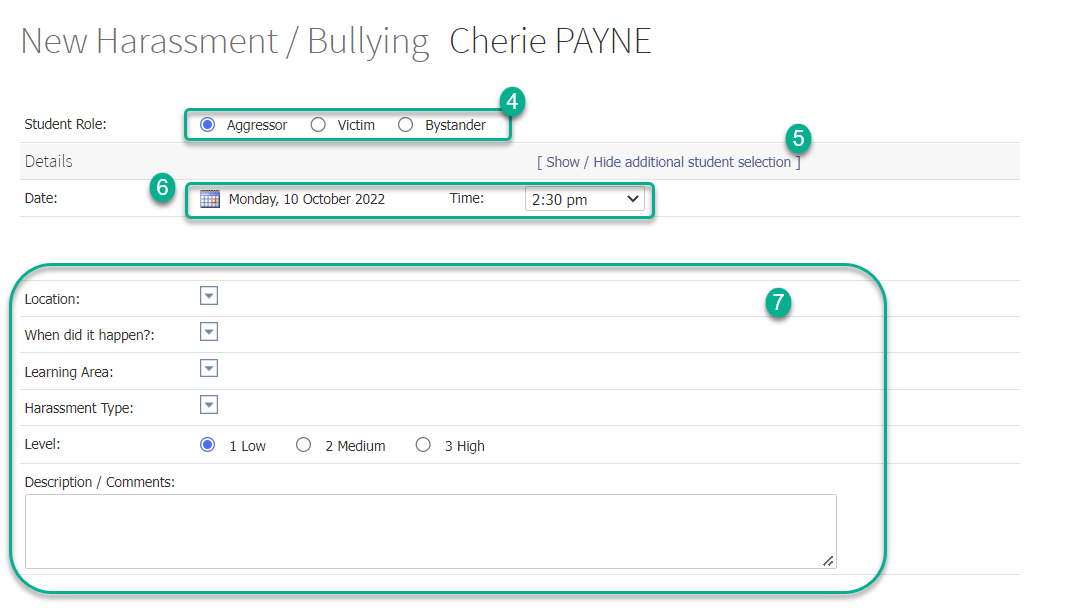
- If you are creating an incident or action that applies to multiple students, you can click the [ Show / Hide additional student selection ] text and select one or more students to add to this note. If student role is enabled, you can assign a role for each student you select. Any additional students you add will also have the same incident saved to their profile.
- In the Details section, select a date and time for the incident or action using the Calendar picker and Time dropdown list, respectively.
- Fill in the rest of the form as applicable. The fields will have been set up by the person who created the incident or action type in XUNO for your school.
- In incidents where linked XUNO actions can be added, you will see the Behaviour Management section. Use the Choose an action to add dropdown list to select an action. If this section is not displayed, or you are creating an action on its own, skip to Step 10.
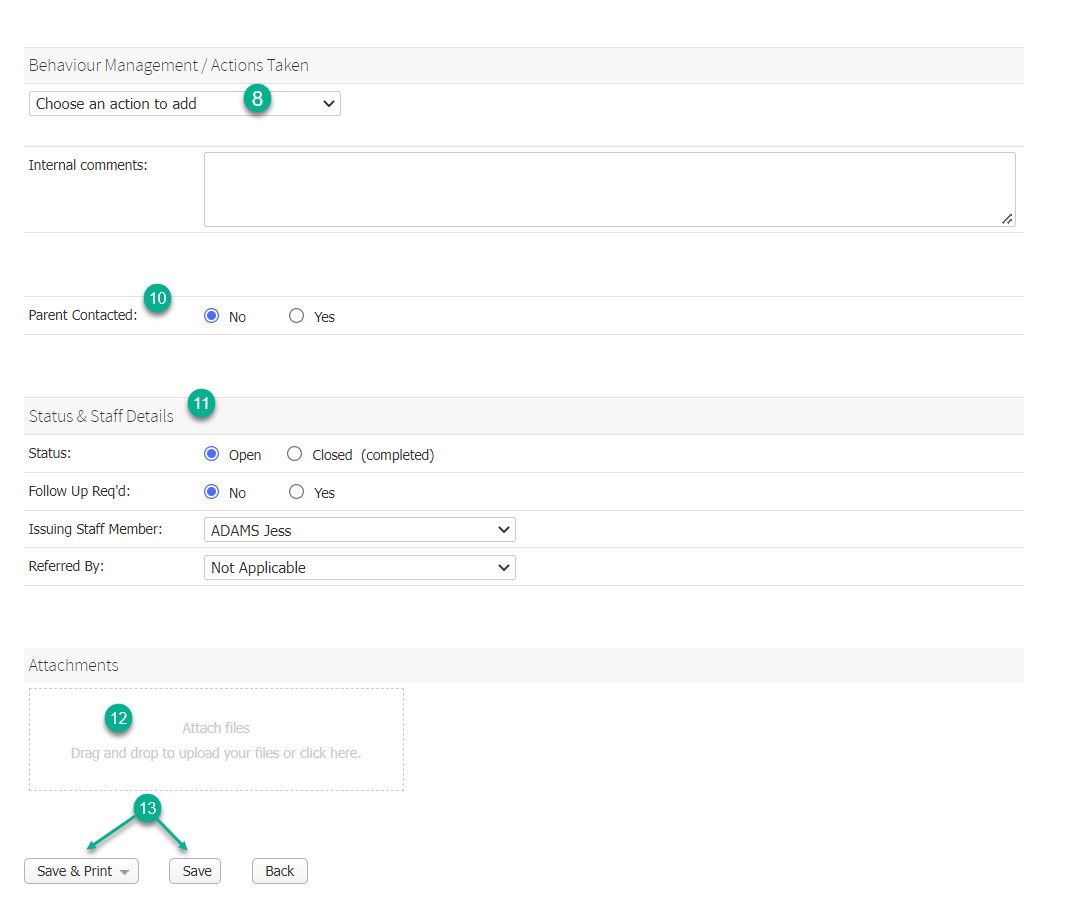
- A popup window will appear with the XUNO action form. The fields will have been set up by the person who created the action type in XUNO for your school. Fill in the action form and click the Save button when completed.
- Choose the applicable No or Yes radio button to indicate whether the parent was contacted.
- In the Status & Staff Details section, make selections as appropriate. You may or may not see all fields shown below, depending on the incident/action type settings.
- Attach any files to the incident/action if required, by clicking in the Upload area and browsing to your file, or by dragging and dropping files into the area.
- Click on the Save button, or the Save & Print button if you would like to print an incident/action letter, and there is a template associated with this incident/action type.
- If there are automated email notifications set up for student notes or confidential notes, these will be sent to recipients as determined by your messaging settings. For more information, see the related article Automated email or SMS notification alerts to messaging groups for incidents, notes and achievements.
Viewing or editing an incident or action
- Find a student using the search bar and click on their name to go to their student dashboard.
- Click on the Incidents item in the left hand menu.
- Use the Year dropdown if you need to change the date range displayed.
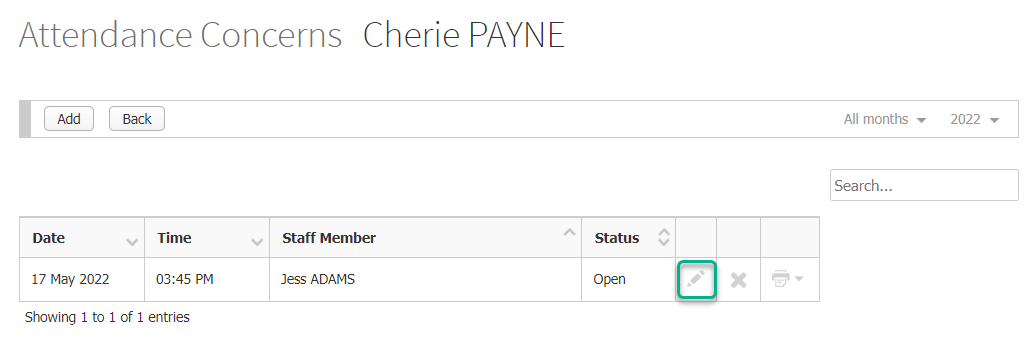
- Click on the row of the incident or action that you would like to view or modify. If you need to view all incidents together, regardless of type, then use an incident report to filter all incidents by a particular student. See the related article 'Incident/action reporting' for more information.
- Click the Pencil icon next to an incident/action to view or edit it. You can use the Search bar at the top right of the table to find specific incidents/actions, or sort any of the columns in the table with up or down arrows in the column header.
- Edit your incident/action as needed.
- If you are editing an incident/action and there are automated email notifications set up for that incident or action type, these will be sent to recipients as determined by your messaging settings if you tick the checkbox to Resend email messages to: the applicable recipients.
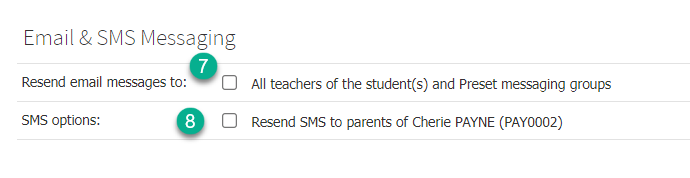
- Similarly, if SMS is enabled for parents for this incident or action type, you can tick the Resend SMS to parents of [student] to resend the SMS(s).
- Click the Save or Save & Print button, or the Back button if you are viewing only. Note: if the original incident or action was created with additional student(s) added, editing will only affect the incident/action for the student you searched for, not the additional students(s).
Deleting an incident or action
- Find a student using the search bar and click on their name to go to their student dashboard.
- Click on the Incidents item in the left hand menu.
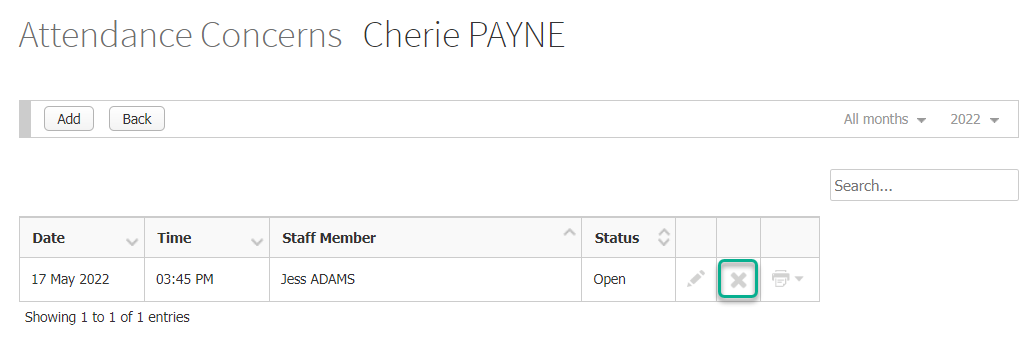
- Use the Year dropdown if you need to change the date range displayed.
- Click on the row of the incident or action that you would like to view or modify. If you need to view all incidents together, regardless of type, then use an incident report to filter all incidents by a particular student. See the related article 'Incident/action reporting' for more information.
- Click the X icon next to an incident/action to delete it. You can use the Search bar at the top right of the table to find specific incidents/actions, or sort any of the columns in the table with up or down arrows in the column header.