Importing your timetable from Edval
Two-Step Staged Import Process
Edval uses a LISS semi-manual sync process which requires you to push your timetable from Edval into XUNO. Once the timetable has been pushed, it is staged in XUNO ready to be imported. You must then complete the import by following the standard XUNO timetable import instructions.
Setting up the Edval export
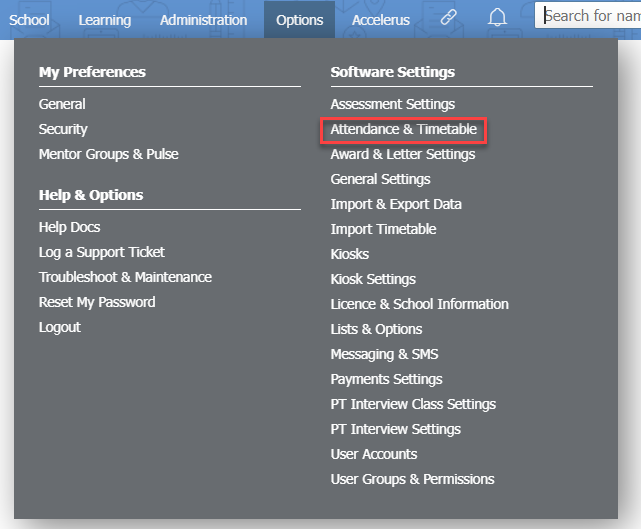
- In XUNO, go to Options > Software Settings > Attendance & Timetable.

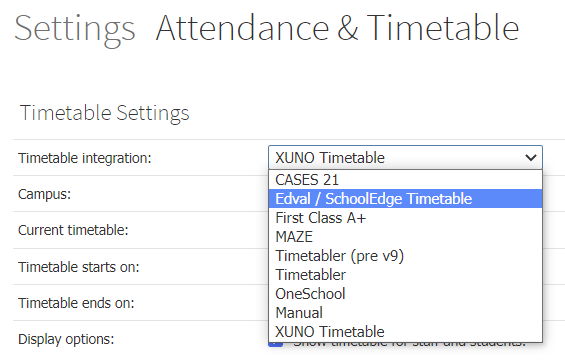
- Choose Edval / SchoolEdge Timetable as the timetabling option from the Timetable & Integration: dropdown list.

- In Edval:
- Go to File > Synchronise > Configure > Sync tab.
- Click on the + button
- Select XUNO (Xtreme Software) from the dropdown menu that is added.
- Go to File > Synchronise > Configure.
- Go to the Connection tab.
- Change the Filter on the top right to XUNO (Xtreme Software).
- Enter the XUNO URL: https://xuno/import/edval.im.php, if required replace “xuno” with the domain name of your XUNO web server (you may have to ask your technician for these details).
- Enter the username and password of an active XUNO account with full admin permissions.
- Click the Test connection button to confirm the connection has been made correctly.
- Use the Edval timetabling package to stage your timetable import by “pushing” it into XUNO.
In Edval:- Go to File > Synchronise > Sync Now.
- Select XUNO (Xtreme Software) from the Filter dropdown on the top right.
- Click on Basic/Advanced sync.
- Set the date range and what you would like to sync.
- Click the Sync button when ready.
Refer to your Edval manual for more information about this feature.
Importing your timetable
When you run the Edval Sync Now option, your timetable will be imported into XUNO as a 'staged' timetable - in other words, you will have a pending timetable import into XUNO. Follow the steps in the How to import your timetable if you are using an external timetabling package article to complete your import.