Who is this article for?
Schools in Western Australia using Integris will need this article to step them through the process of:
-
- exporting student and parent/carer data from Integris.
- importing student and parent/carer data into XUNO.
Please make sure:
- there are always two CSV files imported, the Student Details CSV and the Contact Details CSV.
- the Student Details CSV contains the entire list of students at the beginning of a new year or semester. XUNO will adjust any changes to existing students’ details that have been made in Integris e.g. changed address, year level, or parent/carer contact details. Any student no longer in the data file will be marked with a "Left" status.
NOTE: XUNO will create Family Codes that are assigned to students and their parents/carers based on the information imported.
Students with the same details for PG1 and PG2 (including name, email and phone number) will be assigned the same Family Code, as will these parents/carers. This means that if siblings have different details in these fields, they will not be assigned to the same family.
Please ensure that all siblings in the same family have uniform details for PG1 and PG2 to avoid this issue.
If there are name changes for parents, this may be more complex – please contact XUNO Support for assistance if required.
How to export data from Integris
You will need to create two CSVs, one for student details, and one for contact (parent/carer) details.
NOTE: You must export these two reports with the columns in exactly the order specified below. The import will not work properly if columns are not in this order.
To do this:
1. Student details:
- Export an Ad Hoc Report from Integris, selecting the following fields, in this order:
- Student Reference
- Student Number (Previously CC Number)
- Name: Surname
- Name: First Name
- Name: Second Name
- Name: Preferred Name
- Sex (m-Male, F-Female)
- Date of Birth
- Student Address - Line 1
- Student Address - Line 2
- Student Address - Town/Sub
- Student Address - State
- Student Address - Postcode
- Student Address - Country
- Roll Status
- Movement: Student Entry date
- Movement: Student Leave date
- Year Group
- Form
- House
- PG1 Surname
- PG1 First Name
- PG1 Title
- PG1 Address - Line 1
- PG1 Address - Line 2
- PG1 Address - Town/Sub
- PG1 Address - State
- PG1 Address - Postcode
- PG1 Address - Country
- PG1 Mobile
- PG1 Relationship
- PG1 E-mail Address
- PG2 Surname
- PG2 First Name
- PG2 Title
- PG2 Address - Line 1
- PG2 Address - Line 2
- PG2 Address - Town/Sub
- PG2 Address - State
- PG2 Address - Postcode
- PG2 Mobile
- PG2 Relationship
- PG2 E-mail Address
- Save the exported CSV file as 'Student and Contact Details'.
2. Emergency contact details
- Export another Ad Hoc Report from Integris, selecting the following fields, in this order:
- Student Number (Previously CC Number)
- Surname
- First Name
- Title
- Address - Line 1
- Address - Line 2
- Address - Town/Sub
- Address - State
- Address - Postcode
- Address - Country
- Address - Telephone 1
- Address - Telephone 2
- Mobile
- Relationship
- Save the exported CSV file as 'Emergency Contact Details'.
How to import data into XUNO
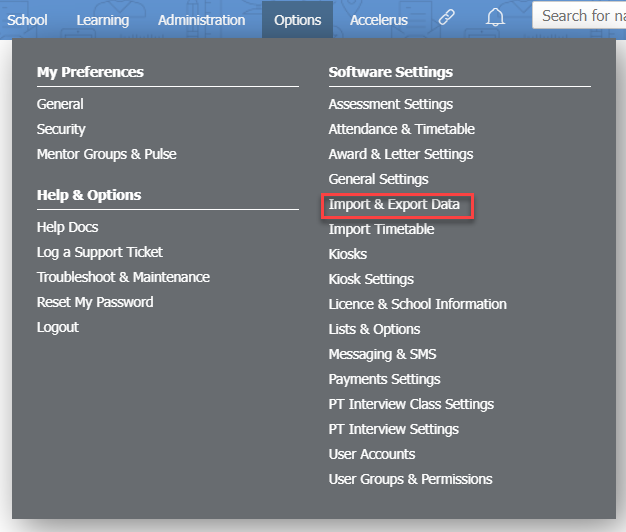
- Go to Options > Software Settings > Import & Export Data.
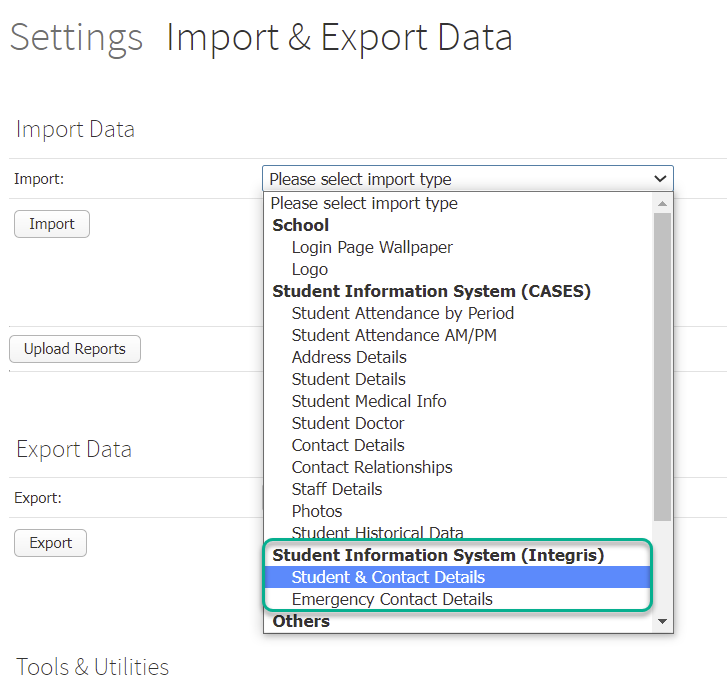
- Select Student & Contact Details from the Import: dropdown list.
3. Click Choose file and navigate to and select your Student and Contact Details CSV files created in the Export data from Integris section above.
4. Make the selections shown below:
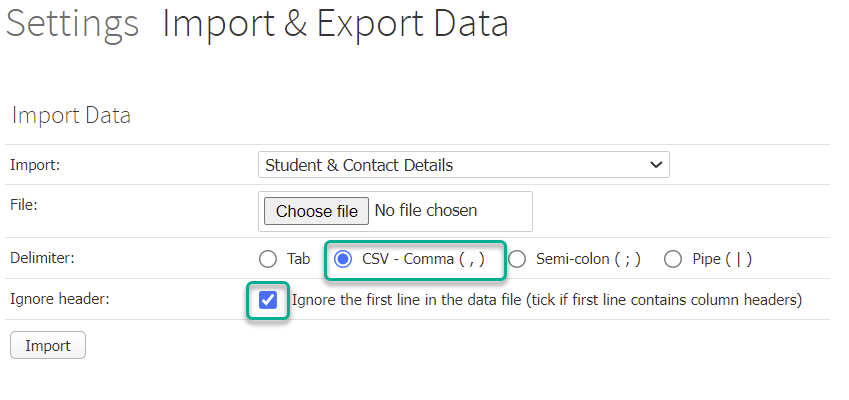 5. Click the Import button.
6. Repeat steps 2 to 4, but choosing Emergency Contact Details in the dropdown menu in Step 2 this time, and selecting your Emergency Contact Details CSV file in step 3.
Note: The Date columns must be in this format: dd MMM yyyy