Importing assets into XUNO
XUNO can manage all of your assets - from laptops and computers, to cameras, tables and even the fridge. You can import information about all of your assets using a CSV file.
The import file should be a CSV document with one line per asset. Each line should be in the following format.
assetno, make, model, serialno, purchase_date, warranty_expiry_date, supplier, purchase_amount, current_status
- Date fields should be in the YYYY-MM-DD format (e.g. 2015-10-08).
- 'current_status' must be either 'Unassigned' or 'Assigned'.
Example:
123456, Apple, MacBook Pro 2014, ABC123, 2015-01-01, 2017-01-01, Apple, 1200, Unassigned
How to import your assets from a CSV file
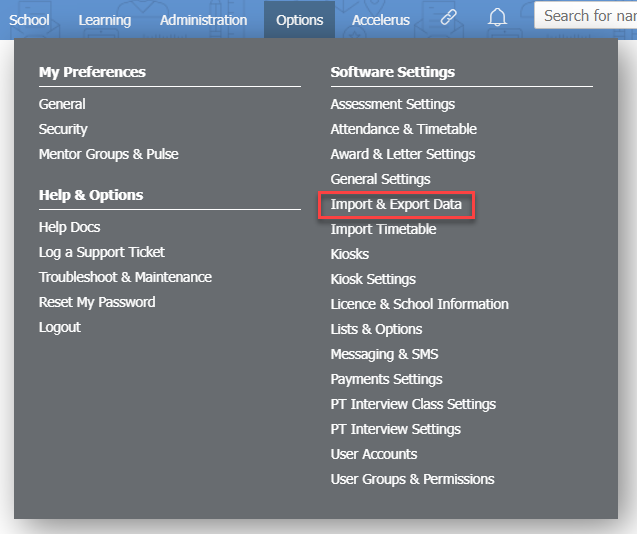
- Go to Options > Software Settings > Import & Export Data.

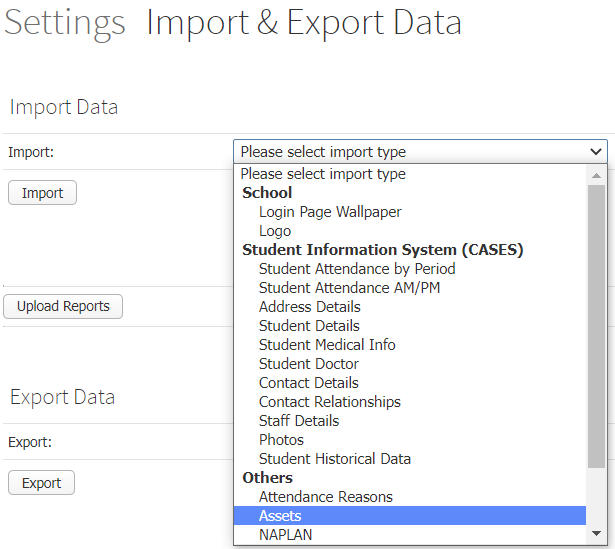
- Select Assets from the Import: dropdown list.

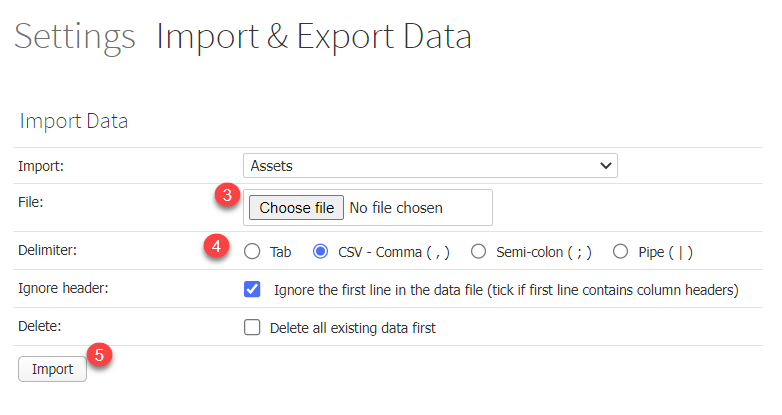
- Upload the file that contains your assets using the Choose file button.

- Select the delimiter using the radio buttons next to Delimiter:.
- Click on the Import button.
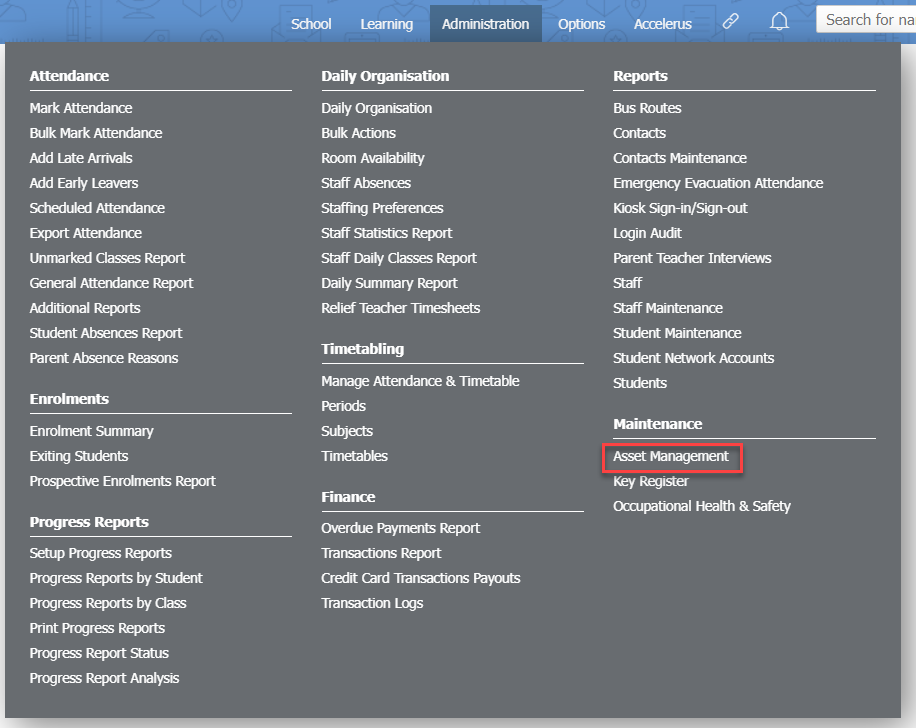
- Once imported, your assets will appear under Administration > Maintenance > Asset Management.
