In this article
We recommend you ensure that only limited staff should have access to this menu due to the generally sensitive and confidential nature of the data.
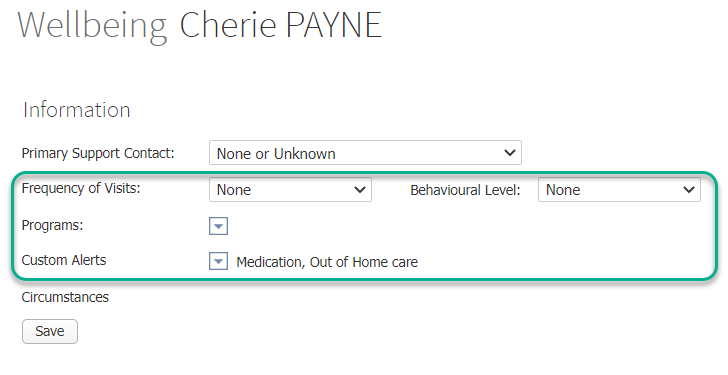
Each student can have a primary support contact assigned to them as well as other information such as frequency of visits and programs entered. You can also add your own custom alerts, which will appear next to the student on each page, alongside any other major alerts that have been imported from your Student Information System (SIS) administration package (such as access restrictions, student at risk and medical alerts). See the article Custom Alerts and icons for more information on setting these up.
Viewing and editing student wellbeing information
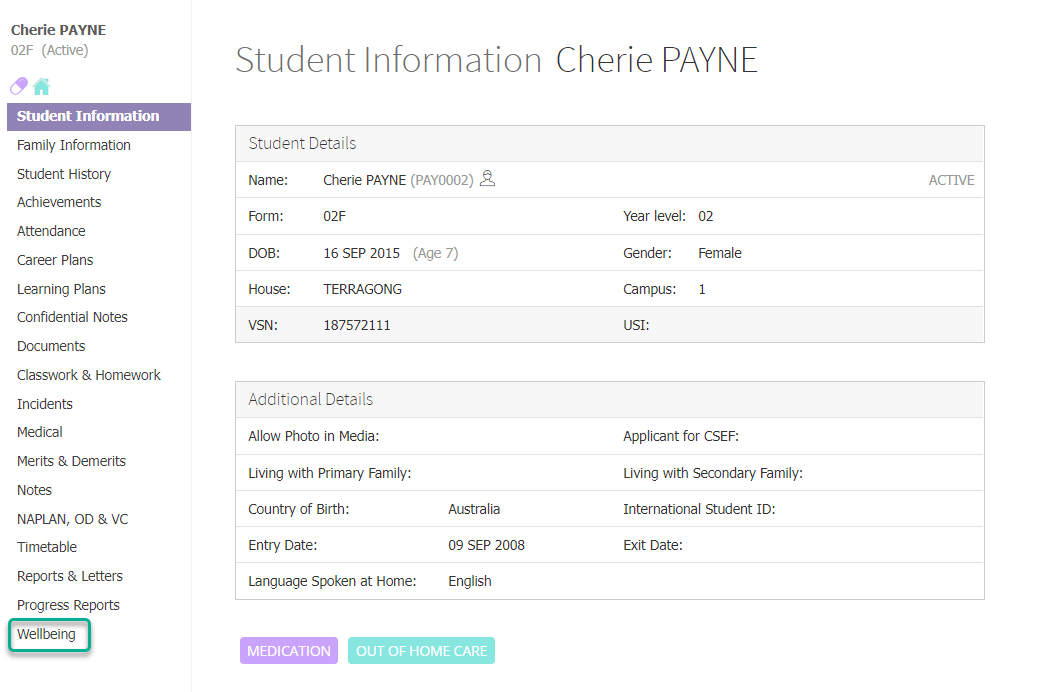
- Choose a student from the search bar and click on their name to go to their student dashboard.
- Click on the Wellbeing item in the left hand menu.
- In the Information section, you can select a Primary Support Contact, Frequency of Visits and Behavioural Level from the dropdown list options.
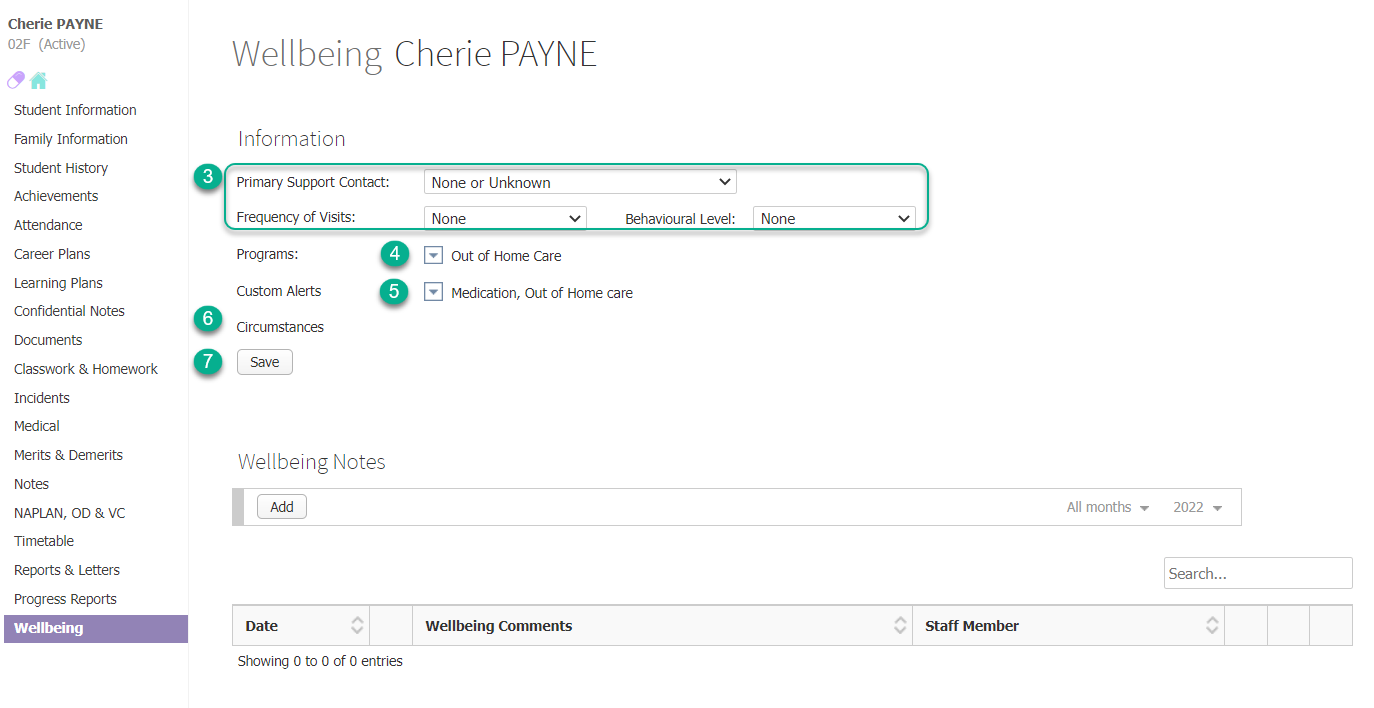
- Next to Programs, you can select all the programs (such as language support and integration) that the student is enrolled in, by clicking the dropdown arrow and ticking the appropriate boxes. You can add to and modify this list yourself, if you have permission, by clicking the [ Edit List ] text at the bottom of the lis
- Next to Custom Alerts, you can tick all the alerts that you want shown next to the student's name (e.g. Medication, Out of home care), by clicking the dropdown arrow and ticking the appropriate boxes. You can add to and modify this list yourself, if you have permission, by clicking the [ Edit List ] text at the bottom of the list.
- Alerts coming from your SIS will be shown next to Circumstances Alerts.
- Click the Save button, when done.
Adding a new wellbeing note
You can add specific welfare notes with attachments, visitations, confidential data, discussions and any other information needed to a student's profile.
- Choose a student from the search bar and click on their name to go to their student dashboard.
- Click on the Wellbeing item in the left hand menu.
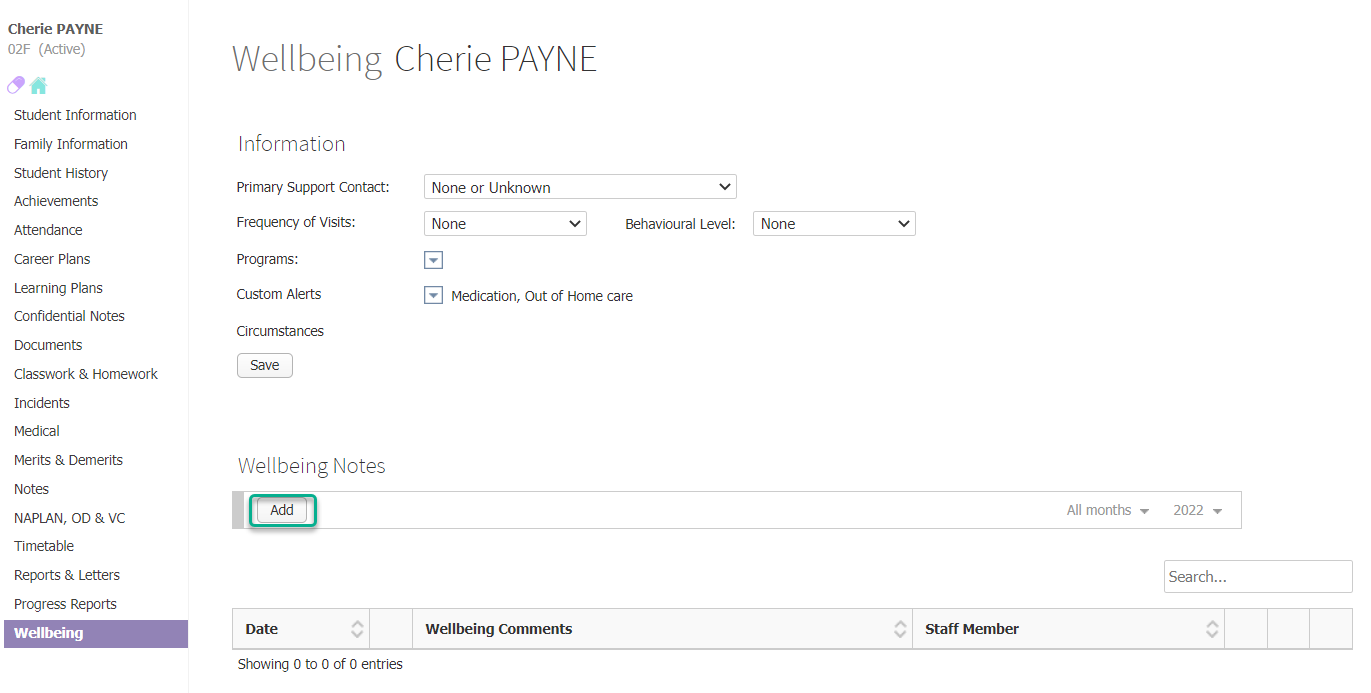
- In the Wellbeing Notes section, click the Add button.
- Under the Details section, click the Calendar icon next to Date: and select a date for the wellbeing note.
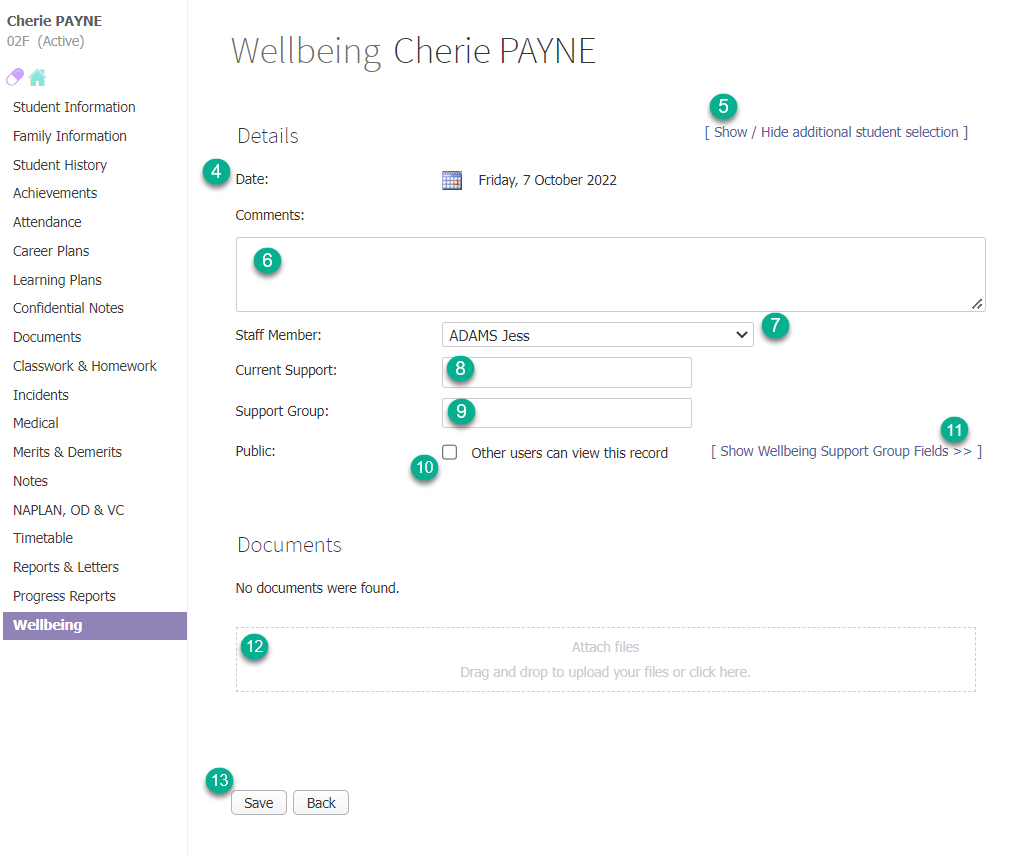
- If you are creating a wellbeing note that applies to multiple students, you can click the [ Show / Hide additional student selection ] text and select one or more students to add to this note. All information is duplicated across to all students added to the same note.
- Add any Comments you wish to add in the text box.
- Choose a Staff Member for this record by choosing from the dropdown list.
- Enter any Current Support details in the text box if applicable.
- Enter a Support Group in the text box if applicable.
- This record is a private record. To make it Public to staff that have permission to view public wellbeing notes, tick the checkbox that says Other users can view this record. If this checkbox is unticked, only those with permission to view ALL wellbeing notes will be able to see it.
- Wellbeing notes have a series of built-in fields to enter more specific information into. Click the text to [ Show Wellbeing Support Group Fields >> ] to see these and enter any text applicable.
- Attach any files to the wellbeing note if required, by clicking in the Upload area and browsing to your file, or by dragging and dropping files into the area.
- Click the Save button.
- If there are automated email notifications set up for wellbeing notes, these will be sent to recipients as determined by your messaging settings. For more information, see the related article Automated email or SMS notification alerts to messaging groups for incidents, notes and achievements.
Viewing and editing wellbeing notes
You can view or edit existing wellbeing items by following the simple process below.
- Choose a student from the search bar and click on their name to go to their student dashboard.
- Click on the Wellbeing item in the left hand menu.
- In the Wellbeing Notes section, select the applicable month or year from the dropdown lists at the top right.
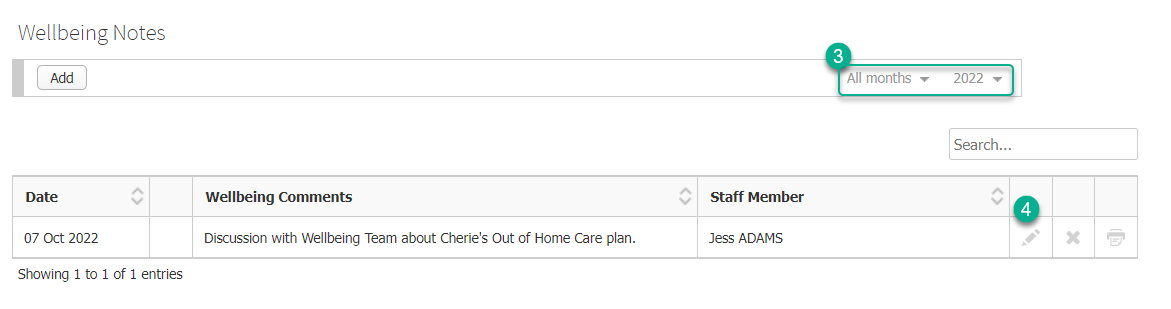
- Click the Pencil icon next to a wellbeing note to view or edit it. You can use the Search bar at the top right of the table to find specific notes, or sort any of the columns in the table with up or down arrows in the column header.
- Edit your wellbeing item as needed.
- Click the Save button, or the Back button if you are viewing only.
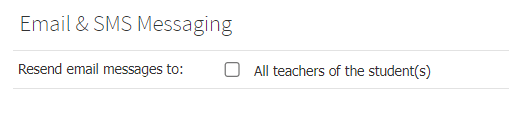
- If you are editing a wellbeing note and there are automated email notifications set up for wellbeing notes, these will be sent to staff as determined by your messaging settings if you tick the checkbox to Resend email messages to: the applicable recipients.
Deleting wellbeing notes
It is not recommended that you delete wellbeing notes, as it is of great benefit to have a full timeline of a student's wellbeing history. However, under the circumstances that deleting a record is necessary, follow the simple process below.
- Choose a student from the search bar and click on their name to go to their student dashboard.
- Click on the Wellbeing item in the left hand menu.
- In the Wellbeing Notes section, select the applicable month or year from the dropdown lists at the top right.
- Click the Delete icon next to a wellbeing note to delete it.

- Click OK.
Printing wellbeing notes
- Choose a student from the search bar and click on their name to go to their student dashboard.
- Click on the Wellbeing item in the left hand menu.
- In the Wellbeing Notes section, select the applicable month or year from the dropdown lists at the top right.
- Click the Print icon next to a wellbeing note to print it.

- The software will generate a PDF document of the record, which can then be saved to your computer or printed.
Viewing the wellbeing notes report
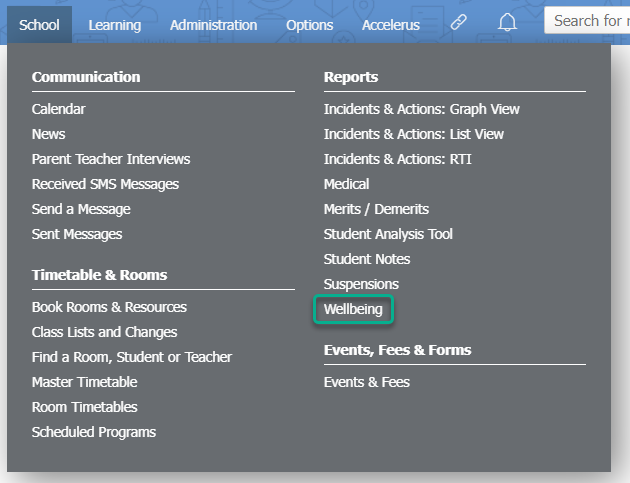
- Go to School > Reports > Wellbeing.
- Choose the date range you want the report for by selecting one of the Date filters available.
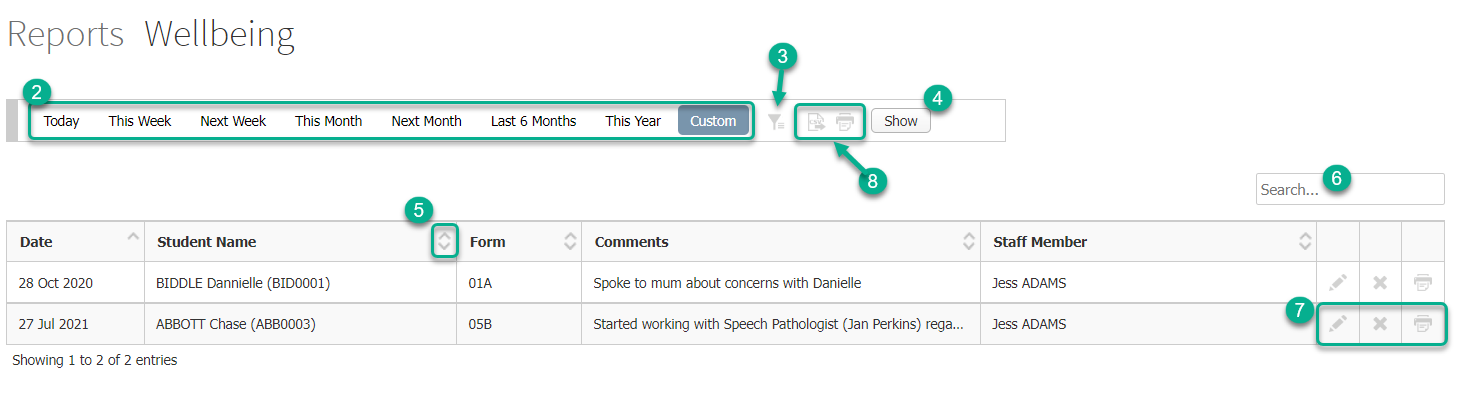
- For more filtering options select the Filter icon.
- Click on the Show button.
- You can sort data in your report by any column using the up or down arrows.
- You can search within your report using the report's Search bar.
- You can view/edit, delete or print any wellbeing note using the icons at the end of each row.
- You can export your report data to CSV or PDF using the icons at the top of the report screen.
Adjusting Wellbeing options for your school
You can customise some of the options staff can select in the Information section of the student Wellbeing page to suit your school's needs.
Note: You will only be able to do this if you have the relevant permissions assigned.
To add, edit or delete options from the dropdown lists shown above, use the following steps.
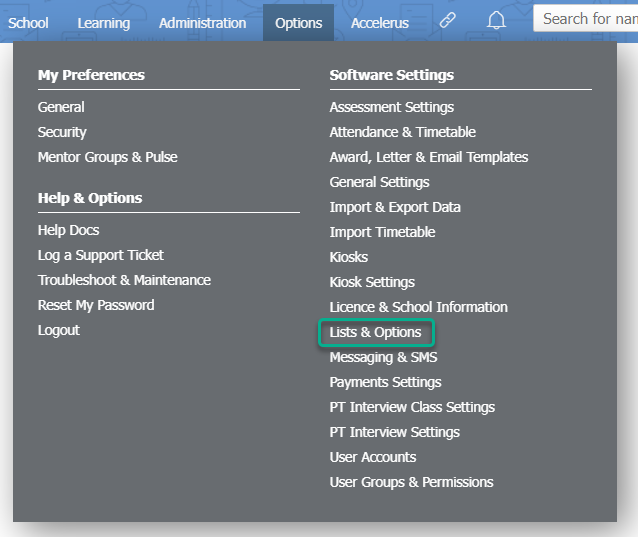
- Go to Options > Software Settings > Lists & Options.
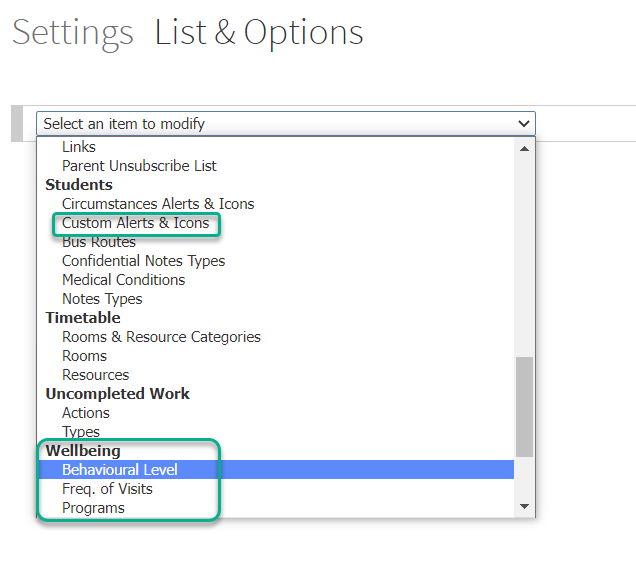
- Use the dropdown list to select the list you wish to access. You can edit options under the Students subheading for Custom Alerts & Icons, as well as options under the Wellbeing subheading for Behavioural Level, Freq. of Visits, and Programs.
- For whichever list you have selected, you can add a new item by entering a name into the Item column, then clicking the Add button.
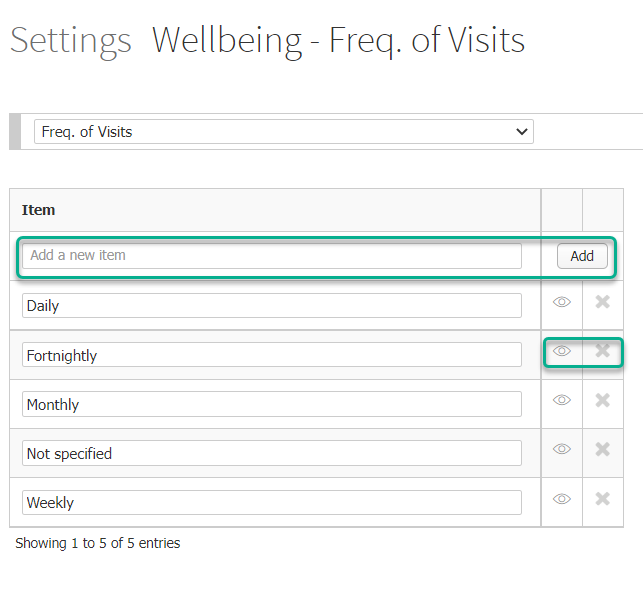
- You can use the Eye icon to hide/unhide options from the list, or the X icon to delete. We recommend that you hide rather than delete options in most cases, as deleting options that you have already added to a student record in the past will cause data integrity issues.
- If you are editing the Custom Alerts & Icons list, you can also add an icon and/or a colour to the alert. See the related article 'Custom Alerts & icons' for more information. You cannot add new Circumstance Alerts & icons, as these are determined by your SIS data, but you can edit their icons and/or colours in the same way.