Note: The On Demand and Victorian Curriculum data import only applies to Victorian schools.
In this article
On Demand data
Exporting On Demand data
When you export On Demand data. it is exported as a Microsoft Word document and must be converted into a CSV (comma delimited) file in order for XUNO to be able to process the data. Each line must contain the fields below and each test result must be on a separate line:
<yearoftest>,<yearlevel>,<testnamedescription>,<testno>,<studentcode>, <testdate>,<testscore>
- Export the data from your On Demand website.
- Open Microsoft Excel to a blank worksheet.
- In the first row (1), starting in the first column (A) enter the text: YEAROFTEST. Then in the next column (B) enter: YEARLEVEL. Continue entering these items each in order, each in a separate column: TESTNAME, TESTNO, STUDENTCODE, TESTDATE, TESTSCORE.
- Open the On Demand test file that you exported from your On Demand website. The file requires Microsoft Word to be able to open. Once opened, you will see a table with all the test results.
- Highlight all the rows containing the Student ID, Test Date and Standard Score columns.
- Do not highlight the header row (the row with the text Student ID, Test Date, etc.).
- Copy the information to your clipboard (Ctrl + C or Apple + C).
- Go back to the Excel file from step 3 and click on the cell of Row 2, Column E. Then click on the Paste button to copy the information across. The information should copy into the correct columns with no blank lines. Please check your data at this point to make sure that it's correct.
- Still in Excel, click on the header row of Column F to highlight the entire Column F vertically.
- Right-click on the Column F header and choose Format Cells. Click on the Date category then choose the example 2001-03-14 from the Type list. Click OK to continue.
- At this point, the first four columns (YEAROFTEST, YEARLEVEL, TESTNAME and TESTNO) should still be empty. You will need to manually fill these in – remember to use the fill down option in Excel! The format of each column must be as follows:
- <yearoftest> – The year the test was completed (e.g. 2009, 2014). The year must be in the format: YYYY.
- <yearlevel> - The year level of the student at the time of the test. Must be in double digits (e.g. 09, 10, 11).
- <testname> – A descriptive name for the test (e.g. Maths test).
- <testno> - The test number of the test (e.g. Unique 4 digit test number supplied from On Demand #1234).
- In Excel, choose the File menu or Office menu ball, and choose Save As…, then click on Other Formats.
- The Save As dialog box will appear. Make sure that the file type is CSV (Comma Delimited); enter a new filename, then click Save. You may be prompted to “keep the workbook in this format” – if so, click Yes.
Note: Please make sure that your <TESTDATE> column is in the format of Y-M-D (Year, Month, Date), e.g. 2016-02-11.
Importing On Demand data into XUNO
- Log in to XUNO as an Administrator.
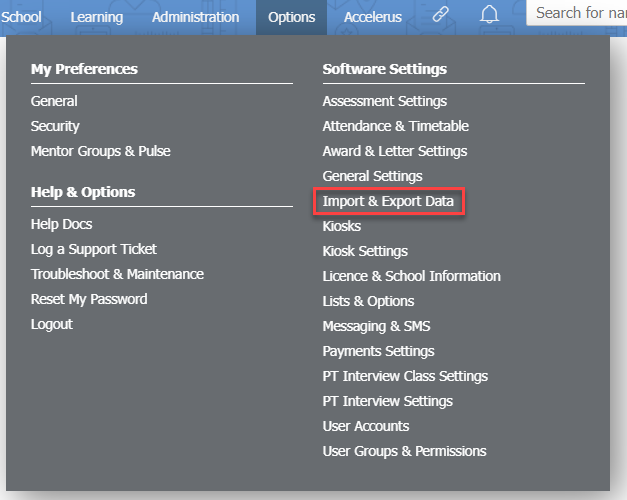
- Go to Options > Software Settings > Import & Export Data.
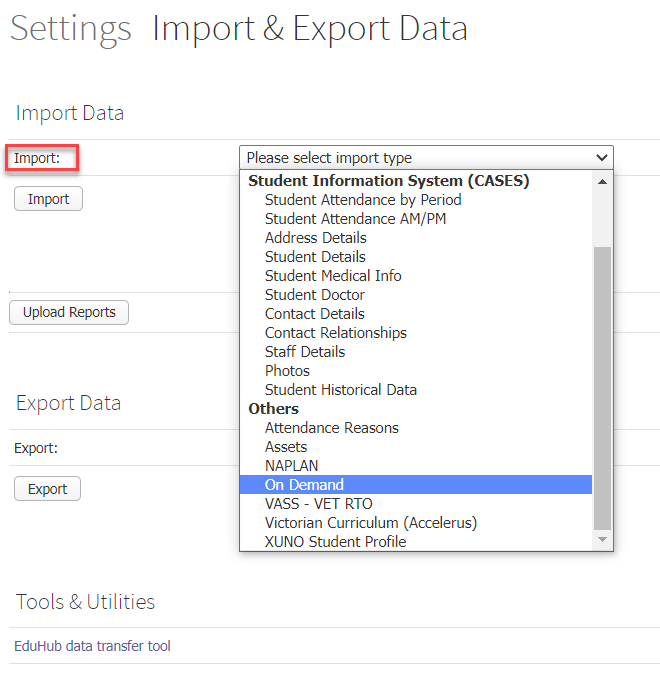
- Click the Import: dropdown list and select On Demand.
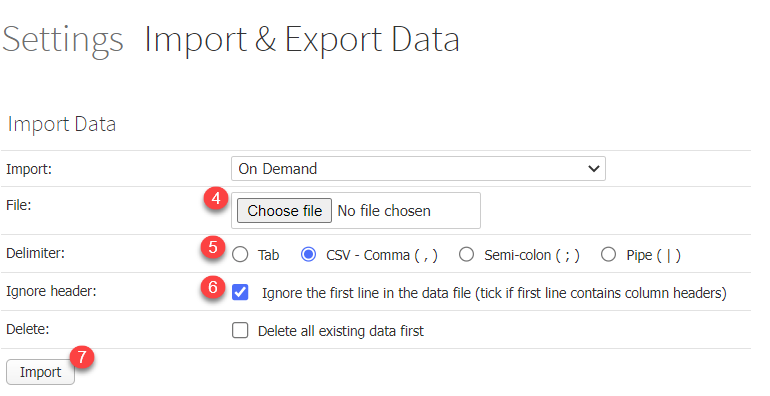
- Click the Choose File button and select the On Demand CSV file you created earlier.
- In Delimiter: select CSV - Comma ( , ).
- Remember to tick the Ignore header checkbox.
- Click the Import button to import your data.
Victorian Curriculum data
- Login to XUNO as an Administrator.
- Go to Options > Software Settings > Import & Export Data.
- Click the Import: dropdown list and select Victorian Curriculum (Accelerus).
- Click the Choose File button and select the Victorian Curriculum XML file you saved earlier in your export procedure.
- Click the Import button to import your Victorian Curriculum data.
Note:
This function is available only to schools that use Accelerus. To extract VC data from Accelerus, navigate to the Import and Export Data tile, then select Export > Student XML.
NAPLAN data
You must export your NAPLAN results from your state’s NAPLAN website in order to import them into XUNO. Please follow the export section relevant to your state. Import instructions can be found at the bottom of this article.
Exporting Victorian NAPLAN Data
- Open the NAPLAN website by clicking on the following link https://dataservice.vcaa.vic.edu.au/.
- Click on the NAPLAN Data Service System Login.
- Click on the NAPLAN dropdown list and choose the calendar Year you wish to export. You cannot extract and import your AIM data due to the lack of a student ID code in the extract options.
- Choose which Test you would like to export (e.g. Year 3, Year 7, etc.).
- Select all options inside of the Study box.
- The Groups box will be shown. Only tick the Student Outcome Level Data option. All other options should be unticked.
- In the bottom left corner, under the Outcome Level Data header, tick the Scaled Scores option, Home Group option and CASES ID option. All other options should be unticked.
- Click on the Extract button to continue. When the download has finished and the dialog box appears click on the Open (or similar) button. Some browsers do not display an Open prompt and require you to find the downloaded file to open it.
- The download file should be opened in Microsoft Excel (or similar).
- Please make sure the data columns are in the following order.

- You now need to change the file to a different format. In Excel, choose the File menu or Office menu ball, and choose Save As…, then click on Other Formats.
- The Save As dialog box will appear. Make sure that the file type is CSV (Windows Comma Separated); enter a new filename, then click Save. You may be prompted to “keep the workbook in this format” – if so click Yes.
Importing NAPLAN Data into XUNO
- Login to XUNO as an Administrator.
- Go to Options > Software Settings > Import & Export Data.
- Click the Import: dropdown list and select NAPLAN.
- Click the Choose File button and select the NAPLAN CSV file you created and saved earlier.
- In Delimiter select CSV - Comma (,)
- Tick the Ignore the first line in the data file (tick if the first line contains column headers) checkbox.
- We do NOT recommend ticking Delete all existing data first, as this will delete all NAPLAN data for every calendar year.
- Click the Import button to import your NAPLAN data.