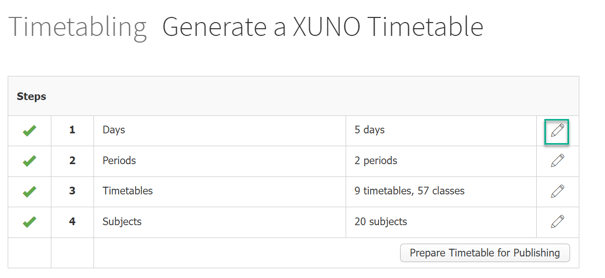
When you first set up your timetable in XUNO, you will need to complete all steps below.
You will need to generate a new timetable each year, or each semester if you have substantial changes to teachers, classes or subjects.
Each time you update your timetable at the start of a new year or semester, you will need to complete steps 4, 5 and 6.
In this article
Overview
XUNO timetabling is designed for schools that have a basic timetable, such as small primary schools. We recommend schools use a third-party timetabling package for more advanced and complex timetables.
Step 1: Setting up
To begin, we will need to make sure that we have set XUNO to be the timetabling package.
- Go to Options > Software Settings > Attendance & Timetable.
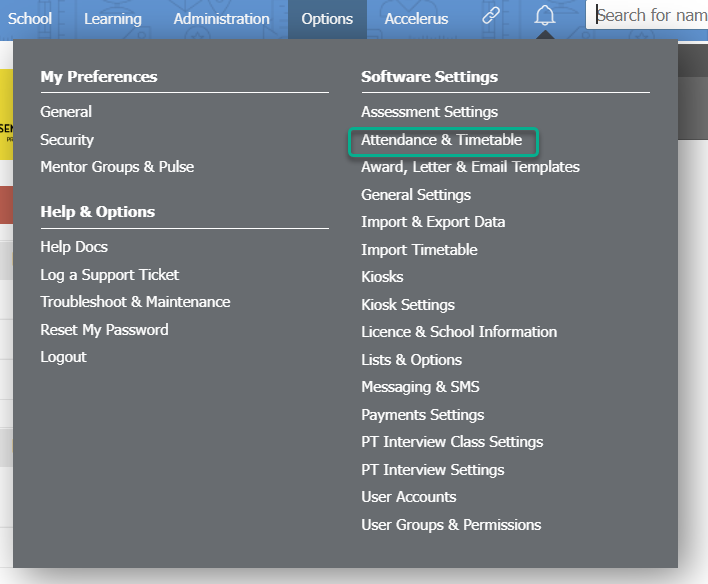
- At the top of the page, make sure that the Timetable integration: option is set to XUNO Timetable. If it isn't, select it from the dropdown list and click the Save button at the bottom of the page.

Tip
The Number of school days per week is set to 5 by default. If your school operates from Monday to Saturday, please change this setting to 6. This setting is required for the Timetable Generation program to correctly repeat timetable schedule each week.
Note
Changing to a different timetabling package will not alter or remove your current or previous timetable or attendance data. However, if the class codes generated during Step 4 of this article are different from the class codes from your old timetabling package, new classes will be created which may appear to be duplicated.
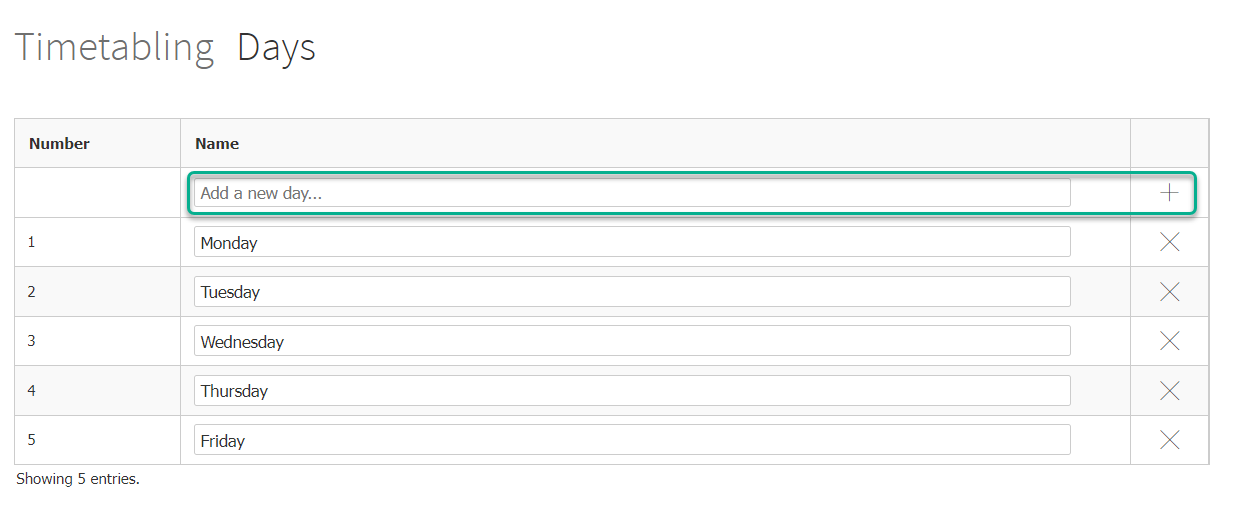
Step 2: Adding days
Next, you need to add days to your timetable. You can choose any amount of days, and this will represent your timetable cycle. We recommend something simple, like 5 days.
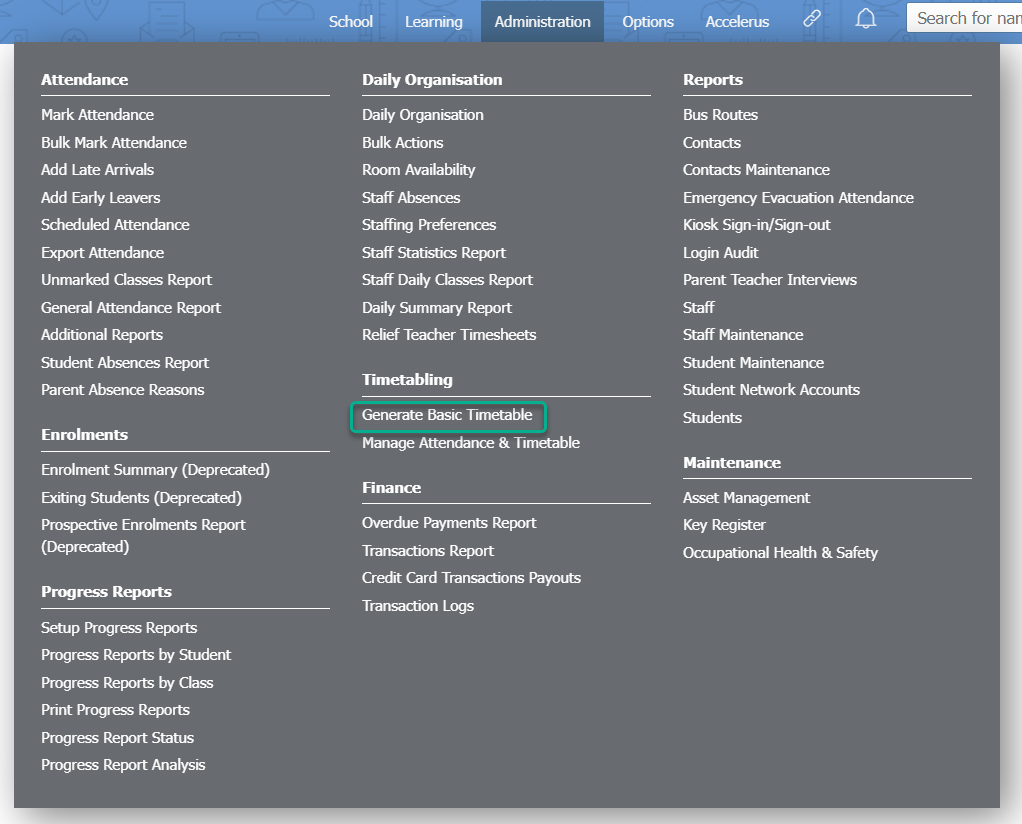
- Go to Administration > Timetabling > Generate Basic Timetable.
- Click the Pencil icon in the first row, next to Days.
- Add the amount of days you require (eg. Monday, Tuesday, Wednesday...) by typing the name in the Add a new day... field, then clicking the + icon.
Tip
If your school operates on weekends, please ensure that Saturday and/or Sunday are added to this table.
Step 3: Adding periods
You'll now need to add your periods. When setting up Periods for a XUNO timetable, consider when the roll will be marked and what attendance data needs to be exported to an external Student Information System (SIS) (e.g. CASES21). Add two half day (AM and PM) periods. If you're a primary school that doesn't have 'periods' as such, you can use "AM" as one period, and "PM" as another.
You can create as many periods as your school requires, and can even include yard duty periods for assigning yard duties within the Daily Organisation module.
- Go to Administration > Timetabling > Generate Basic Timetable.
- Click the Pencil icon in the second row, next to Periods.

- Select the first day or your timetable week in the dropdown list in the top left. Each day of the week can have different start and end times for periods.
- Add the name of your first period in the Add a new period... field in the Name column.
- Select the Start Time and End Time for this period on this day. You can use the up and down arrows next to each time to adjust, or double-click on the hour or minute values and type over them to edit. You can tab between consecutive values.
- Select from the Half day dropdown list whichever half of the day this period will apply to for attendance export purposes (AM or PM). Regardless of the times set, this will export as AM/PM attendance as selected. If it is a yard duty, or a period not associated with either AM or PM, select Time.
- For CASES21 schools, select from the Timetable Period dropdown list whichever period this is associated with for CASES21 export, (100) - AM or (200) - PM. If it is a yard duty, or a period not associated with either AM or PM, select None.
- The Export Period field will be populated with AM or PM as applicable, or stay blank. Do not edit this field.
- If you do not wish the attendance data from this period to be exported, tick the No Export checkbox.
- If you are creating a yard duty period, tick the Yard Duty checkbox. Yard duty periods will show on teacher dashboards and timetables, but not on student timetables.
- The Allotment value is used for the Daily Organisation module to determine how many teaching periods this period will represent.
- Click the + icon.
- You can change the position of each period using the up and down positional arrows.
- When you have finished adding all periods, use the Copy icon to copy the periods across to each day of your timetable week in turn. You can then use the dropdown list to navigate to each day if you need to individually change start and end times for periods on different days.
Step 4: Adding a timetable
In this part, we'll be giving your new timetable a name. This step won't yet import the timetable into XUNO - it is just the pre-import, the preparation step.
- Go to Administration > Timetabling > Generate Basic Timetable.
- Click the Pencil icon in the third row, next to Timetables.
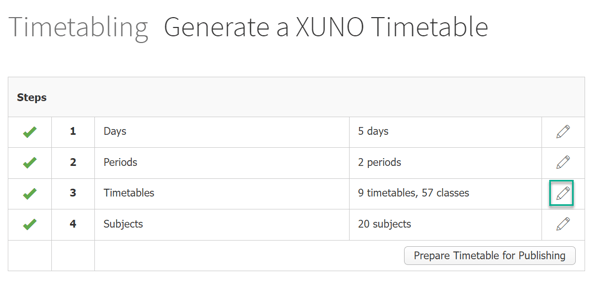
- Create a name for your timetable 'quilt' by selecting the current Year & Semester and Version from the dropdown lists, and then click on the + icon.
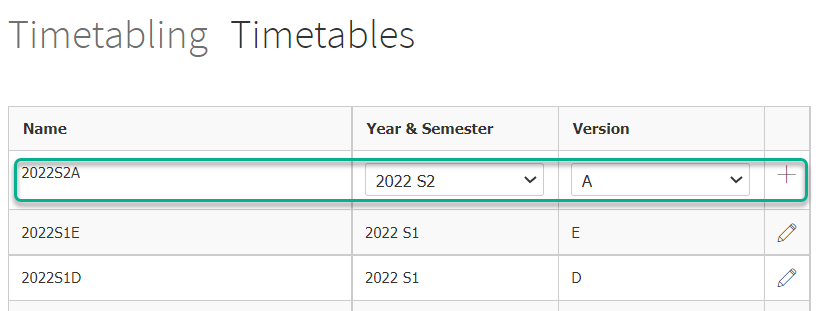
- Click OK.
- Click the Pencil icon next to the timetable quilt that was just created.
- If you want to include all of your forms/homegroups and be able to timetable these, then click on the Generate classes & enrolments from forms button. This will use information synced from your SIS to create classes for each form/homegroup and will automatically add all students and staff to these classes.
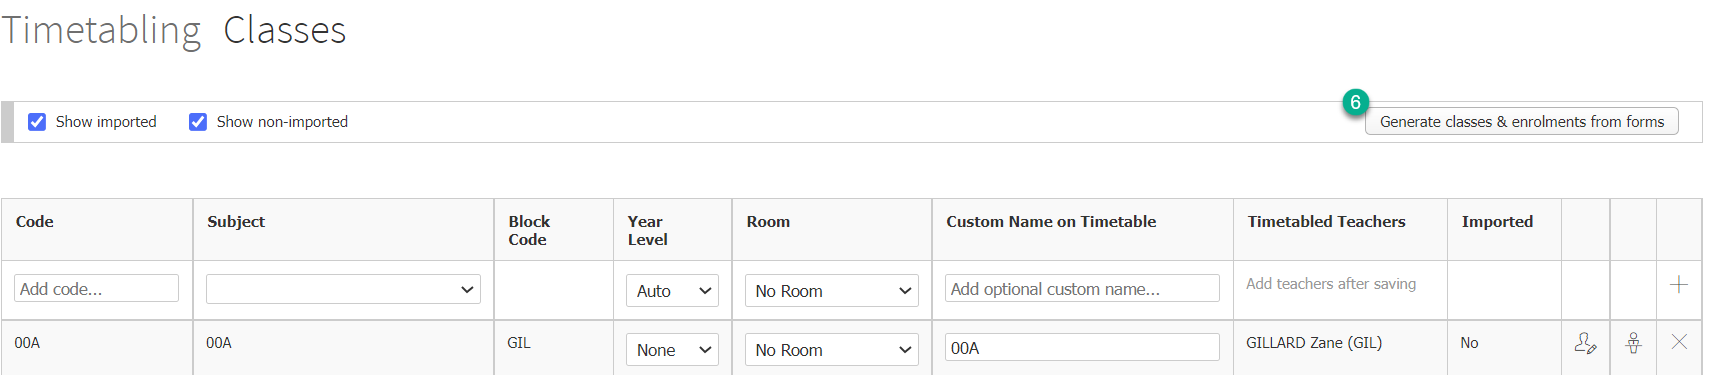
- Add or remove teachers from each class if required:
- Click on the Edit teachers of this class icon.

- To add a teacher, select the teacher from the dropdown list.
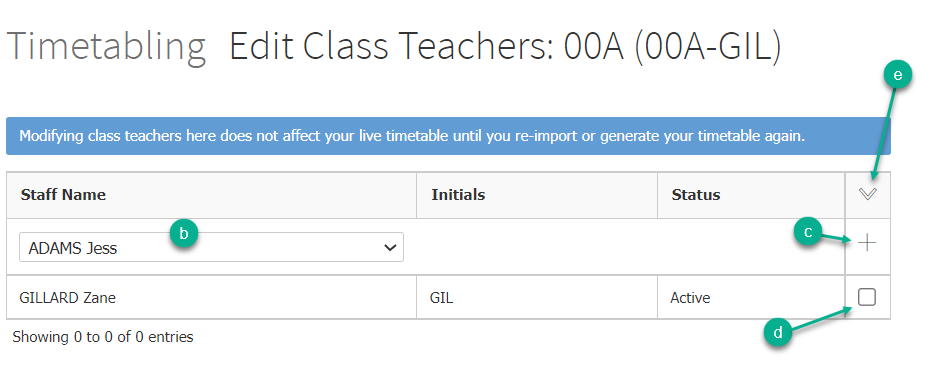
- Click the + icon.
- To remove a teacher, tick the checkbox at the end of their row.
- Click on the dropdown arrow at the top of the right-hand column and select Remove Staff.
- Follow steps 1, 2 and then 5 above.
- Click on the Edit teachers of this class icon.
- Add or remove students from each class if required:
- Click the Edit the class enrolments icon.

- To add students, select an option from the dropdown list.
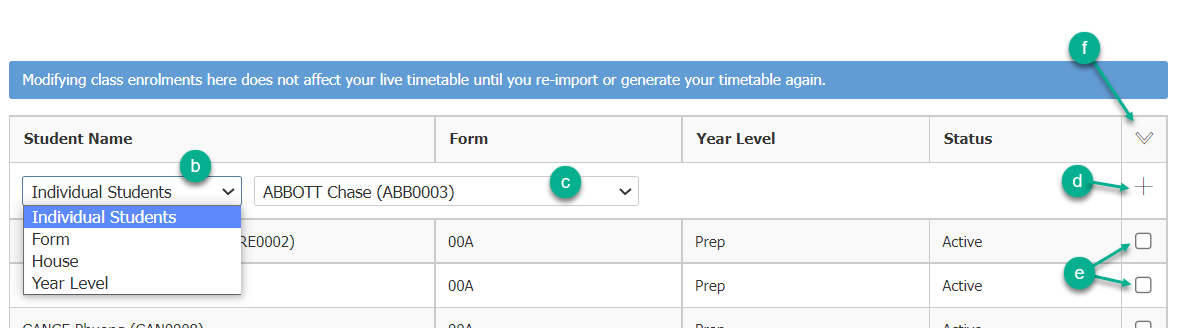
- Find the students, form, house or year level to add in the dropdown list.
- Click the + icon.
- To remove students, tick the checkbox at the end of their row.
- Click the dropdown arrow at the top of the right-hand column and select Remove Student.
- Follow steps 1, 2 and then 5 above.
- Click the Edit the class enrolments icon.
- Where required, add the room the class is generally held in against each homegroup. Under the Room column, click on the dropdown and select the room.
Step 5: Adding subjects, classes and yard duties
If you used the Generate classes & enrolments from forms button in Step 4, XUNO will have already created all your homegroup subjects and classes for you. You can follow the steps below to add any extra subjects (including yard duties) if required, or skip straight to Step 6 if not.
We will need to add subjects first, and then add classes to the timetable and assign a subject to them. A yard duty is considered a subject, which can then have multiple yard duty classes (i.e. one for each yard duty area).
- Go to Administration > Timetabling > Generate Basic Timetable.
- We'll start by adding a yard duty subject. Click the Pencil icon in the fourth row, next to Subjects.
- Add a code to the Add code... field.
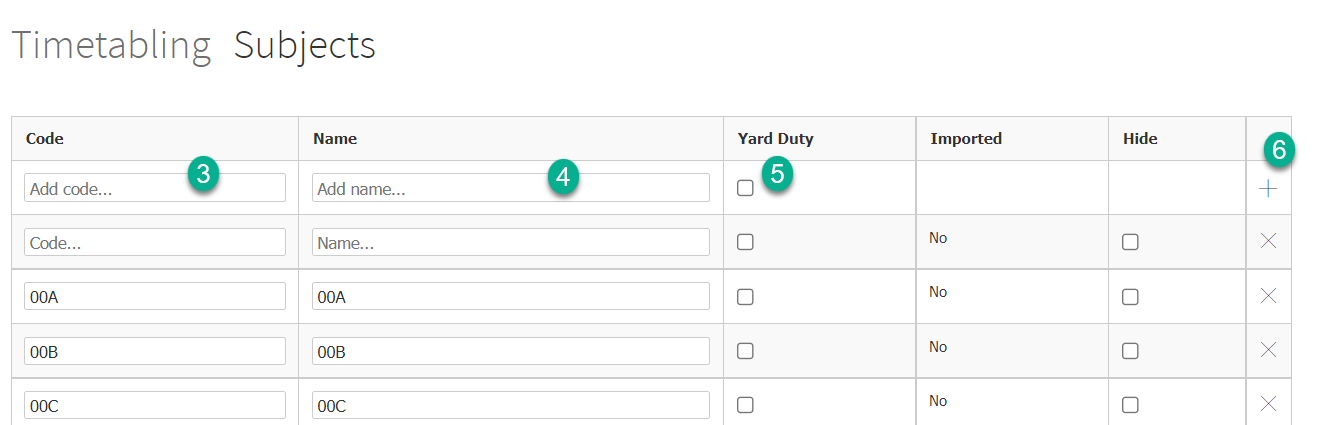
- Add a name to the Add name... field.
- Tick the checkbox in the Yard Duty column if you are creating a yard duty subject. For yard duties, subjects are generally created for each area that teachers are assigned to on yard duties (e.g. Oval, Prep Playground, etc.).
- Click the + icon.
- Repeat steps 3 to 6 for all your subjects.
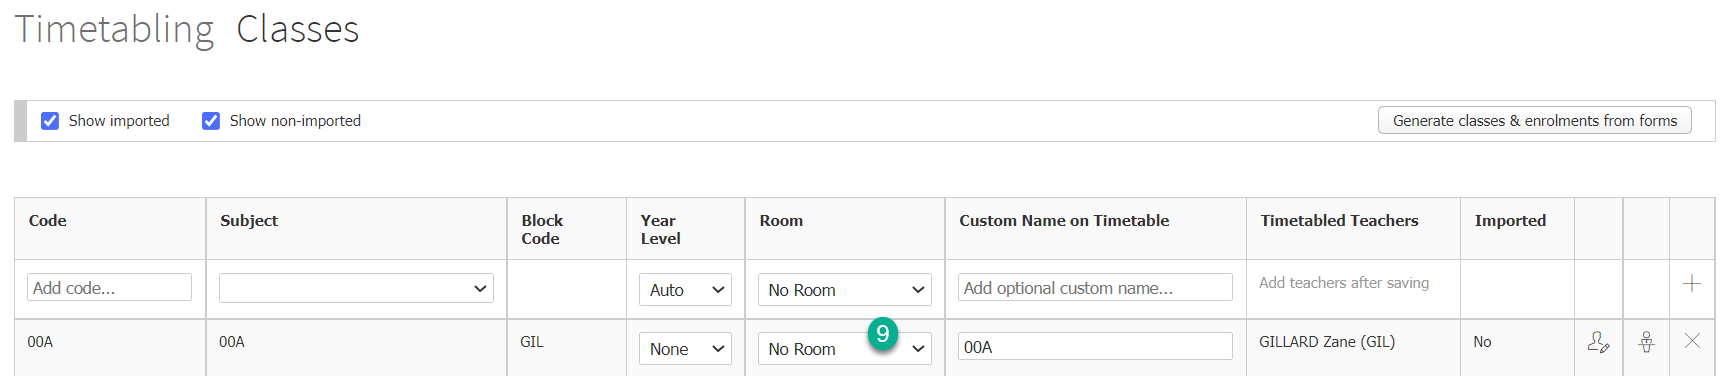
- You'll now need to create one or more classes for each subject. Go to Administration > Timetabling > Generate Basic Timetable again.
- Click the Pencil icon in the Timetables row. Then click the Pencil icon for the timetable quilt name that you created earlier in Part 4.
- Now add your classes: In the Add code.. field, enter a unique class code (for your new class). For yard duties, you will need to create a class for each teacher and each yard duty subject (e.g. a class for Ms. Smith in the Oval yard duty subject, and a class for Ms. Smith in the Prep Playground yard duty subject, if she will be assigned to both these areas over the course of a week).
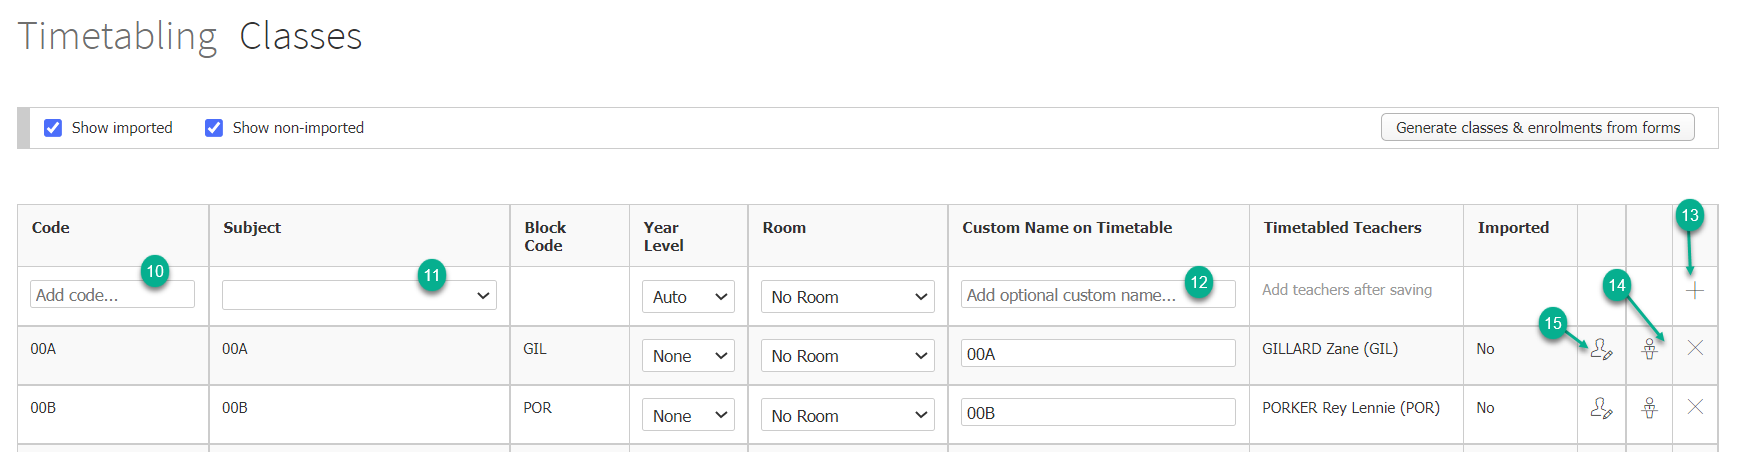
- Select the corresponding subject that the new class belongs to from the dropdown list.
- By default, XUNO will use the name of the subject for your classes, but you can give your class a custom name that will appear on the timetable. Enter text into the Add optional custom name... field to do this.
- Click the + icon to add the new class.
- Assign a staff member to a class or yard duty by clicking on the Edit teachers of this class icon. Select a staff member from the dropdown list and click the + icon to add them. Repeat to add more teachers to the class if required.
- You'll also have to assign students into classes. Click on the Edit the class enrolments icon. Use the filtering options at the top of the page to select which students will be enrolled in the class. Then click the + icon to add the selected students.
- Repeat steps 10 to 15 for all of your classes.
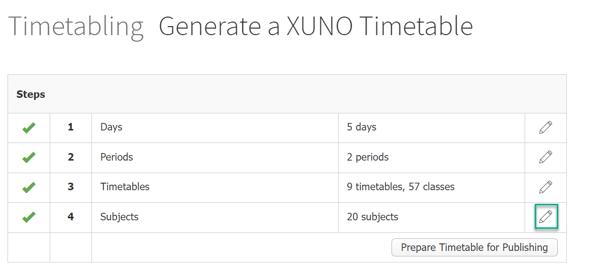
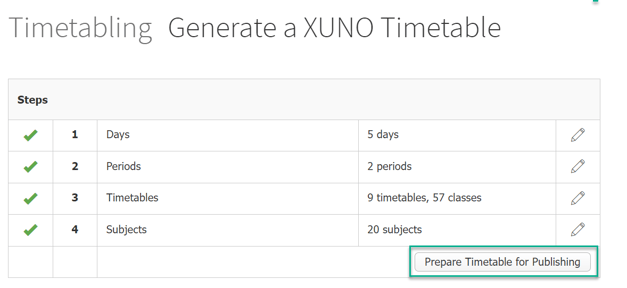
Step 6: Prepare the timetable
This last step will generate the timetable and import it into XUNO so that it is available for everyone to use.
Important: Backdating a timetable import will cause any student who has changed classes to lose all their attendance for the backdated period. Attendance data will also be deleted on backdating if there are changes to a class code or teacher. XUNO will tell you if you are about to delete attendance data when preparing your timetable.
- Go to Administration > Timetabling > Generate Basic Timetable.
- Click on the Prepare Timetable button.
- In the Select a timetable dropdown, choose the timetable that you want to generate.
- Select the Generate from and Generate to dates by clicking on the dates and selecting using the calendar picker that appears. These will be the dates that the timetable will span from (e.g. from the start of Term 1 - 31/01/22 until the end of Term 2 - 24/06/22).
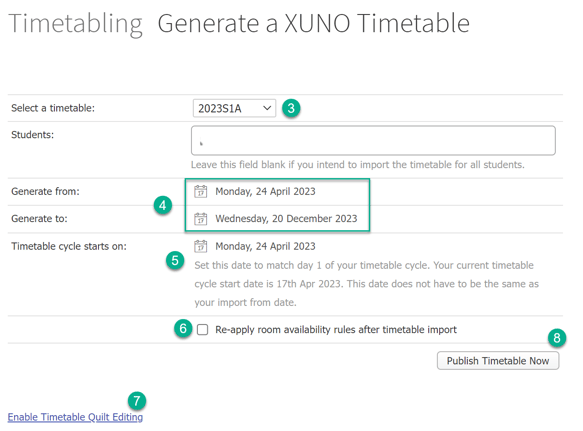
- Select the Timetable cycle starts on: date. Set this date to match day 1 of your timetable cycle (for most primary schools, this will be the Monday on or before the day you are preparing the timetable. This date does not have to be the same as your generate from date.
- Tick the Re-apply room availability rules after timetable import option, if you have room availability rules set up in XUNO.
- At the bottom of the page you will see a large table that contains checkboxes. Each row in this table is a class, and each column is a period. To edit this table, click the [Enable Timetable Quilt Editing ] text.
Tick the checkboxes for the corresponding periods of the classes that you want to mark attendance for. This table allows you to choose when your classes will be timetabled. This is an important step! The very left column lists all of your available classes. Across the top, you'll see the days and periods under each day. Row-by-row, tick or untick when a class should be timetabled into a day and period. If a class is unticked for a particular day and period, then you will not be able to mark attendance for that period since the class won't be timetabled (Note: You do not need to record attendance for classes assigned to yard duty subjects, but you should tick these checkboxes to timetable them for teachers). - Double check that all of the previous steps above have been followed and that your generate from/to date ranges are correct. Then click the Continue button to generate your timetable.
- A confirmation alert will appear, click OK to proceed with the timetable generation.