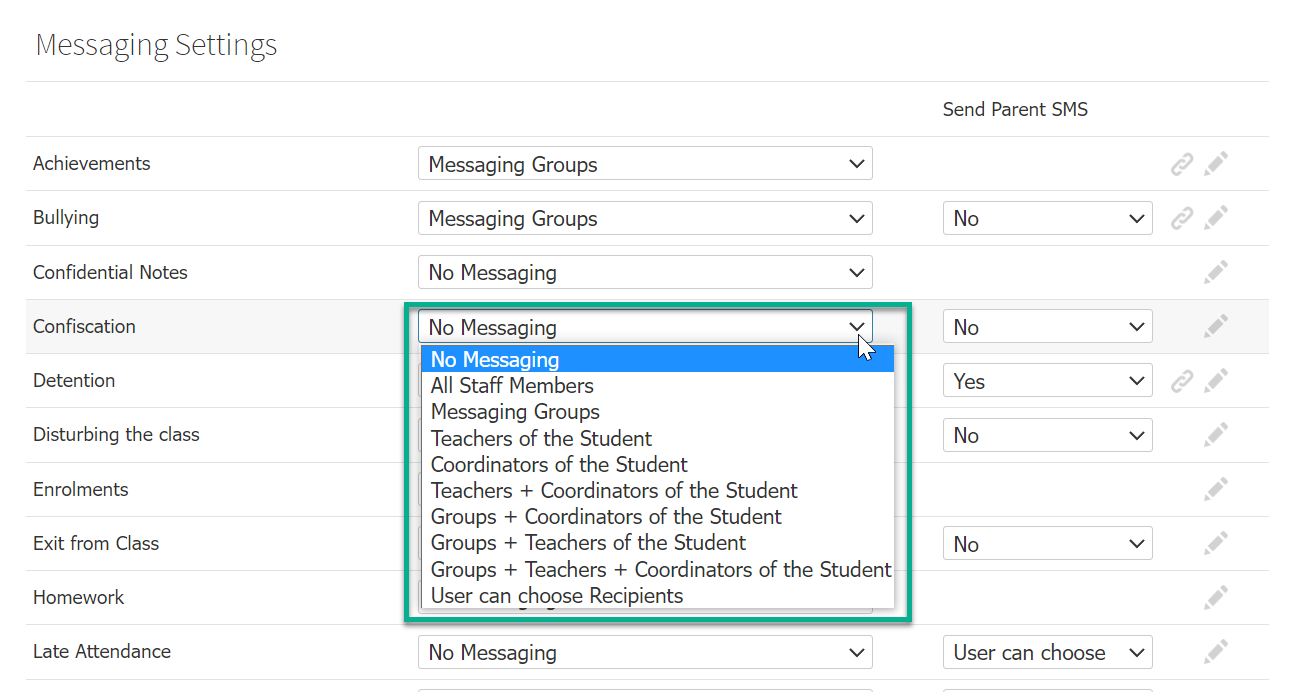
The Messaging Settings allow you to specify how the notification emails should function. Use the corresponding dropdown list to enable the emailing of notifications. Each dropdown list has the following options:
- No Messaging – no emails will be sent.
- All Staff Members – an email will be sent to every staff member.
- Messaging Groups – an email will only be sent to members of groups that match the student’s form and/or year level.
- Teachers of the Student – an email will only be sent to the teachers of the student.
- Coordinators of the Student – an email will only be sent to the coordinators of the student.
- Teachers + Coordinators of the Student – an email will only be sent to the teachers and the coordinators of the student.
- Groups + Coordinators of the Student – an email will only be sent to members of groups that match the student’s form and/or year level and the student's coordinators.
- Groups + Teachers of the Student – an email will only be sent to members of groups that match the student’s form and/or year level and the student's teachers.
- Groups + Teachers + Coordinators of the Student – same as above but also to all teachers and coordinators of the student.
- User can choose Recipients – the user can choose which recipients and groups should receive the emails.
Changing the messaging settings
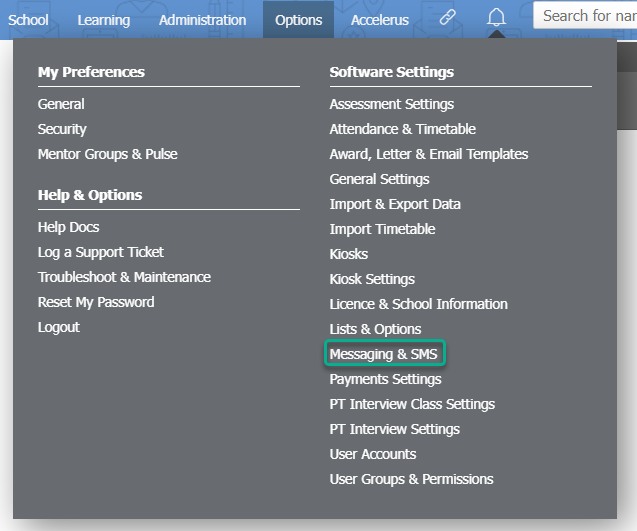
- Go to Options > Software Settings > Messaging & SMS.
- Under the Messaging Settings section, choose an item to adjust.
- Change the dropdown list to specify which recipients should receive automated notifications.
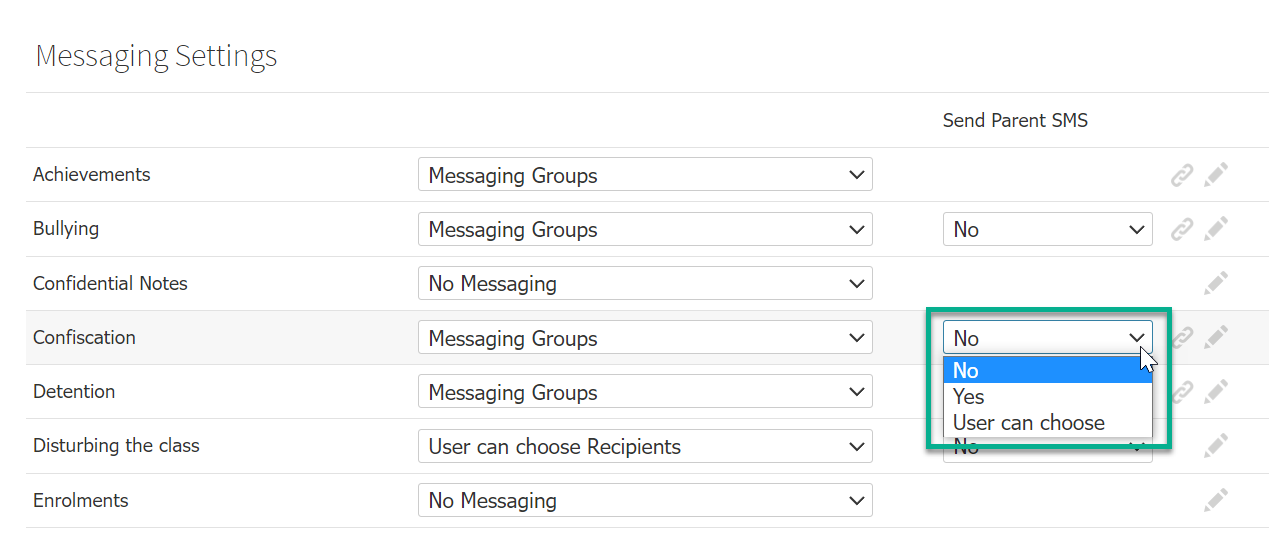
- If you would like to enable parent SMS notifications for the item, change the Send Parent SMS selection to Yes.
- Click on the corresponding pencil icon to change the message text for either email or SMS templates. There are separate tabs for a Parent Message, Staff Message or Student Message If a template is empty, no notification messages will be sent.
You can include merge fields in your message template. Clicking on the [ Show Merge Fields ] text will open a second tab with the list of available merge fields for your school. When you create new incident or action types, new merge fields are created in your school's list. See the related article 'How to use XUNO merge fields' for more information.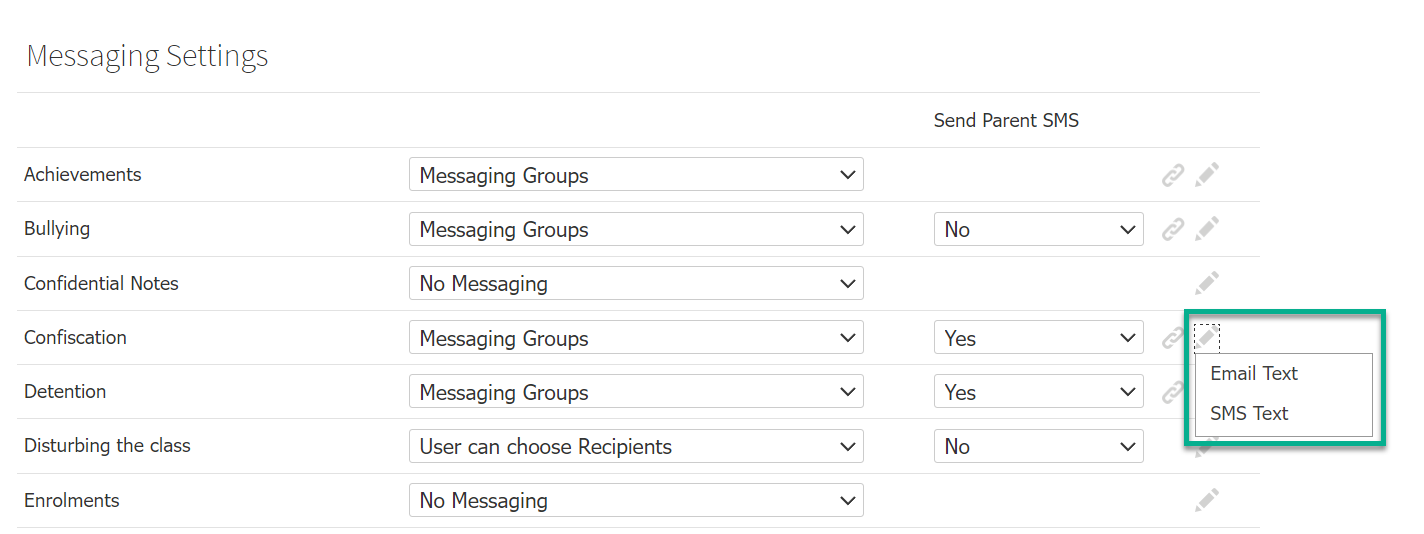
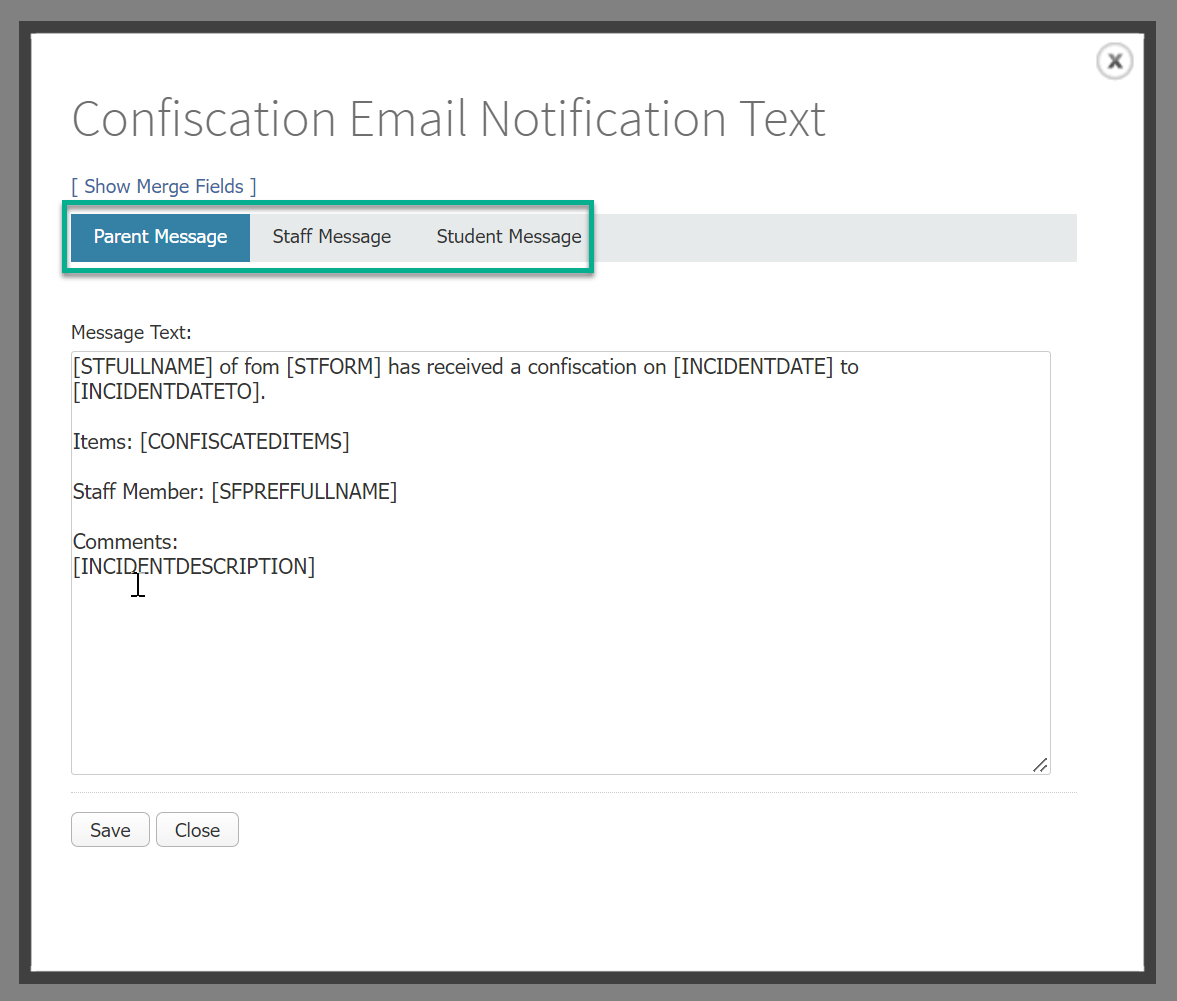 When you have finished your template(s) in each of the Parent, Staff or Student Message tabs as required, click the Save button.
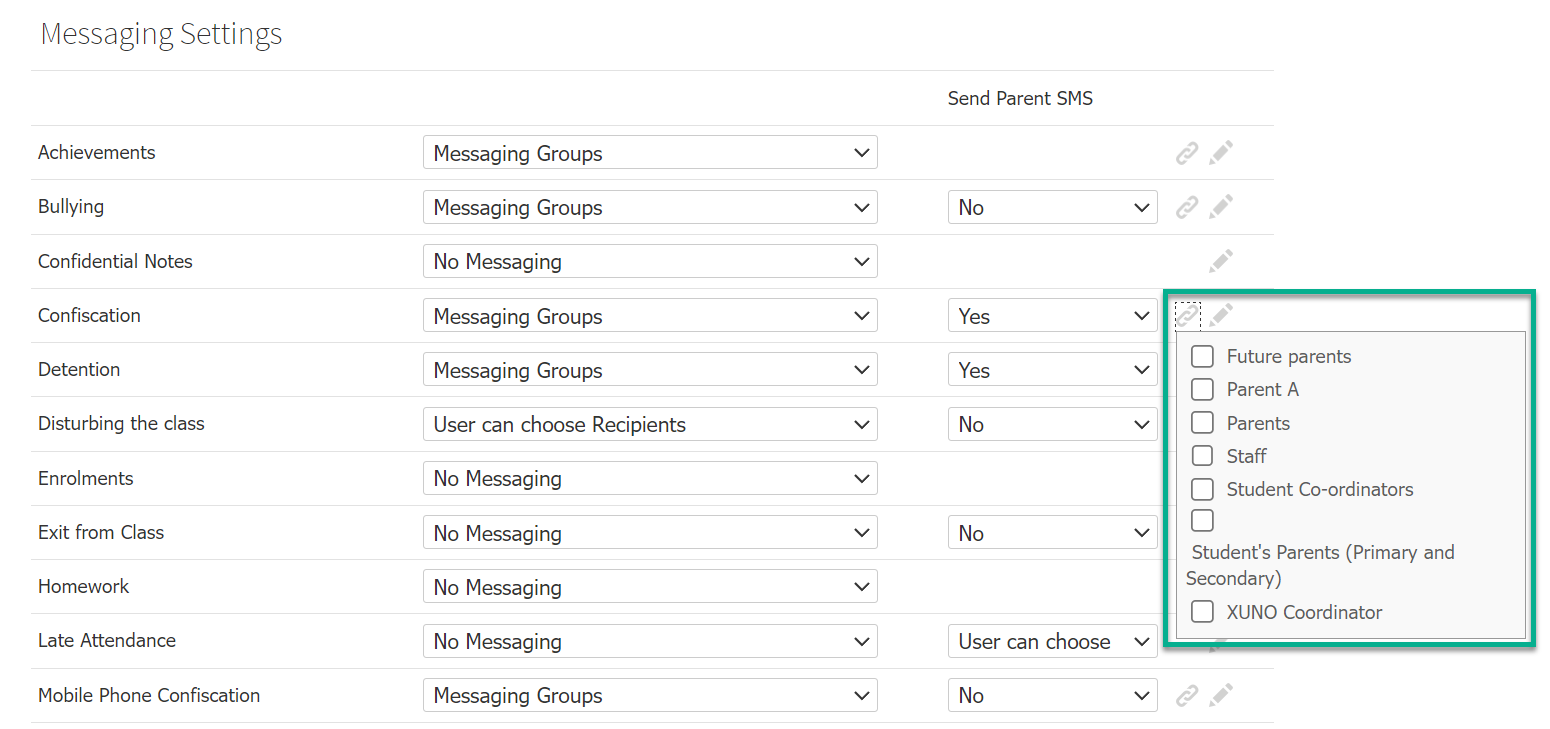
 - If you have selected an option that includes messaging groups, you will also need to link the groups that should apply to the item. If you do not select any groups, then messages will not be sent. This feature provides you with the flexibility to set up groups but not use them for every item. Click the Link icon and select one or more messaging groups to link them to the item.
- Changes made are automatically saved.
Creating messaging groups
Messaging groups are used in XUNO to group together certain staff, parents or students. XUNO allows for an unlimited number of groups and recipients in each messaging group. In addition, messaging groups can be linked to a form, year level, house or to the first letter of the student’s surname. These links are used as criteria when sending email notifications, so that emails are only sent to the relevant people.
-
Go to Options > Software Settings > Messaging & SMS.
- Scroll to the Messaging Groups section.
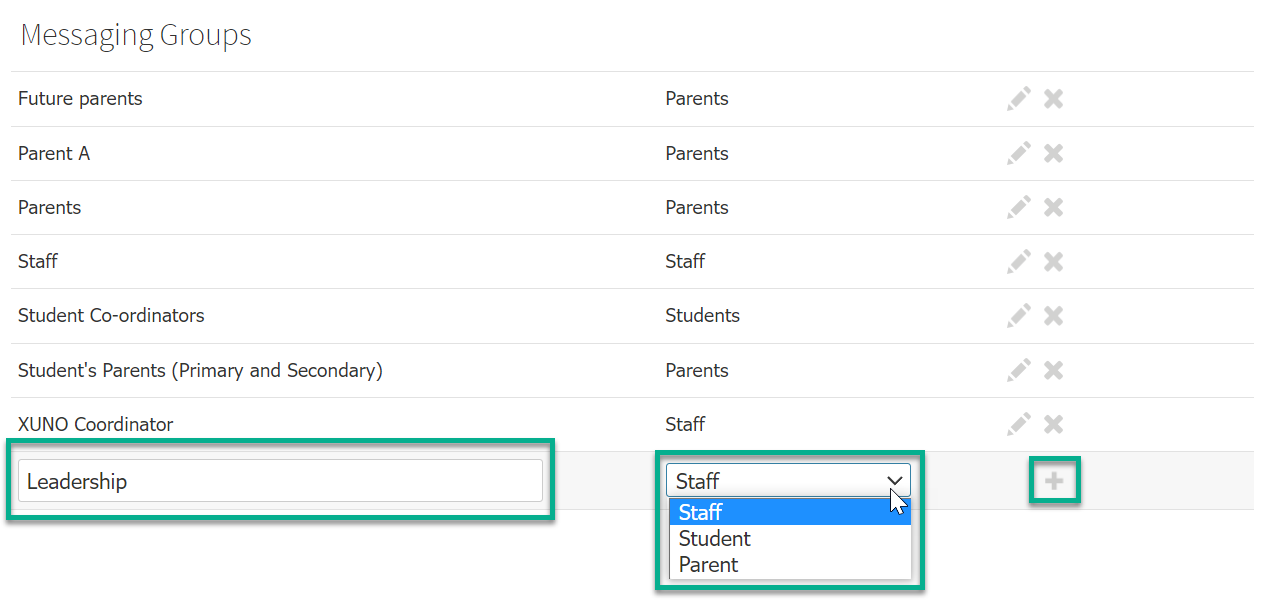
- To add a new group, type the name for the new messaging group in the New group name... field and select the user type that will populate this group (staff, students or parents) from the dropdown list. Click the + icon to create.
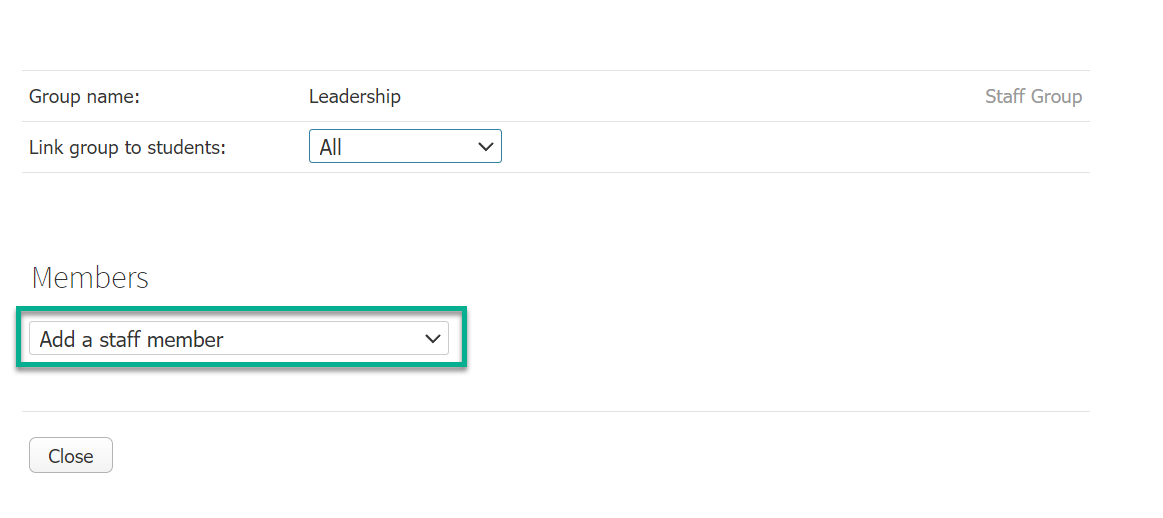
- To modify or add members to a group, click the Pencil icon corresponding to the group name.
- Choose which criteria the new group should be linked to using the Link group to students: dropdown list. If you are creating a student or parent messaging group, you will usually be selecting All here. In the next step, the members you select will be either the student the item is linked to, or the parent(s) of students the item is linked to. XUNO will then message parents or students based on who is involved when the incident, note, etc. is created.
For staff messaging groups, you can link separate groups to subsets of students, for example a messaging group that contains senior year level coordinators may be linked to students in senior year levels only.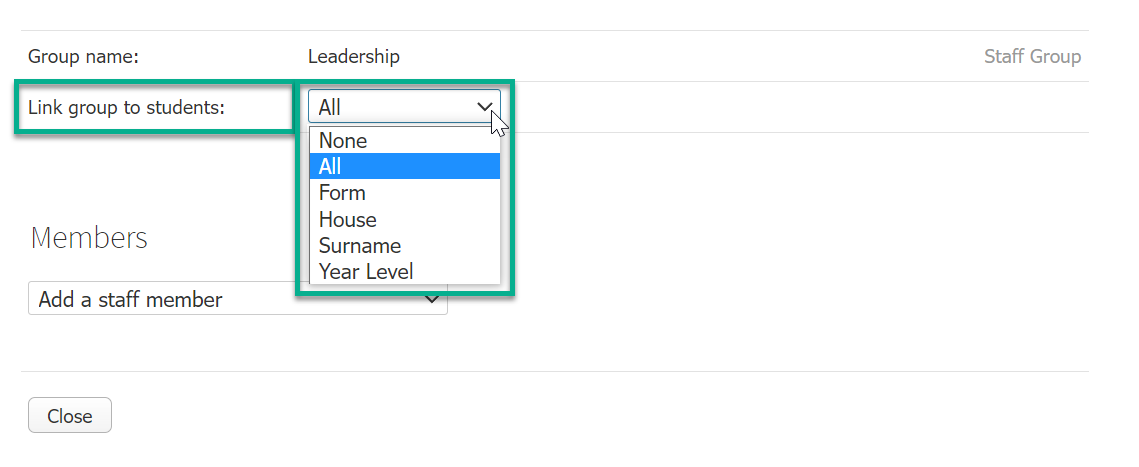
- Add your staff members, students or parents to the group by selecting them from the dropdown list in the Members section. Your settings are automatically saved as you change them.