Logging In
- Open a web browser. Accelerus Light works with most web browsers. However, you will find some browsers are preferable to others. We recommend the use of Google Chrome, Safari or Firefox.
- If your school has Xuno connected to Accelerus Light, you will access Accelerus Light through the menu option on the left side of the screen if not enter the website address – live.accelerus.com.au
- An authentication window is displayed, select the appropriate option. If you are unsure or unable to login, speak to the Accelerus Light Administrator at your school.

The Accelerus Light Home page
Once you have logged into Accelerus Light you will be presented with your class dashboard. If you are a classroom teacher who also has other responsibilities i.e. subject leader, you may also have the subject or school tab at the top of the page. You will see tiles, as per the screenshot. The main tiles for the class page are:
- Assess classes – when you click into this, you will see all your classes on the left side of the page
- Student profile – this allows you to select an individual student and view their details
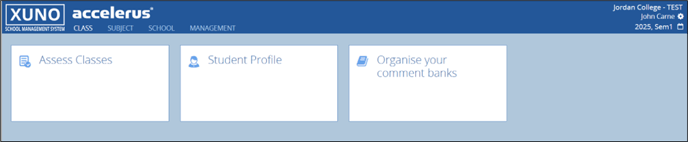
In the top right corner, you will see the name of the school, your name and the current reporting cycle e.g. 2025 Sem 1. By clicking on the cog next to your name, you can access Accelerus Light support materials and also logout when your session is complete.
The calendar icon next to the current reporting cycle allows you to move back and forth between reporting cycles. You can view information from previous cycles but not change any details, as Accelerus recommends all closed cycles be locked.
 |
The Accelerus Light administrator at your school is your best support. They have been trained in using the program and can support you with the program and your school’s reporting requirements. |
Assessing your classes
Click on the Assess Classes tile. You will see your classes listed on the left side of the window. When you click into a class, you will be taken to the class homepage, below.
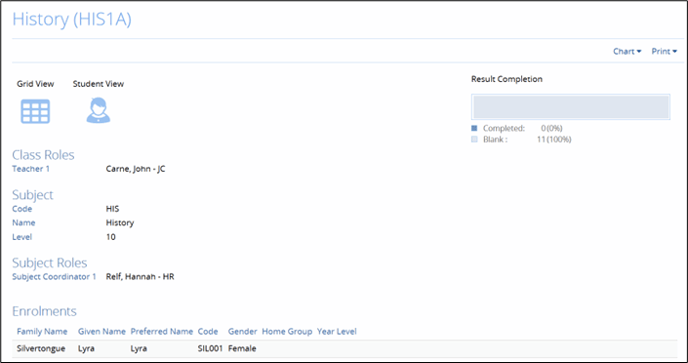
This page shows information about the class, teacher, subject coordinator and students. There is also a graphic tracking completion of reports for this class.
Grid View
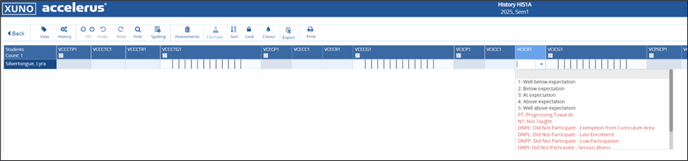
All of the students in the class are listed in this view, together with all of the assessment items for which you need to enter data. Here you can see prior results (if available) and any fields that need to be completed by the class teacher. There are fields with drop down menus for grades or ratings, and typable fields for comments. There may also be graphics showing progress etc.
Student View
This view allows you to work on one student’s results at a time. It is best used for entering comment results. You may move through the students in the class, draw on comment banks, and even add a newly composed comment to a bank for future usage. You can toggle between grid and student view using the button in the top right corner.
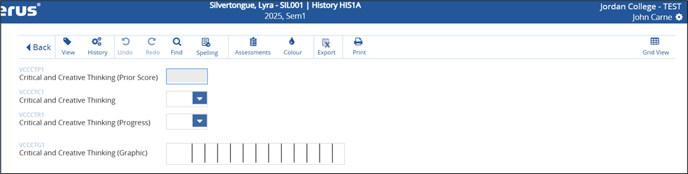
Once results are entered, they may trigger a point to appear on a graphical scale or populate another field. These settings are managed by your Accelerus Light administrator, they can address any queries you may have.

 |
If you hover over an assessment item e.g. VCECR1, a label will appear with a description i.e. VCECR1 – Ethical Capability (Progress). This information will also appear at the very bottom of the screen when an assessment item is selected. |
Toolbar
Both grid and student view have a toolbar at the top with a range of functions. One of the most used by teachers will likely be the View button which allows you to customise your view. You can choose to only view items that are editable or you could hide any graphical items. If you wish to restore the view, you can select ‘Reset to default view’. Within grid view, you can also drag columns to change the order. This will be specific to your view, it won’t change the columns for anyone else. You can also use the ‘Fill’ function to copy results to a set of students rather than making individual selections.
You can view a short description of each button’s function by hovering over it.
 |
Accelerus Light automatically saves your results and will give you a warning if you attempt to exit a screen if results are still saving. |
Comment Results
Comment assessment items are often set up with a limit on the number of characters able to be entered.
![]()
If you exceed the number of characters the message will turn red.

If using a comment bank, this will appear at the bottom of the screen when you are in Student View. You can select comments to add to the field by double clicking on them or clicking ‘Insert’.

Comment Banks
Depending on your school’s requirements, teachers may be able to type comments freely or select from a comment bank. In Accelerus Light, teachers can create their own comment banks but the default version of the program does not have school-wide comment banks.
Teachers can build comment banks from scratch or import a file of existing comments.
- Click on the Organise Comment Banks tile in your Class dashboard
- Select Comment Banks from under the View/Edit menu on the left side of the screen
- Click ‘Add’ or ‘Import (if importing, use a sample comment bank from the Comment Bank tutorials page)
Comments can be written using placeholder fields for student names or pronouns, as shown below. Click on the option you wish to use and then type the rest of the comment.

Troubleshooting
Your school’s Accelerus Light administrator or your Subject Coordinator should be able to support you with any issues that might arise. They can add or remove students from a class and help you with accessing Accelerus Light.
Some common issues teachers may encounter are below, along with solutions:
- Having trouble logging in – clear your browsing history and try logging in again. Ensure you are selecting the correct authorisation option i.e. Google or Microsoft. If this still doesn’t work, contact your administrator
- Can’t see items in Grid View – Click the ‘View’ button and ensure all the settings are correct
- Can’t see a column – Ensure you have not dragged it elsewhere. Use the ‘Reset to default view’ option
- A student has left my class but is still appearing on reports – check with you administrator. They may need to resync the data
- One of my classes is missing from my list – check with your administrator, they may need to resync the data or reassign the class