Configuring attendance type settings
- Go to Options > Software Settings > Attendance & Timetable.
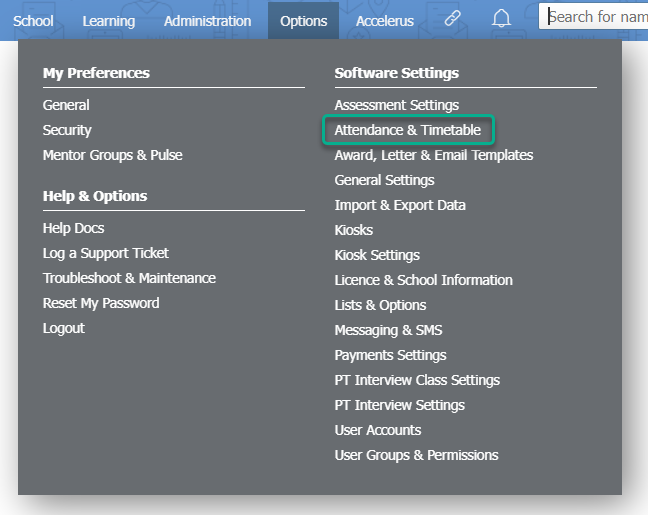
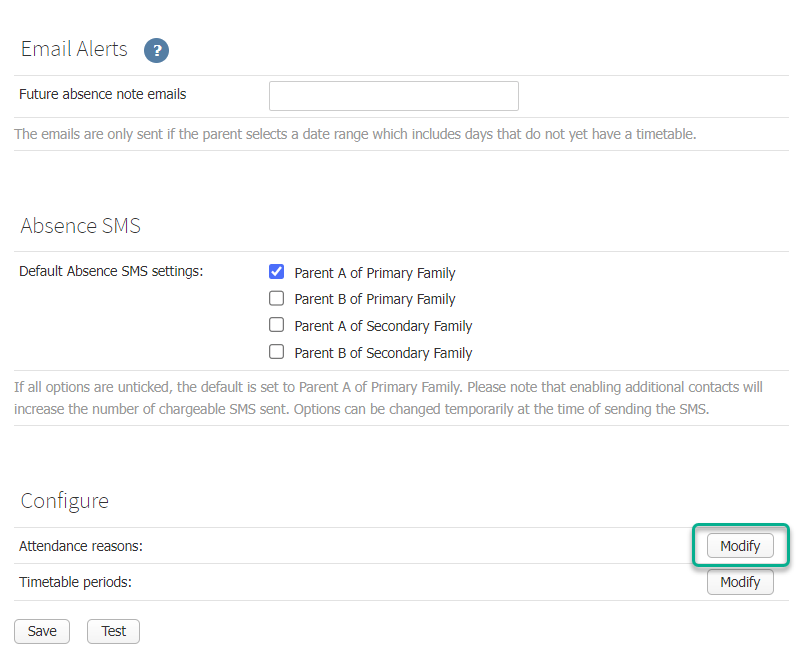
- Scroll to the bottom of the page and click the Modify button next to Attendance reasons:.
- You will see a table containing your current attendance types.
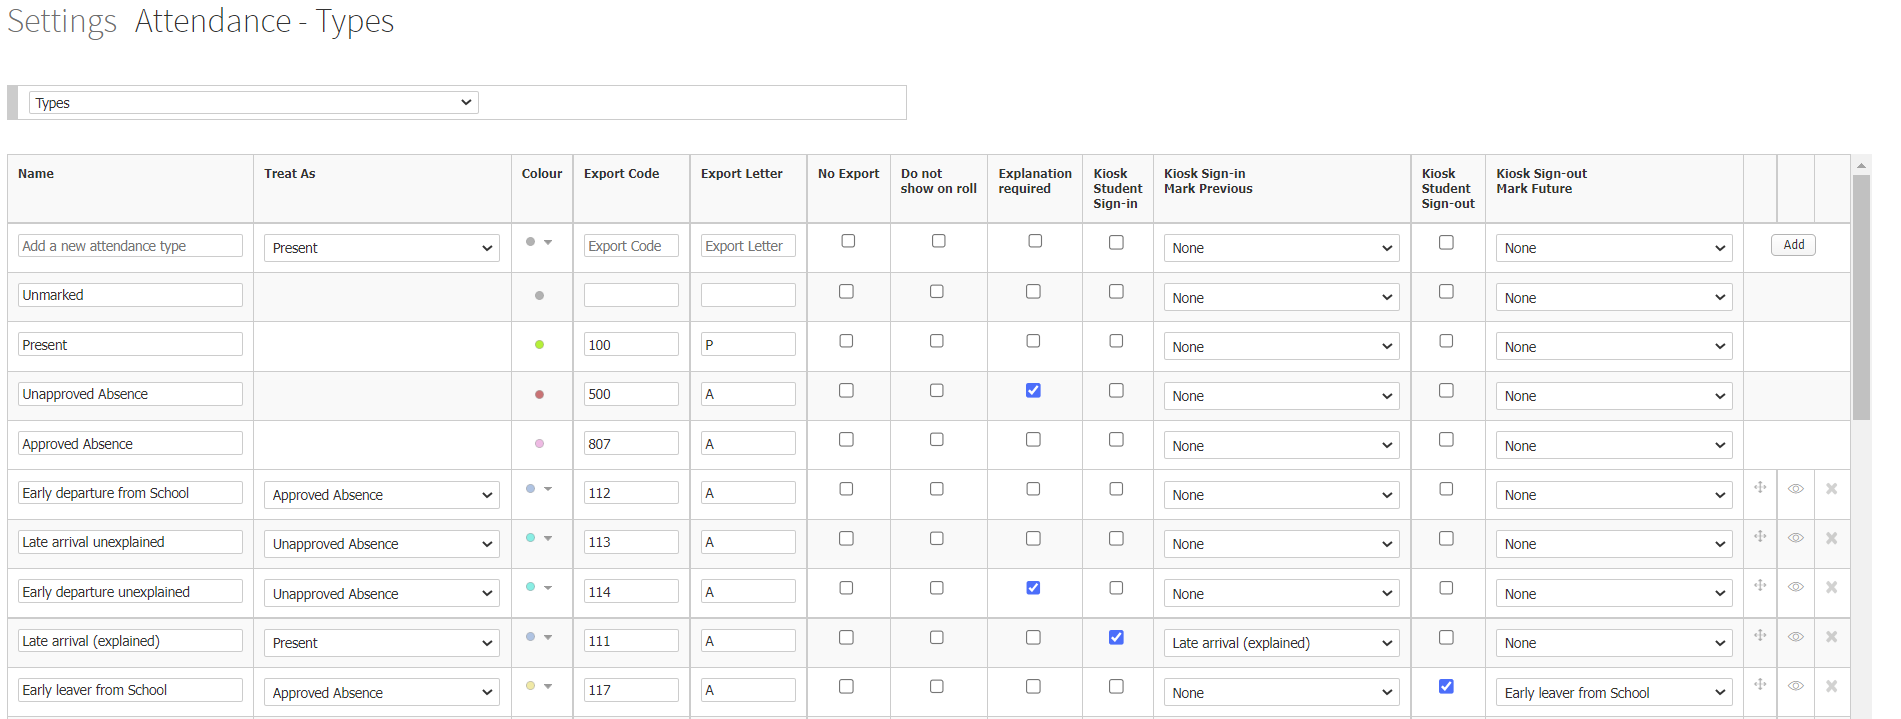
- Find the attendance reason you wish to configure settings for and see the table below for explanations on what each column is for.
| Column name | Setting information |
| Name | The name of the attendance type that will appear on rolls and in attendance data recorded for students. |
| Treat As | You can choose to treat an attendance type as any of the four main types: Unmarked, Present, Unapproved Absence or Approved Absence. This tells XUNO how you want this attendance type to be treated when it calculates attendance statistics. It also affects whether or not an attendance type will show up in the Student Absences Report - if an attendance type is set to be treated as an Unapproved Absence, it will show up in the Student Absences report. In the screenshot above, students marked as 'Late arrival unexplained' will show up in the Student Absences Report, as the selection in the Treat As column is 'Unapproved Absence'. |
| Colour | The colour of the dot that appears on rolls and other parts of XUNO to represent a timetable period. |
| Export Code | The code for this attendance type that is exported from XUNO for use in your school's Student Information System (SIS), and to send to the relevant Department of Education. |
| Export Letter | The letter for this attendance type that is exported from XUNO for use in your school's Student Information System (SIS), and to send to the relevant Department of Education. Some schools will not require anything to be entered into this field. The letter must be a capital letter. |
| No Export | If you do not wish to export data associated with this attendance type from XUNO in attendance reports, tick the checkbox in this column. |
| Do not show on roll | Tick this checkbox if you do not want this attendance type to appear on teachers' rolls as an available option. The attendance type will still show as an option for staff with Attendance Admin permissions. |
| Explanation required | Tick the Explanation required checkbox if parents need to provide a reason why the student was not present. Parents will see a pencil icon in the parent portal next to this attendance type, so that they can provide more information about the absence. Details about periods marked with this attendance type will show in the Student Absences Report. |
| Kiosk Student Sign-in | Tick this checkbox if you want this attendance type to appear in the XUNO Kiosk for students to select when they sign in. |
| Kiosk Sign-in Mark Previous | Use the dropdown list to select how XUNO should mark previous periods when a student signs in using the XUNO Kiosk and selects this attendance type. For example, in the screenshot above, if a student signs in during Period 3 using the attendance type 'Late arrival (explained)', then XUNO will also mark Periods 1 and 2 (and any other periods before Period 3) with 'Late arrival (explained)'. |
| Kiosk Student Sign-out | Tick this checkbox if you want this attendance type to appear in the XUNO Kiosk for students to select when they sign out. |
| Kiosk Sign-in Mark Future | Use the dropdown list to select how XUNO should mark future periods when a student signs out using the XUNO Kiosk and selects this attendance type. For example, in the screenshot above, if a student signs out during Period 5 using the attendance type 'Early leaver from School', then XUNO will also mark Period 6 (and any other periods after Period 5) with 'Early leaver from School'. |
| Row icons | Setting information |
 |
Positional icon - click and hold to drag the attendance type to a new position in the table. The table order determines the order in which attendance types will show in rolls and other places in XUNO where attendance type selection is made via dropdown list. |
 |
Hide/unhide icon - clicking this icon will hide the attendance type from all XUNO users, so it is no longer available to all XUNO users for selection on rolls or other places in XUNO where attendance type selection is made via dropdown list. Hiding an attendance type will not delete attendance data. When an attendance type is hidden, the icon will change to show a diagonal line across the eye, and the name of the attendance type will be grey. You can click the icon again to unhide the attendance type. |
 |
Delete icon - clicking this icon will prompt a popup to ensure you really want to delete the attendance type. XUNO will not allow you to delete an attendance type if it has been used in the past. This ensures attendance data integrity. We recommend always hiding, rather than deleting, attendance types unless you are absolutely sure they have not been used by your school in the past. |
Creating a new attendance type
- Go to Options > Software Settings > Attendance & Timetable.
- Click the Modify button at the bottom of the page next to Attendance reasons:, under the Configure heading.
- Type in the name of the new Attendance Type in the Add a new attendance type field in the Name column.
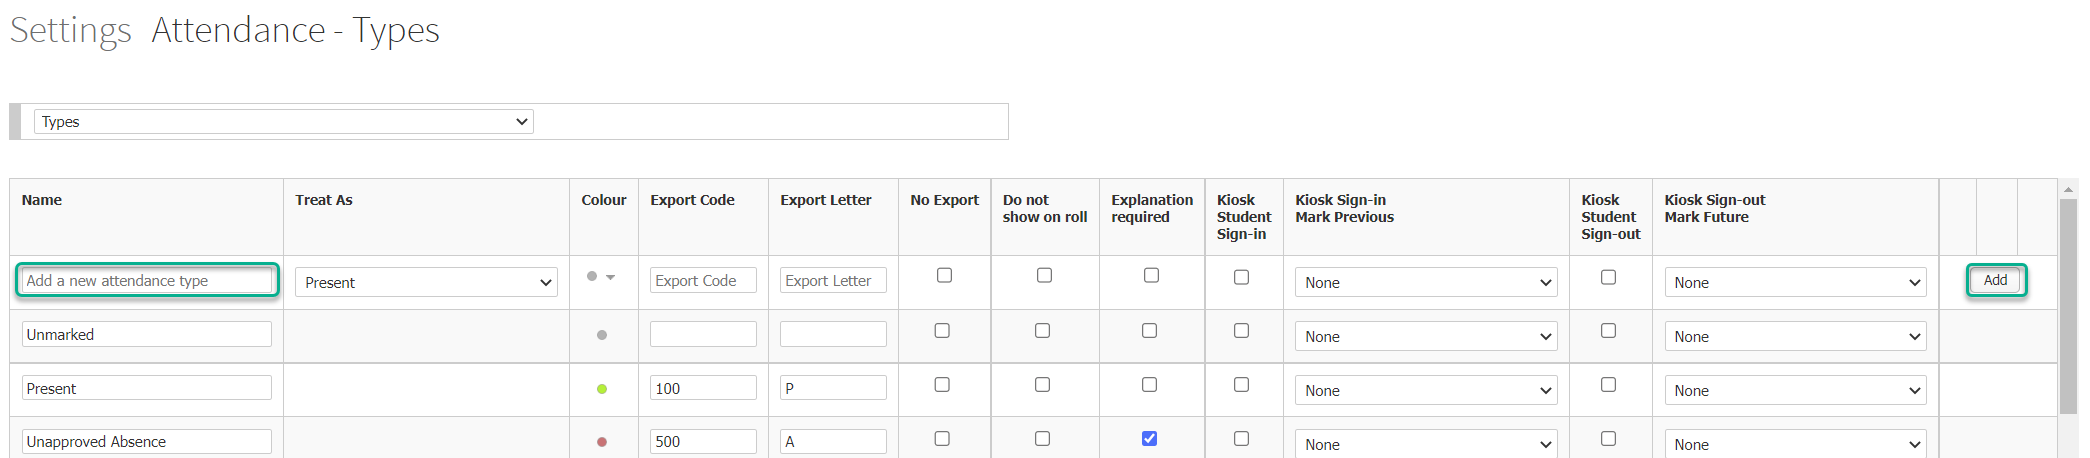
- Configure the settings for the new attendance type using information from the table in the section above; Configuring attendance type settings.
- Click the Add button.